An intentionally blurred background in a photograph can make them look very much more accomplished. The blurred backdrop can make whatever is in the foreground look much sharper and stand out; it can isolate the main subject from a messy background. The article below will explain how to achieve this photo enhancing technique.

To achieve a blurred background, use a large aperture opening to minimise the depth of field. The distance between the subject and the background should be large enough to keep it out of focus. Longer telephoto lenses can increase background blur. Stay close to or zoom in to the main subject.

This is a useful skill to have in your arsenal of photographic techniques. Read on to learn how you can use your camera settings, different lenses and awareness of your surroundings to maximise your chances of a perfectly blurred background in your photographs.
Guide to Achieving a Blurred Background
What Aperture should You Use For A Blurred Background?
The first step is to understand that a large aperture opening will give us a shallow depth of field. Don’t forget that a large opening has a small F-stop number like F1.8 or F3.5. A small depth of field means that much less of the scene, from front to back will be in focus; only a narrow sliver of what we see will be in focus.
The depth of field is measured backwards and forwards from the point on the object that we focus on. So you can see that a shallow depth of field would throw the background (and foreground) out of focus and blurred.

What Distance From The Background Should You Be In Order To Blur It In Photography?
It may seem obvious but if you increase the distance between the main subject and background, you will have a greater chance of blurring it in the final image. However, if you use a small aperture opening (large F-Stop Number) it will still bring the background into sharp focus and prevent the desired blurring effect.
So, do increase the distance but don’t forget to check your aperture setting to ensure it has a large enough opening to achieve the desired blur. As a rule of thumb, the subject that you focus on should be further away from the background than you are from the subject.

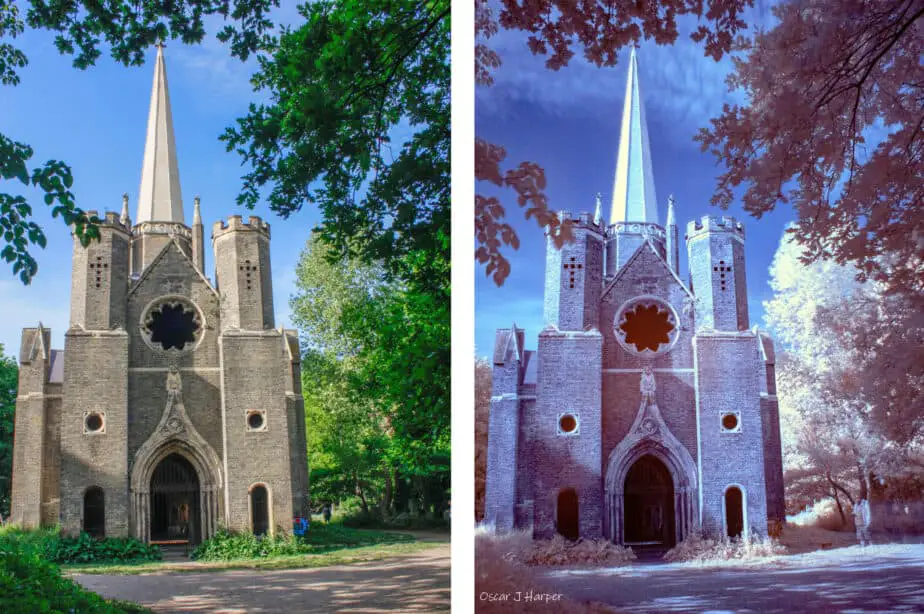
Photo by Oscar J Harper
What Type of Lens Works Best For Blurred Backgrounds?
A wider-angle lens has a short focal length and a greater depth of field inherently so more of the scene will be in focus from the foreground to the background. This makes it harder to achieve a blurred background. With these types of lenses, you have to be quite close to the main subject that you intend to focus on.
Longer telephoto and zoom lenses have a narrower angle of view and therefore a shallower depth of field naturally and so it is easier to achieve a blurred background.

Fast lenses have a very large maximum aperture such as F1.4 or F1.8. They let a lot of light into the camera and so fast shutter speeds can be used often meaning that a tripod is not necessary. The very wide opening means that they can achieve a very shallow depth of field.
Remember though that if they have a short focal length they will have a very wide angle of view that will naturally keep details in focus across a broad area of the scene. In this case to achieve a blurred background make sure you are very close to the subject and the background is far away.

What Distance From The Subject Should You Be For A Blurred Background?
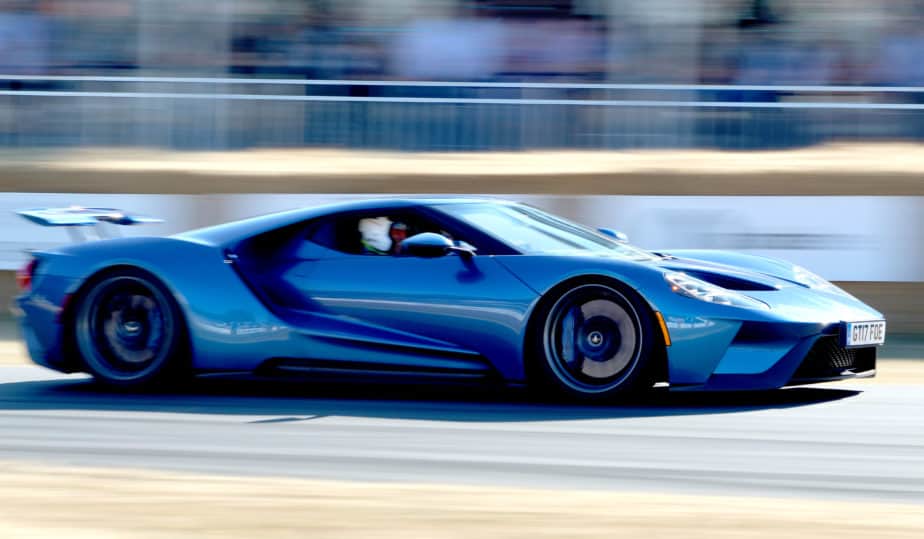
Moving closer to your subject fills the frame and forces the camera to focus at a short distance and therefore throws the background out of focus. You will see that if you move away from the subject and refocus on it, the background will appear to be sharper.
This is an undesirable effect in this case. If you have a zoom lens you can get closer to your subject by zooming in; no need to physically get closer. This will have the same effect as moving closer with a wider angle lens. So, stay close to your subject or zoom in.

What Type of Background Is Best For A Blurred Effect?
The amount of blur required for a background depends on how distracting it is. A plain background of one colour or a fine texture would probably require very little blurring to render it acceptable as a backdrop.
On the other hand, if a background is highly contrasted with deep shadows and bright highlights, it will probably need a good deal of blurring to prevent it from competing with the main subject.
A messy, untidy background that is unavoidable in the scene can be blurred out to be a pleasing, nebulous cloud of colour or tone. This all helps to focus attention on the main subject.

The effect can appear magical and the final result will be incomparable from the scene that we see with our own eyes. Practice and experience will allow us to start to imagine the scene with the background softened before we take the photograph.
What Is Bokeh In A Blurred Background?
Bokeh is the pleasing visual quality of the out-of-focus background or foreground of an image and depends upon the type of lens being used and the size of the aperture opening. The effect is improved with a high-quality, faster lens and when points of light are present. The lights could be Christmas tree lights, distant vehicles lights, a busy shopping street at night or the sun reflecting off moving water.
The result is more impressive if there are a myriad of overlapping, glowing circles of different intensities. As a background, they provide an interesting element to the composition but as they are softer they do not distract from the main sharp subject in the foreground.

Bokeh can be bad. If there are too few bright points on a dark background, this can cause a distraction and compete with the main subject.
Is Aperture Priority Mode Good For Blurring The Background?
Aperture Priority mode is a semi-automatic program on your camera that allows us to have full control over the Aperture-Opening setting. To complete the balanced exposure the camera takes care of the shutter speed automatically.
We can now force the camera to use a wide aperture that produces a shallow depth of field and a great blurred background. The exposure should be perfect as the camera chooses the correct shutter speed to go with our choice of Aperture.

Is Macro (Close-Up) Mode good For Blurred Backgrounds?
The macro or close-up mode will naturally select a wide aperture over a small one to allow for a faster shutter speed. When you are focussing very close to a subject camera movement becomes more obvious so the faster shutter speed helps to minimise the effect of that.
Of course, to see the best effect of the Close-Up mode you will have to attach a Macro Lens to your camera. As a result of these settings and the close proximity of the subject, the background will be naturally blurred. Not only will the background be blurred but the immediate surroundings of the focusing point will rapidly fade to blur in a smooth gradient.

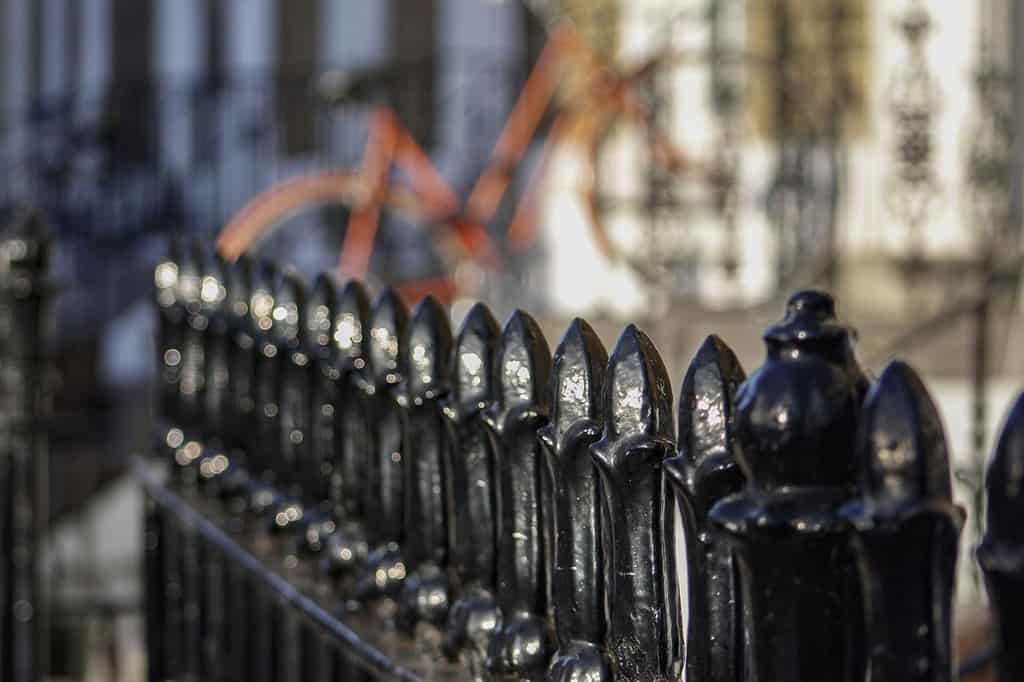
Photo by Oscar J Harper
How Do You Fake a Blurred Background In Photography?
In photoshop, there are several options for faking the background blur:
- Gaussian blur – We can isolate the main subject on a separate layer or with the aid of a mask and then we can use the gaussian blur filter to blur out the background to any degree that we desire.
- Lens Blur – Again, isolate the main subject and then apply the lens blur. You can control the degree of the blurring and also the shape of the aperture iris and even the curvature of the blades of the iris.
- Motion Blur – With this filter you can simulate extreme blurred movement in the background. The direction of movement can be controlled and the apparent degree of speed. We can easily create the impression of taking a photo out of a speeding train for example


Blur Gallery – In Photoshop filters
Within this feature, there are several very powerful and easy-to-use methods to create a convincing background blur:
- Field Blur – With this tool you can easily simulate the bokeh background, We don’t even need to have particularly strong points of light to create a strong bokeh effect. Use with caution though because we can easily over-edit the image and produce an overblown creation.

- Iris Blur – This is a very easy way to pick out your subject and isolate it from the background without the need for a layer mask. We can create the following shapes and any size of iris: circular, elliptical, square or rectangle.
- We can move and rotate it to best suit the main subject. Finally, we can choose the degree of blurriness for the surrounding background and the transition gradient from sharp to blurred. The subject within the iris shape remains sharply in focus.
- (It is difficult to match the iris exactly to a complicated foreground shape though. In this case, it is still best to do it with the camera by focussing on the subject with a large aperture-opening to blur the background).


- Tilt-Shift Blur – This effect can simulate the use of a tilt-shift lens fitted to a camera. The tilt aspect allows you to change the plane of focus so you can select a narrow band of focus as the lens is no longer parallel to the plane of the sensor.
- This can create the fake miniature looking photos that appear like you are photographing a tiny model with a macro lens. Background and foreground are both thrown out of focus. In photoshop you can specify the width of the blur gradient from the edge of the narrow band that is in focus.


Related Techniques
How to Take a Zoom Blur Photo!
This is a special kind of blur photography designed to add action and movement into static looking images. It’s a fun technique and it is quite forgiving as the unexpected results can prove to be very interesting. We have written an illustrated guide that you can read right here on Photography Skool!
How to Take Amazing Fake Miniature Photos!
This technique produces a visual effect that simulates a macro photo of a miniature model. It can be created with a highly specialized Tilt-Shift lens or it can be faked in Photoshop. If you wish to know more about this fascinating effect you can find our illustrated article, here on Photography Skool.
How to Capture Motion Blur in Photography!
There are many ways to capture Motion Blur in your photographs and they all add interest, dynamism and a sense of speed. It’s quite a big subject but the techniques are explained with example photos in our guide that you can find here on Photography Skool.
What is Bokeh in Photography?
The defining quality of the out-of-focus portions of an image is often described as Bokeh. It is the very definition of blurred backgrounds and you can read all about it right here in Photography Skool.
How do You Blur The Foreground With a DSLR?
Apart from blurring the background to make a subject stand out, it is also possible to blur the foreground for an interesting effect. For a fully illustrated guide on blurring the foreground see our article here in Photography Skool.
How to Use a Fog Machine to Create a Foggy Street Photo Indoors!
A fog machine can add a mysterious almost hazy, blurred background to your photos. To find out how to utilize this tool to create an outdoor street scene in a small indoor room, check out our article, here in Photography Skool.