Fog in photography can provide unprecedented levels of mystery but it is extremely unreliable; it never appears when you really want it! In fact, it is very rare but you can introduce it artificially with the aid of a fog machine. Using a fog machine indoors doesn’t limit your creativity and you also have more control as the fake smoke can’t blow away in a breeze.

It is possible to create a scene inside your room, that looks like it is outdoors such as a mysterious foggy street at night complete with a car, dramatic characters, and backlit, billowing fog.
- To create a foggy street photo indoors:
- Get a fog machine and fill it with the correct fog juice.
- Place two remote controlled Speedlites or Strobe flashes at the far end of the room facing the camera.
- Set up your camera and flash controller at the other end of the room.
- Try F8, 1/200th Shutter Speed, ISO 200
- Initially, set flash power to 1/16th.
- Place your model between the flash lights and the camera.
- Make sure one flash is masked by the model (to make a strong silhouette).
- Place a Pringles tube over the other one (to make a circular beam of light in the mist).
- Place the fog machine to produce fog between the flashes and the model.
- Start the fog machine when it’s heated up to deliver a good cloud of smoke between the Speedlites and model.
- Focus on the model then take a test shot, triggering the remote flashes.

- Review the shot and make adjustments before trying again:
- If the image is too dark or too bright, adjust the flash power on the flash controller and try again.
- Post process the images in Lightroom to intensify the mood by adjusting:
- Contrast
- Shadows
- Highlights
- Clarity
- Now finish the editing in Photoshop by adjusting the following:
- Crop out any extraneous details at the edges
- Clean up any blemishes with the Spot Healing Brush

Let’s break down these steps into more detail to give you:
A Complete Illustrated Guide to Producing a Foggy Street Scene in a Confined Indoor Room
What Fog Machine Should You Use Indoors?
Because you’ll be working indoors in a relatively confined space, you won’t need a super-powerful machine to achieve the desired smoke output. Just a few short bursts from my “Chauvet 1200” Fog machine was enough to set the mood for the photographs.

It is safe to use this machine indoors as the fog juice is non-toxic and water-based. Although it makes sense to choose a room that you can ventilate by opening a window or using an extractor fan. They can set smoke alarms off so be prepared for that and they can also, sometimes leave a fine coating on the objects in the room so make sure any valuables are cleared from the room.
You can buy different types of fog juice and they are usually water-based. They can produce heavy, thick fog that hangs around for a long time or quick blasts that are very noticeable but disperse very quickly. I used a High-Performance fog juice by Chauvet.
It is a medium-density fog that hangs around for quite a while if it is not force-ventilated but it’s quite thick and works well with the flash units. It is odourless, non-toxic, and doesn’t leave a noticeable residue.

The goal is not to fill the room with an impenetrable cloud of thick mist. Be aware that it may be more difficult to see objects on the floor. Clear the floor of any low-lying trip hazards to avoid accidents once the fog has been released into the room.
Fog machines can get very hot so don’t place them on a flammable surface and leave plenty of room around them for cooling ventilation. Placing it on a metal tray or ceramic tile should provide a good, non-flammable surface. Obviously, don’t allow children near the device.
How Do You Set up The Speedlites For A Foggy Street Photo Indoors?
For this set up you need 2 light sources. In this case, I used two Yongnuo YN660 Manual Speedlites, off-camera and controlled by the Yongnuo YN560-TXii radio flash controller set into the Hotshoe of the camera. Fix the two flash units onto lights stands at a height of about 2 & a half feet (800mm – about the height of headlight on an average small car).
Set them about 4 feet apart (1200mm – average width of the headlights on a small car). One will be obscured by the model/actor to create a dramatic silhouette in the mist. Place a Pringles Tube over the other one; this creates a perfectly circular beam of light to simulate a car headlight glowing in the mist.


On the Radio Flash controller, set each flash unit to a different Group for absolute control. Now, set the flash power of each Speedlight to 1/16th to start with. Set the flash zoom of each to the widest setting (usually 24mm) to illuminate a wide angle of fog when you take the shot.

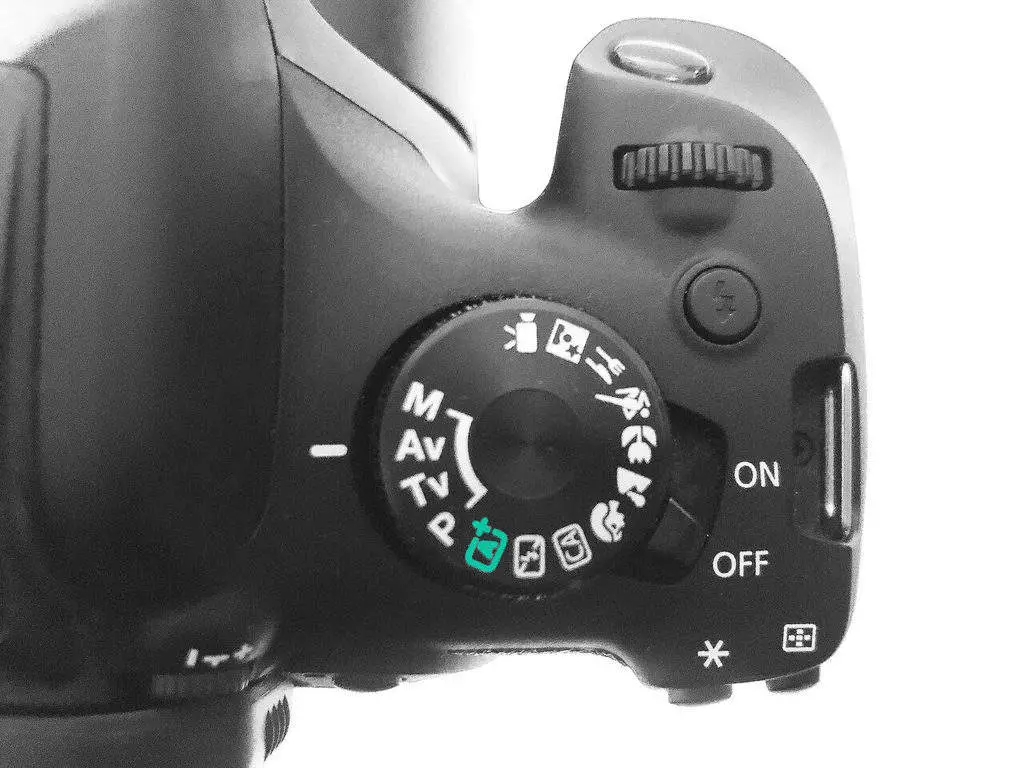
What Camera Settings do You Use For a Foggy Street Photo Indoors?
Choose an ISO of 200 to keep the visible noise to a minimum but allow some flexibility in exposure. You have the option of increasing the flash power or increasing the aperture opening if things look too dark.
Start with an Aperture opening in the mid-range to start with, Choose F8 as this will keep most of the scene and the model/actor in reasonable focus. (the fog will add a random, blurry haze to some parts of the image).
Use your camera’s flash sync speed for the shutter speed. (Usually, 1/60th, 1/200th or 1/250th). You can play with these settings after taking a few test shots later.

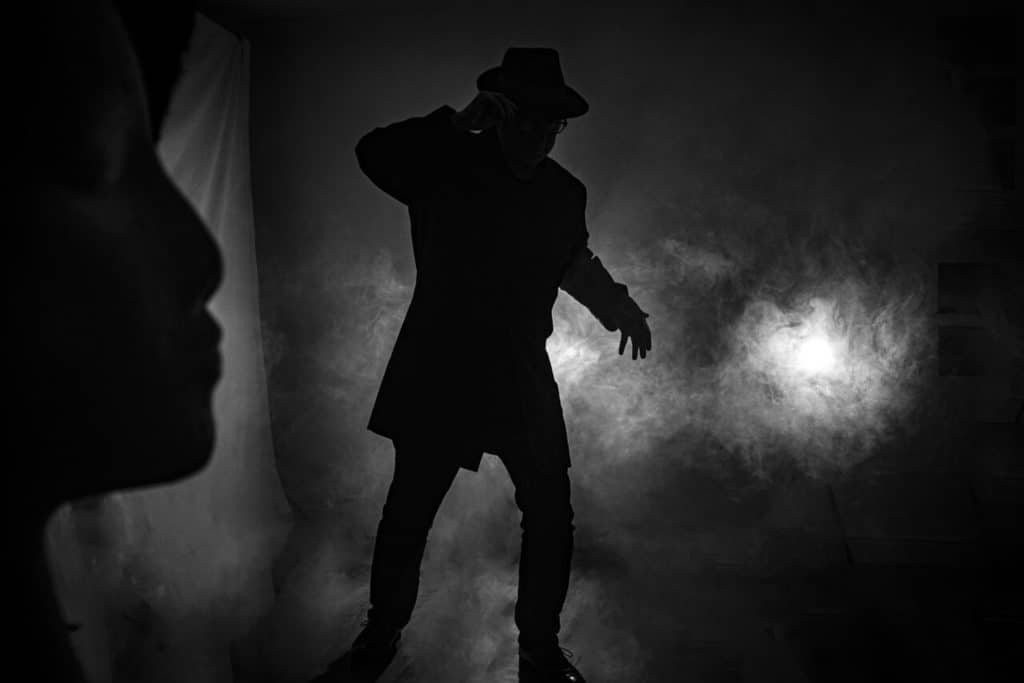
Where Do You Place The Model For a Foggy Street Photo Indoors?
The model/actor should obscure one of the Speedlites completely in order to create a perfectly black silhouette. Add suitable clothing to capture the mood of the image.
I used a loose raincoat and a Fedora hat to conjure up a Film Noir atmosphere, which seemed to suit the style of the photograph.

Where do You Place The Fog Machine For a Foggy Street Photo Indoors?
The best place to place the fog machine is off to one side, facing into the scene perpendicular to the camera position. For great illumination of the smoke by the Speedlites locate the fog machine so it will pump smoke between the flashes and the model/actor.
This will help to optimize the glow of the smoke cloud and the solid blackness of the silhouette.

Photo by Oscar J Harper
Take The Photograph
Now everything is set up for the first test shot. Once the fog machine has heated up blast a burst of smoke into the space between the Speedlites and the model/actor. Watch how it billows and drifts into the scene.
If you are fortunate you might have the option of a remote control so you can trigger the fog machine while positioned behind the camera.

Photo by Oscar J Harper
As you watch the smoke formations unfold through your viewfinder, focus on the model then press the shutter when you see a pleasing arrangement of smoke behind the model. (this is hit and miss and may require a few attempts). This will trigger the remote manual flash units and create a backlit cloud of fog causing the silhouetted model to stand out against the flash-lit mist.
If the smoke builds up too much into a thick haze, take a break and let the room vent to disperse some of the smoke.

Photo by Oscar J Harper
Review your shots to see if there are any improvements that could be made to the exposure by adjusting the:
- Flash power
- Flash zoom
- Aperture
- ISO
- Smoke density
Post Processing
Now it’s time to take your RAW images into Adobe Lightroom or Photoshop Camera RAW for some final editing and finishing.

Photo by Oscar J Harper
You can see that the above photo looks nothing like a foggy street right now; just a guy in a room wearing a mac and hat, a mannequin’s head in the foreground, and some fake car headlights cut out of a piece of cardboard. You can see the pictures on the wall of the room at the rear and generally, the lighting is dull and the smoke is undramatic.
Now to transform the RAW image into something believable. In the “Basic” tab you can adjust the main settings until you achieve a highly contrasted, bold monochromatic, film noir type scene that suits the foggy street aesthetic. Play with the following sliders to achieve this:
- Exposure
- Contrast
- Highlights – Slide to the right to really enhance the backlit smoke
- Shadows – Slide to the left to enrich the inky blackness of the shadows and help the white smoke to stand out
- Blacks
- Whites
You can also play with the “Clarity” and “Vibrance” sliders to help lift the contrast and tone of the foggy street image.

This resulting image edited in “Photoshop Camera Raw” is much better but there are still some issues to fix. The car headlights are much too low and aren’t glowing in the foggy mist and the support stand for the mannequin’s head is visible.
You can fix all of these problems by simply cropping off the bottom quarter of the image (you’ll add back in the car headlights later.)

This is much better. Now you have to address the back wall with the visible pictures showing up on the right. You can disguise these and blend them in the scene by using the “Spot Healing” brush set to a large size and with a soft edge. Just paint over the area a few times to obliterate the hard edges of the pictures.

Now to add back in the car headlights. Add a new Layer called “Headlights” and using a circular, white paintbrush tool, set to approx. 190 pixels and a slightly soft edge, paint in a white circle with one click. You can also add in a smaller “Side” light beneath the main headlight to reinforce the illusion of a car in the foggy street.


Using the “Gaussian Blur” tool from the “Filter” dropdown menu, soften the edges of the car headlights by adjusting the pixel radius. This will help to give the appearance of distant headlights glowing in the mist.
The headlights need a more convincing ring of diffused light to finish the full, foggy effect so let’s go ahead and add in a new layer called “Halo” and introduce a glowing orb around the headlight.
You can achieve this stunning effect by drawing a large circle over the headlight with a “Radial Gradient” tool, set to “white” and fading out to “clear”.


Start at the centre of the headlight, click and pull the tool out to the left for a good distance to create a good sized light halo around the main headlight. Adjust the opacity of the halo so it doesn’t overpower the central glow of the headlight.
The image is really starting to shape up but there are still a few tweaks that you can carry out to further improve the impact of the photograph. Looking at the image, the main character’s head and hat detail are somewhat lost in the deep shadows near the top of the scene.
You can improve the visibility of these elements by introducing a little wispy smoke behind the shoulder, head, and hat of the model.
You need to separate the main character’s silhouette from the background. Luckily there is enough distinction between these two elements in the RAW file to separate the foreground from the background. Using the “Magic Wand” selection tool. Set the “Tolerance” to about 10 to start with.
Click in the head area and you should see a “Marching Ants” selection line around the head, shoulders, and upper body of the model.

You need to work in the area outside of this selection though so go up to the “Select” drop-down menu and choose “Inverse”. Now click on the “Clone Stamp” tool and choose a fairly large brush size of approx 400 px and a very soft edge.
Select an area of wispy smoke with the brush tool then hold down the “Alt” key to confirm that area as the starting point of the cloning target. Now, move the brush up to the edge of the head and shoulder and begin to gently paint in a wispy, smokey edge to highlight the head and hat as if it were backlit by the car headlights.
This should make the whole silhouetted character appear sharper and lift it out of the gloom of the shadows.
There is only one more thing to fix; the weird line beneath the chin of the mannequin’s silhouette. You can achieve this by using the “Spot Healing” tool. Set the brush size to easily cover the width of the offending line.
Then simply click on the brush and paint over the full length of the line with the tool, then release. The scar should be magically fixed with “Content Aware” data from the smart tool.

So that is how to create a dramatic, Film Noir, damp foggy street scene in a confined bedroom with the illusion of a full sized car and a mysterious, shadowy onlooker.
Fog machines are great fun to use and with a little imagination you can create stunning looking photographs without the need for large, expensive studios and lighting……. nor waiting around forever for real fog to show up.

Photo by Oscar J Harper
Related Questions
How do You Take Low Key Photos Indoors And Outdoors?
Like the Film-Noir style foggy street scene discussed above there are many other ways to make Low-Key photographs both indoors and outdoors. You can learn more about this intriguing subject by checking out our helpful illustrated guide right here on Photography Skool.
How do You Get a Blurred Background With a DSLR?
Fog or fake fog can produce a very blurred, mysterious background for your photographs. It is possible to create a nicely blurred background in-camera without the need for fog or mist. This helps to sharpen up the subject in the foreground and dissolve any distracting details in the background. We have written a useful illustrated article on this very subject which you can find here on Photography Skool.
Yongnuo YN660 Flash And YN560-TXii Trigger, Helpful Illustrated Guide
These are the Speedlites and controller that I used in this studio experiment to create a foggy street scene indoors. They make a very capable and affordable flash lighting solution. You can read our helpful illustrated guide on how to use them and how to connect them in our article, here on Photography Skool.
How do You Blur Foreground With a DSLR?
Fog can have the effect of blurring the foreground and background but there are other ways to blur the foreground in-camera. For a fully illustrated guide on blurring the foreground see our article here in Photography Skool.