We have all seen the blurred backgrounds in photography but how do we blur the foreground and why would you want to? It can add an unexpected element to a picture that can add drama and help to reinforce the story.
To blur the foreground in photography you need to use a large aperture opening to create a shallow depth of field. The main subject should not be too close to the camera; somewhere in the mid-ground or background. Carefully focus on the subject in the background to blur the foreground.

It is a worthwhile technique to know and will add some variety to your photographs. The blurred foreground can guide the viewer gently up and into the photo towards the main subject that will be sharply focussed. It’s a fairly simple process and the following guide will explain the steps required to produce a great foreground blur.
(This post may contain affiliate links which means I may receive a commission (at no extra cost to you) for purchases made through links. Learn more on my Privacy Policy page.)
The Steps to Achieving a Blurred Foreground
How Should You Compose The Scene For A Blurred Foreground Photograph?
When considering the composition of a blurred foreground shot we need to examine the immediate surroundings. We must ensure that there is enough foreground to make the photograph work. If we are too high or using a long telephoto or zoom lens, we may crop out most of the foreground.
The texture or contrast of the foreground is not that important as it will be out of focus but some detail could make a more interesting bottom frame even if it is blurred.
We must frame the shot to include some foreground, the main subject and the background of course.

Where Do You Place The Main Subject In a Blurred Foreground photo?
To achieve a good blurred foreground we need some space between the camera and the main subject that we will be focusing on. We can’t be too close to the subject as the foreground may remain in focus. If we drop down to a lower position the foreground becomes more prominent and will lead naturally to the main subject.
The subject should be far enough away to render the foreground blurred when we focus on it. It shouldn’t be so far away that it becomes lost against the backdrop.

“As an Amazon Associate, I earn from qualifying purchases.”
Check out the latest Canon DSLR cameras on Amazon US here.
Check out the latest Canon DSLR cameras on Amazon UK here.
What Aperture is Best For a Blurred Foreground Photo?
A large aperture opening will give us a very shallow depth of field and the best chance of producing a blurred foreground. Aperture is measured in F-stop numbers and small numbers like F1.4 or F2.8 produces a large opening letting in more light but making most of the visible scene blurred. You can still achieve satisfactory results with smaller Aperture openings such as F4 or F5.6.
Just a narrow band of the image will be sharp from the point of focus. The foreground, closest to the camera would be the most blurred with the mid-ground getting progressively sharper up the point of focus.

Photo by Oscar J Harper
Where Do You Focus For a Blurred Foreground Photograph?
It is important to focus accurately on the main subject and not on the foreground or background. Focusing too close could make the foreground look too sharp. Focusing too far away could blur the main subject as well as the foreground.
To produce a blurred foreground and a sharp subject you should focus carefully on the distant subject; use a single focus point on your camera to help pick it out and avoid focussing on the foreground distractions. In this case, if you get it just right, the subject will appear to be sharp against the blurred foreground.

Photo by Oscar J Harper
What Type of Lenses Are Best For Blurred Foreground Photos?
The wide-angle lenses have a short focal length and therefore a greater depth of field so more of the scene will be in focus from the foreground to the background. This makes it harder to achieve a blurred foreground. With these types of lenses, the camera should be very close to the foreground, be quite far away from the main subject and use the maximum aperture-opening possible for that particular lens.
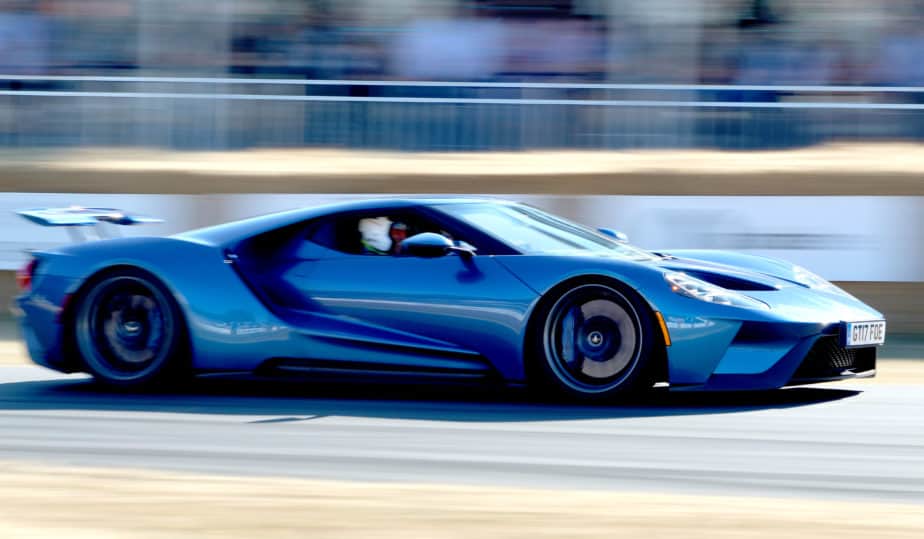
Telephoto and zoom lenses have a much narrower angle of view and therefore a much shallower depth of field naturally. This will make it easier to create a nicely blurred foreground. Starting with the largest aperture-opening, experiment until you are happy with the degree of foreground blur you have created.

(F5, 1/1600th Second, 210mm Telephoto/Zoom)
Photo by Oscar J Harper
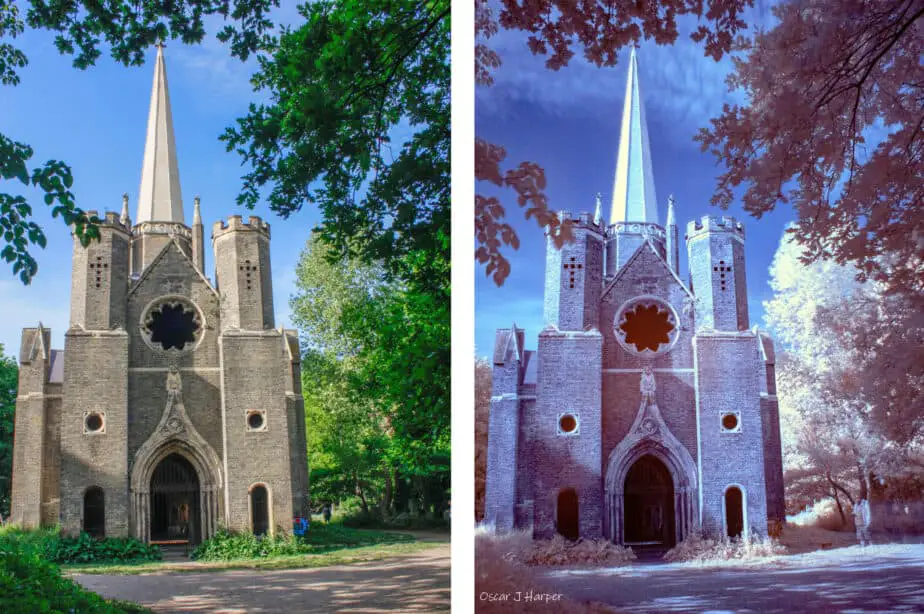
Low light or fast lenses have a very large maximum aperture opening such as F1.4 or F1.8. They are usually more expensive due to the enhanced optical specification. They’re called fast lenses because they can achieve the same exposure with a faster shutter speed than with a cheaper lens. This can mean that a tripod may not be necessary for low-light situations.
The very wide Aperture opening means that they can achieve a very shallow depth of field. Remember though that if they have a short focal length they will have a very wide angle of view that will keep details in focus across a broad range of the scene.
In this case to achieve a blurred foreground make sure you are far away from the subject, very close to the foreground and be sure to use the largest aperture opening.

(F4, 1/800th Second, 35mm Wide Angle Lens)
Photo by Oscar J Harper
The fast lenses with the longer focal lengths will make it easier to achieve the very blurred foreground as they have an extremely narrow depth of field when set to use the largest aperture opening.
How do You Use a Blurred Foreground To Frame a Photograph?
A foreground frame that is out of focus can be employed to add a three-dimensional quality to your images. They can also help to frame the main subject but remain vague enough to add an intriguing component to the story.
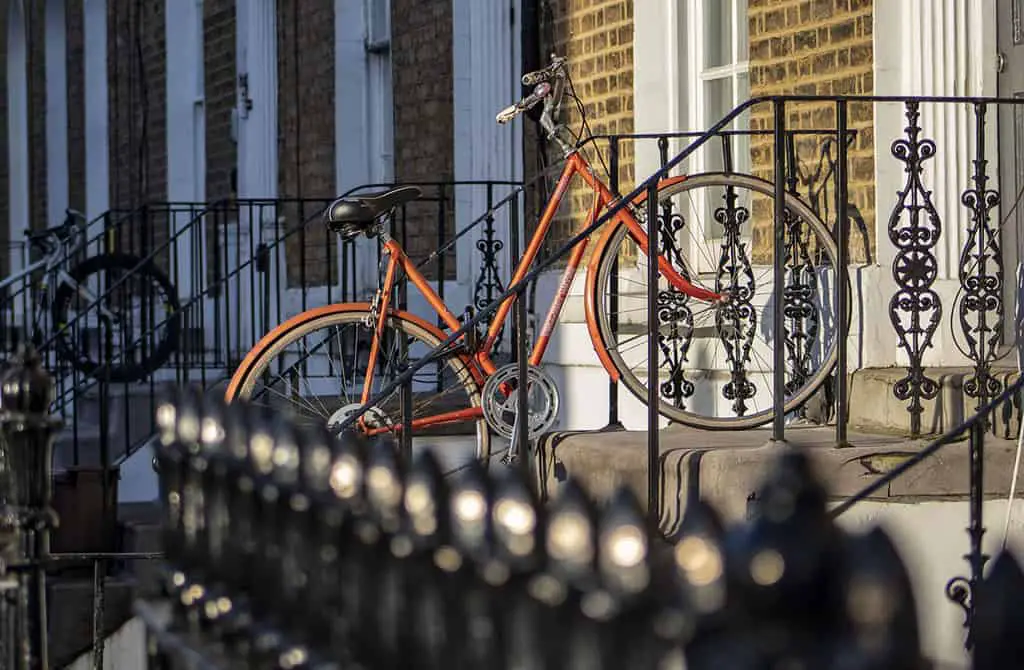
The foreground frame could be anything solid or delicate. A pile of rocks, the edge of a building, flowers, tree branches or a bicycle wheel. Anything that can protrude into or be placed in the scene without completely obscuring the main subject. It can have a relationship with the main subject to reinforce the drama or story.

(F5, 1/400th Second, 190mm Telephoto/Zoom)
Photo by Oscar J Harper
The foreground frame could have a relationship with the distant background to create the illusion of an immersive scene with the main subject at the centre of the layered scene.
To blur the foreground frame it should be quite close to the camera so that as we focus on the main subject it will be thrown out of focus to create a pleasing soft frame. The closer it is to the camera the more blurred it will appear. Experiment with different distances to achieve the desired amount of blur for the frame. Don’t allow them to get too close to the camera though as they will virtually disappear in the blur.

Photo by Oscar J Harper
Shooting through blurred foreground frames can give the impression of clandestine observation which could add to the mystery and drama of the story.
How do You Fake a Blurred Foreground in Photoshop?
In Photoshop, there are several options for faking the foreground blur:
Blur Gallery – In Photoshop Filters
Photoshop has some powerful features and using these filter tools will give you precise control over the amount and type of blur in your photos.
- Field Blur – With this tool, you can easily simulate a bokeh foreground, a strong bokeh effect can be achieved with fairly weak points of light. If possible, select portions of the foreground. Now, use the Field Blur sliders to change the degree of blur of the foreground and the bokeh sliders to increase the blur of the points of light. It is very easy to overdo the effect though so don’t get carried away and ruin the subtlety of the image.

- Iris Blur – If you have a strongly shaped subject, this is a very easy way to isolate it from the foreground without the need for a layer mask. The following shapes of any size of iris are possible: circular, elliptical, square or rectangle. It is possible to move and rotate the Iris to match the shape of the main subject. You can control the amount of blur of the foreground and the amount of feathering from blurred foreground to the sharp subject. The contents of the iris shape remain in focus and the foreground is gently reduced to a diaphanous mist. Complicated shapes are hard to accommodate within the limits of the Iris shape so it is best to choose a subject that is geometrical in form.


- Tilt-Shift Blur – This tool can replicate the effect of using the “Tilt” aspect of a Tilt-Shift lens. Tilting the special lens up when mounted on a camera allows the lens to isolate a very narrow band of the scene in focus.

Diagram by Oscar J Harper
- This can be achieved in Photoshop to simulate the Fake Miniature photos like macro photography of a toy model. This effect blurs both the foreground and the background but the focus band can be enlarged to keep the main subject and the background in sharp focus. The degree of blur gradient can be chosen to transition between the sharp central subject and the blurred foreground.


Other Ways to Create Foreground Blur in Photoshop
- Gaussian blur – We can isolate the main subject on a separate layer or with the aid of a mask and then we can use the gaussian blur filter to blur out the foreground to any degree that we desire.
- Lens Blur – Again, isolate the main subject and then apply the lens blur. You can control the degree of the blurring and also the shape of the aperture iris and even the curvature of the blades of the iris.
- Motion Blur – With this filter you can simulate extreme blurred movement in the foreground. You should isolate the closest portion of the foreground on a separate layer then apply the filter settings to it. The direction of movement can be controlled and the apparent degree of speed. We can easily create the impression of taking a photo out of a speeding train where the close foreground is motion-blurred and the distant background remains in focus.


Related Techniques
How to Get a Blurred Background With a DSLR!
A very similar technique to Foreground Blur but there are differences in where to focus. This time the foreground is brought into sharp focus and separated from a blurred background. We have written a useful, illustrated guide which you can find right here on Photography Skool.
How to Take Amazing Fake Miniature Photos!
This technique is mentioned briefly in the article above but if you want to read a more detailed, illustrated guide on the subject, you can find this fascinating, creative method explained here on Photography Skool.
How to Take a Zoom Blur Photo!
This is another creative form of blurring that can add a sense of movement and dynamism to static looking images. It’s a fun technique and the results can be unpredictable and surprising but always interesting. To find out more, you can read our illustrated article here on Photography Skool.
What is Bokeh in Photography?
The defining quality of the out-of-focus portions of an image is often described as Bokeh. It is the very definition of blurred foregrounds or backgrounds and you can read all about it right here in Photography Skool.
How to Use a Fog Machine to Create a Foggy Street Photo Indoors!
A fog machine can add a mysterious almost hazy, blurred foreground to your photos. To find out how to utilize this tool to create an outdoor street scene in a small indoor room, check out our article, here in Photography Skool.