This is a very creative type of photography, combining the knowledge of long shutter speed exposure, physical movement, artistic flair and a fertile imagination. It involves moving lights or “Painting” with some form of a light source in front of the exposed light sensor of a camera.
Moving points of light are recorded as continuous trails. Bursts of flash light, or strokes of soft, broad light from a torch/flashlight, pointing away from the camera are recorded as pools of light, illuminating whatever they fall upon. People moving around in the scene remain invisible or as blurred streaks.
This technique can produce some very cool and unexpected results. It is something worth experimenting with, to unleash your creative side.
To paint with light in a photo you need a camera on a tripod in a dark place, a very slow shutter speed; 5 seconds to several minutes, a light source that can be moved around in front of the camera or a scene with moving lights within it. Use a small aperture, a low ISO number and manual focusing.

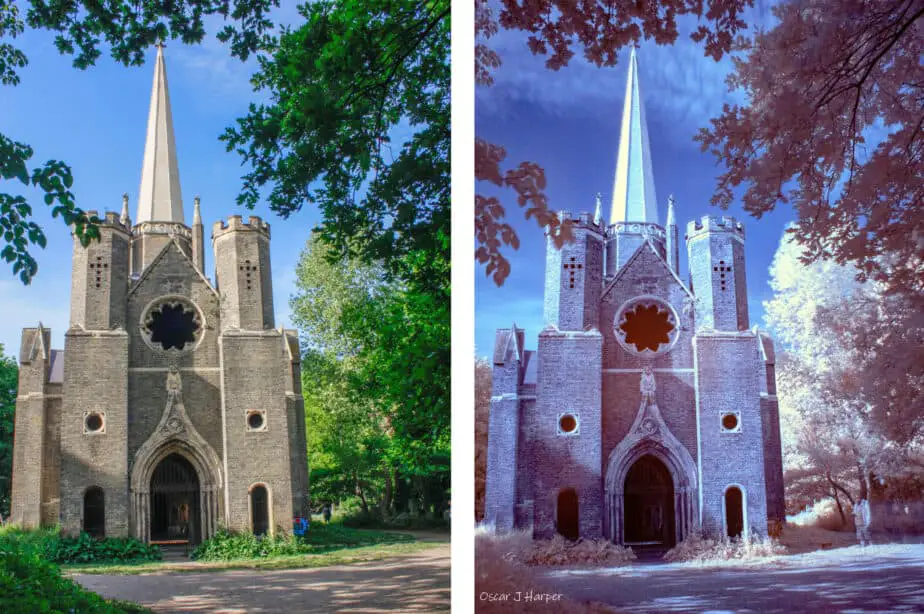
Photo by Oscar J Harper
The potential for creativity with light painting in photography is boundless. Anything goes really, just exercise your creativity. There are a few steps to take to perfect the technique, keep reading for a detailed illustrated guide.
Detailed Guide to Light Painting in Photography
What is a Suitable Subject For Light Painting in Photography?
Any light source that is much brighter than the ambient light of the scene would be suitable. It has to able to glow and not be overwhelmed by the background light. Don’t forget that during a very long exposure, the background ambient light could appear to be very much brighter than it appears in reality. This is why a darker scene is easier to control and predict.

For the “Paint”, experiment with anything that lights up: torches, candles, sparklers, fireworks (not handheld of course), lanterns, glow sticks, phone screens. Or you could find a scene with lights moving through it such as vehicles, aircraft, people hiking in the dark with lanterns or skiers on the piste at night with flares.
Maybe use different types of light sources in the composition; torches and a Speedlite flashgun, creating bold strokes and soft pools of light.

There could be multiple source points of light in the scene, manipulated by multiple performers to create an elaborate ballet of light trails. Add coloured filters to the light sources or use dozens of multi-coloured glow sticks or LED lights.

Make your own light sabre with a translucent tube and internal lights then swoop it around in broad, snaking fans of light. Always consider safety first but you could photograph a fire eater spitting flames or juggling flaming torches. Flying sparks off a disc grinder cutting through metal would make an exciting subject.
Nail some LED banks to a piece of wood and spin the contraption while moving at varying speeds through the scene. There’s always the classic vision of spinning a flaming piece of wire wool on a string, spitting and shedding the molten metal in a myriad of flaming arcs.

There are endless possibilities, go and have some fun while producing some spectacular photographs.
What is Essential Equipment For Painting With Light?
You will definitely need a camera, probably a DSLR. It must be able to take full control of the shutter, aperture and ISO settings. The shutter speed should have the ability to be set from a couple of seconds to multiple minutes. Having a “Bulb” setting is essential because most cameras will only allow a max shutter speed of 30 seconds in most “Manual” program modes.
The “Bulb” setting on the shutter allows you to hold open the shutter for as long as you need. You can operate the “Bulb” mode from a remote control or a wireless remote so you can already be in the scene yourself if you are shooting alone. Some cameras allow your phone to connect by WIFI so you can control it from your phone.

Photo by Oscar J Harper
You will need a tripod. These types of photographs are typically taken with extremely long shutter speeds so in order to keep the background and surroundings steady and sharp, the camera must be kept from moving. Any type of tripod will work, full-sized or pocket-sized. Even if you don’t have a tripod when inspiration hits you, you can improvise by setting your camera on a handy wall, table, chair or ladder.
The point is that it would be impossible to handhold a camera for such a long exposure without some detrimental camera shake……. unless that chaotic abstract light painting is your goal; more on this later.

You need something to paint with! If the camera sensor is your canvas, a light source is your “Paint and Brush”. A single, strong point of light can produce a sinuous, bright, continuous band of light that you can draw with, make patterns and shapes with or even use it to paint around other objects or people.
The light source for the “Brush” can be multiple and varied, erratically moving or gently swaying. They can be different types of light, glowing in the same scene. The star of the show is Light, so be creative. Some degree of imagination is useful if you plan the composition in your mind before you execute it with “light” brush strokes in view of the exposed sensor.

What Shutter Speed Do You Need For Painting With Light?
The shutter speed required will be relatively long. It would be quite difficult to achieve an elaborate “light” performance in a fraction of a second or even a couple of seconds. When you are working in dark or dim lighting situations, you can actually take your time; you don’t have to rush through the performance. Take your time and think about your moves to get them just right.

If necessary, use a shutter speed of several minutes if the ambient light is dim enough to not overexpose the background. Take some practice shots, review them and adjust your shutter speed accordingly. There’s plenty of storage space on your memory card.
What Aperture do You Need For Painting With Light?
If you have a scene where the distant background is important you may want to consider using a smaller aperture opening to maximise the depth of field and keep the distant objects in sharp focus as well as the foreground lights. Start by choosing a small aperture opening such as F16 or F11.

It will just mean that you need a longer shutter exposure but that may be beneficial. If the distant backdrop isn’t important or even visible you could then choose a slightly larger aperture opening that will keep the immediate close-up action in focus such as F5.6 or F8.
Aperture will also determine how long the shutter remains open; small aperture openings require more light and therefore a longer shutter speed. Balance the aperture with the shutter speed to establish the right mix of “time” and “depth of field”. If you still can’t quite make it work, consider adjusting the ISO setting.
What ISO Setting Do You Need For Painting With Light?
Common wisdom tells you that if you’re shooting in very dark situations, pushing the ISO to glean as much light out of the scene as possible without having crazy-long exposure times is the way to go. In this case, we want the long exposures times but not all the noise and grain. Taking very long exposures in the dark will naturally increase the noise in the photographs.
So, let’s not exaggerate the graininess by choosing a very high ISO setting. Choose the lowest ISO setting your camera will deliver to start with, usually ISO 100. This should help to extend the exposure times by carrying out less amplification of the light and minimising the presence of visible noise.

How do You Set Up to Take a Light Painting Photograph?
Find a suitably dark location with enough space to move around and create your Light Painting. Fix your camera to a tripod and choose “Manual ” mode from the programs. Select a low ISO and a suitable aperture for the scene and the available, ambient light. Choose a long shutter speed that will give you time to carry out your light creation. Frame up the scene leaving enough space for the action.

Photo by Oscar J Harper
Autofocus the point in the scene that you want to be sharp. If it’s too dark to focus, shine a torch/flashlight on the scene or have someone stand in the torchlight. Now switch to manual focus to lock it. Make sure you have brought some spare batteries as the camera will be working long and hard as you practice and experiment. Check that your light sources are handy and have batteries on charge.
The Background Scene
Once set up it is good practice to take an image of the scene without any of the light painting sources. Take this with the same settings of aperture, shutter speed and ISO that you will use in the final image.
Reviewing this image will reveal if the ambient light in the sky and on other objects in the scene have received enough light. (these are the objects that won’t receive any painted light during the process). If it all looks good, you know it will look good in the final composition.

Photo by Oscar J Harper
What Types of Light Painting Are There?
- Illumination Light Painting
- Light Graffiti
Illumination Light Painting
Illumination Light Painting works well when there is very little ambient light on the foreground objects. It involves pointing wider beam soft lights sources away from the camera into a dark scene to “Paint” selective areas and details to reveal their form, texture and colour. You could use a powerful battery-powered torch or a mobile flashgun/speedlite.

Photo by Oscar J Harper
The idea is to not reveal where the light source is coming from so don’t point it directly back towards the camera and don’t reveal yourself in silhouette as you move around the scene. With a torch/flashlight or speedlite, you can literally “Paint” light onto certain areas using brush stroke movements before switching off the torch and moving to the next area, invisibly in the dark. You could add colour gel filters to the torch/speedlite to “Paint” contrasting coloured light onto the objects in the scene.

Light Graffiti
This technique can be done in total darkness or with some background light and context. This time it involves pointing light sources in the direction of the camera and the exposed sensor during a long shutter exposure to record the movement of the lights.
These can be point sources of light like LED torches, laser pointers, sparklers even candles. This technique involves some aspect of performance as the composition is created by drawing, moving or waving the light source to create characters, patterns or words from continuous bands of light.

Photo by Oscar J Harper
Experiment with the speed of movement to ensure the correct luminosity of the light streams. Use several different light sources and multiple performers for more abstract results. If using a powerful torch be careful not to point the torch directly at the open camera sensor as it will flare out and distort the light trail.
How do You Create a Light Graffiti Effect in Photoshop?
Select a suitable image to receive the Light Graffiti effect. If it isn’t dark enough to really make the neon type lights glow against the background then darken the image by going to “Image”, “Adjustments”, “Brightness/Contrast”.
Add a new layer then choose the brush tool. Adjust the brush size so that it is quite narrow in the scene to represent a bright LED torch/flashlight.
Choose the colour white or any colour you desire for the light trails. Now, paint a shape or random pattern over the image. Make it relate to the underlying image. When you are happy with the light trail, go to the “Layers” box and duplicate the layer. Now, staying on the duplicate layer, go to “Filters”, “Blur”, “Gaussian Blur”.

Adjust the slider until you see a faint soft glow to the edges of the light trail line. “Ok” that then click on the first light trail layer. Now go down to the bottom of the “Layer” tray and click on the “fx” button. From there select “Outer Glow”. In the box that opens up, you can control the opacity, colour, spread and size of the glowing edge that has just been created. Play with those until the glow looks convincing.

That’s all there is to it really. If you want to, you could create a new layer, make a thinner brush and roughly draw over the other lines, it doesn’t have to be accurate, to create jitter lines as if the light trails had been gone over as you often see in real light graffiti. Give the new lines a little “Gaussian Blur” and some “Outer Glow” and it should look quite realistic.

Light Painting With Camera Movement!
There is an alternative way to think about light painting. Without going to all the trouble of getting mobile light sources and people to move them around in the scene you could simply move the camera around. You will require a luminous subject against a dark background and a handheld camera.
Scenes with lots of small points of light work very well, like a distant cityscape at night or a shop front. If the scene is too bright with broad banks of lights, the final image may just look indistinct and smokey. You will still need a slow shutter speed but you can start experimenting with a fraction of a second like 1/15th or 1/5th.

Choose Shutter Priority mode and let the camera take care of the aperture setting. Choose a low ISO to minimise the noise. Now you can experiment with the movement of the camera. Start moving the camera just before you press the shutter button. Review the result and adjust the shutter speed to get different effects.
Try different movements: jerking it left or right, thrusting it back and forwards, spinning left and right, rotating up and down. You could even get more creative and try a zoom and roll or a push and pull. This is quite a hit and miss technique but persevere and you may end up with a very cool abstract light painting.

Related Questions
How Do You Capture Motion Blur in Photography?
Light painting is a type of Motion Blur but there are many other techniques you can employ to create a more dynamic looking photograph. To find out more about these exciting methods, take a look at our article on this subject right here on Photography Skool.
How Do You Freeze Moving Objects While Blurring The Background?
This is a magical way of painting with light that can result in an extraordinary contradictory image with frozen action and a streaked/blurred backdrop in the same photograph. It requires a little practice but can produce very rewarding and dynamic compositions. You can read more about it here on Photography Skool.
What Is A Gobo In Photography And How To Use It?
You could say that using a Gobo is a way of painting with shadows as it is a subtractive device. You can find out more about this fascinating intervention in our fully illustrated article right here in Photography Skool.