Lens flares, sometimes called sun flares can be used to add drama to a photograph. They can make your photographs look very cinematic like the road movies of the 1970’s such as Easy Rider. They can introduce a real-life quality to your images because they look unedited and slightly imperfect. There is a dream-like effect as they make the photo softer, less harsh and can introduce transparent halos of various sizes and colours. But how do you achieve lens flares in your photography?
To achieve great lens flare in your images, take photographs looking towards a cloudless sun and partially obscured by something solid. Use a lens with multiple glass elements like a zoom lens. Use a longer focal length and a small aperture to amplify the effect. Remove your lens hood.

(This post may contain affiliate links which means I may receive a commission (at no extra cost to you) for purchases made through links. Learn more on my Privacy Policy page.)
Lens flares are often thought to be undesirable in photography but what if we want this effect to be present? It is possible to maximise the results with knowledge of what produces it. Follow the tips below to create great lens flares in a controlled manner.
The Steps to Achieving Great Lens Flares
The sun is a powerful light source; usually the brightest light source in any scene. This is the basis of a great lens flare. The strong light of the sun must strike the front element of the lens. It doesn’t even have to hit the lens directly head-on, it can hit it from an angle and the sun doesn’t have to be visible in the frame.
“As an Amazon Associate, I earn from qualifying purchases.”
Check out the latest Canon DSLR cameras on Amazon US here
Check out the latest Canon DSLR cameras on Amazon UK here.
Veiling Flare, Haze
The first type of lens flare is the most subtle and can look like a bad exposure in the worst case scenario. It is known as veiling flare and occurs when the sun is not even directly visible in the viewfinder, just a bright hazy glow at the edge of the frame. It is usually just out of view but still casts strong, direct sunlight onto the front element of the lens. From here the hazy bright light is refracted into the camera by an indirect route and starts to set up multiple reflections back and forth between the glass elements of the lens eventually arriving at the sensor and creating an amplified, hazy glow on the image.
The overall effect on the affected parts of the image is that it will look brighter with less contrast and colour saturation. It will look a little washed out and pale. You can experiment live by looking through the lens (not directly at the sun) and try moving the lens around a little to see the effect increase and diminish until it looks right.

Ghosting Flare, Artifacts
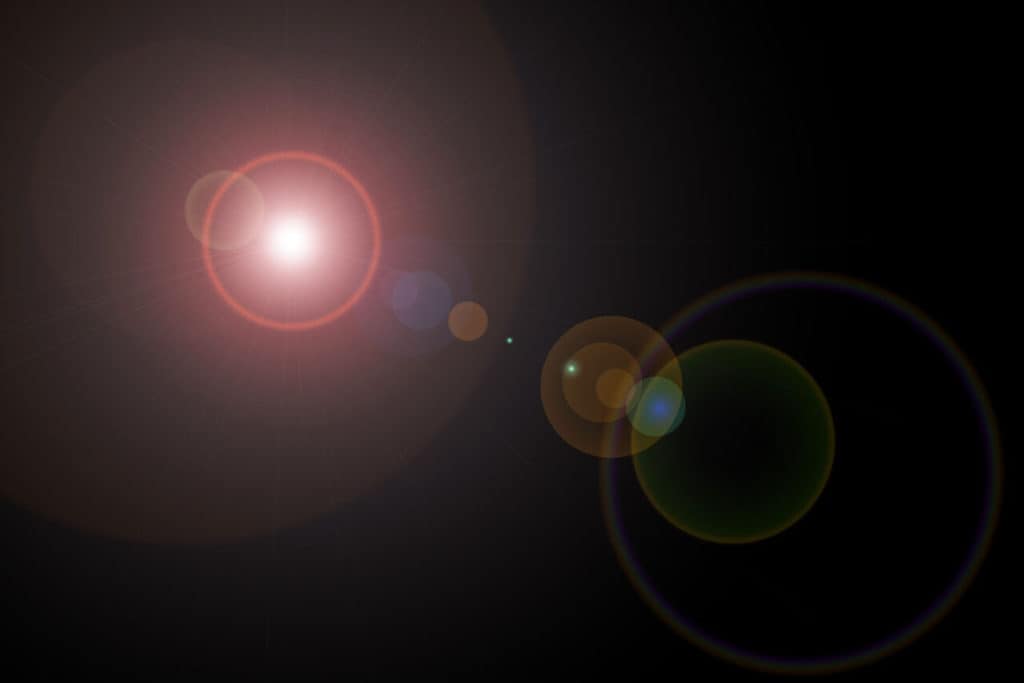
The second type of lens flare is more dramatic and starts to introduce artifacts in the form of transparent glowing circles or polygons. It happens most strongly when the sun is directly within the viewfinder frame.
It is never a good idea to look directly at the sun through an optical device, especially a magnifying device like a zoom or telephoto lens. It would be advisable then to switch to the live view on the rear screen if your camera has this facility. This will ensure that your eyes and retinas are well protected from the magnified sunlight.
General Health and Safety Tip
The sun provides a very bright point of light that strikes the front element of the lens. It is then refracted into the camera on an indirect path and creates a series of reflections off the multiple glass elements. These then arrive at the sensor to be recorded as a series of light artifacts of various colours and sizes. They appear to be projecting in a straight line from the strong light source of the sun and can spread across the whole image. They occur most strongly when the aperture blades are closed down and the reflected light is modified to the shape of the reduced opening and then back towards the sensor.
The ghosting effect is greatly enhanced when the aperture-opening is stopped down to it’s smallest size. When the aperture is fully open to the maximum size the artifacts are barely visible or not at all with very large openings like F1.4. The more complex the lens optics (ie number of elements of glass), the more reflected artifacts will be present in the final image. There is usually a degree of veiling flare that goes along with the multiple glowing circles or polygons.

Starburst flare
The third type of flare is a little theatrical and transforms the sun into a spikey star shape more akin to a kid’s drawing of the sun. The effect is enhanced when you use a small point of light and a small aperture-opening. The sun cannot be described as a small point source of light as it is very bright, large and tends to overwhelm a scene. The way to use the sun for this effect is to partially conceal it behind a solid object thus decreasing its size and power to a small point of light.
Next, we choose a small aperture size like F22 or F16. The definition of the starburst is increased with a smaller aperture-opening. The small opening bends the light a little by diffraction and because the aperture is made up of a number of blades the point of light is transformed into a starburst shape when it hits the sensor. The number of blades in the aperture iris determines the number of starburst spikes. If you have an aperture iris with eight blades you will see eight starburst spikes. If however, you have an iris with seven blades, you will see a starburst with 14 spikes.
This is because if you have an aperture iris with an even number of blades arranged in a symmetrical pattern, the opposite sunbeams spikes will overlap and will register as one. The shape of the blades can have an influence on the resulting starbursts definition also. Some lenses have curved blades which tend to soften the effect. For the most striking starburst spikes, use a lens that has straight-edged blades.

Sensor Flare
As well as the flare from the reflected light from the glass elements and the aperture iris there is something known as sensor flare. This occurs when reflected light that hits the reflective surface of the sensor is reflected back out to the glass elements before being reflected back in towards the sensor. The sensor of a digital camera is covered in tiny microlenses over the pixels. These tiny reflections get amplified in the image and appear as stretched red dots around the sun starburst. The effect is enhanced in mirrorless cameras as the flange distance is much shorter.

Prime Lens or Zoom Lens
The type of lens you choose can affect the degree of sun flare you can achieve. A prime lens or single focal length lens has fewer glass elements inside and therefore less opportunity for internal reflections and artifacts. For the greatest lens flare effect choose a lens with many internal glass elements like a long zoom lens (75 to 300mm zoom that has over a dozen elements for example).
Focal Length
Wide-angle/ short focal length lenses are designed to minimise the effects of lens flare and are therefore not the best choice if you want to embrace the effect in an artistic manner. In this case, you should use a longer focal length lens as these have the effect of amplifying the light and enhancing the number of flares.

Lens Hood
There are some accessories that we should avoid if we want to create the best lens flare. The lens hood is designed to eliminate stray, indirect strong sunbeams, particularly those that are just out of the frame, and therefore minimise the effects of sun flare. You will notice that telephoto and zoom lenses have very large and long lens hoods because the sun flares are naturally magnified with these lenses. So, to ensure that you get the best chance of producing a strong lens flare effect, ditch the lens hood.
Consider Using Older Lenses
This may seem a little retrograde but think about investing in an older lens to improve the presence of lens flares. Older lenses did not have anti-reflection coatings on all of the surfaces of the glass elements that modern lenses have. They will probably be quite old though so you may need a special adaptor ring to fit it to your camera. You could check the optical specification of the lens online. The older lenses will have years of micro dust build up inside and between the glass elements. These imperfections all help to create lens flares in the lighting conditions described previously.
Filters, Dirt, Fingerprints, Price
Some screw-on filters can work to minimise your chances of lens flares such as polarisers and UV filters. On the other hand, some cheap or micro-scratched filters could assist with the generation of extreme lens flares but not in a natural way.
Dirt on or in the lenses can assist in the pursuit of lens flares as they act like imperfections and could defract or deflect light from it’s intended path.

Something we all try to avoid; greasy fingerprints on the outer most element or filter. These can help to produce extra lens flaring in the right conditions. The angle of the sun striking the surface of the lens must be just right and the aperture-opening must not be too small or the fingerprint would be too sharp and show up on the final image.
Consider a cheap lens if you are keen to try and experiment with lens flares. There is a good chance that a cheaper lens will be low quality, have imperfections and optical aberrations. Maybe this is going too far as it will also degrade the quality of the whole photograph.
Reframe to Increase Flare
How you frame the scene can have an effect on the degree of lens flare that you can achieve. If you frame the scene with the sun outside the view make sure it is just outside. This will maximise the chance of veiling flare. If you frame the scene with the sun visible inside the frame (don’t forget to use the live view rear screen) locate it close to the edge of the viewfinder to get the strongest collection of polygonal artifacts streaking across the image from the direction of the light source. Bring the sun closer to the centre of the frame will produce a strong starburst flare provided that it is partially blocked by something solid like trees branches, a models head, the edge of a building or structure.

Spot Metering
Try using spot metering as it is great when working with bright light. Partial and evaluative metering may get confused by the very bright point of light and try to hijack the exposure. Use the autofocus and choose a single, central focussing point. Experiment with focussing and reframing the scene until you find the sweet spot of lens flaring.
Faking Lens Flares in Photoshop
If you couldn’t achieve the desired amount of lens flare with your camera or you have an existing sunny photograph that could benefit from manipulation, Photoshop has a very powerful tool that can artificially produce a plausible lens flare effect. It is found under the Filters drop-down tab, then choose, Render, Lens Flare.

Once inside the tool you can reposition the source point of the light or sun that stretches the string of artifacts across the screen. If you pull the light source to the centre of the image, the circular halo artifacts all line up into concentric circles. You can also choose the type of lens that you want to simulate:
- 50-300mm Zoom
- 35mm Prime Lens
- 105mm Prime Lens
- Even a movie type prime lens
They all have different characteristics and different numbers, sizes and colours of aperture artifacts, as the real lenses would. It can even produce a degree of starburst effect of the primary light source. You can adjust the brightness of the whole sun flare string which also increases the intensity of the veiling flare.

It is a very useful tool and could transform some otherwise mediocre photos by introducing some cinematic magic.
Other Photographic Techniques
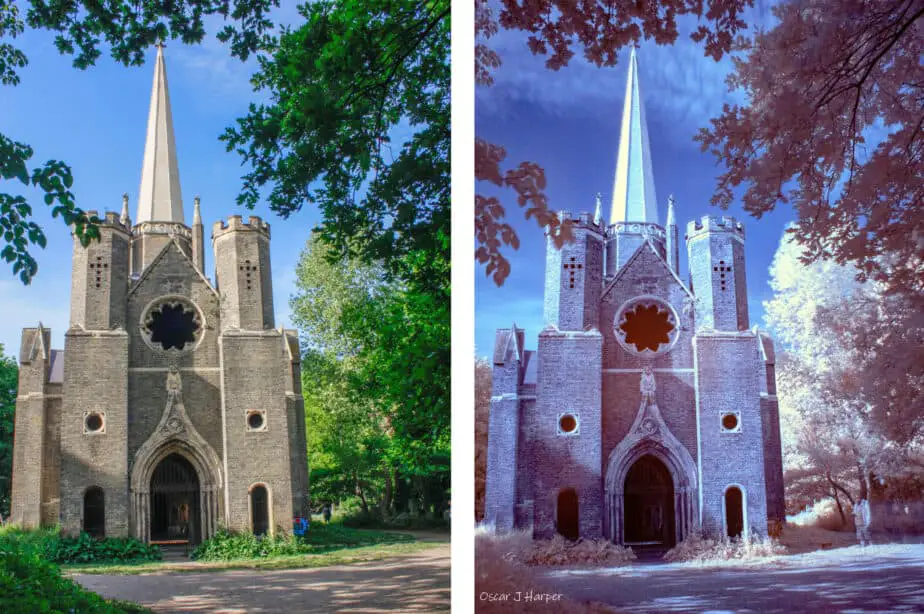
Infrared Photography With Filter on DSLR
There is a way to take infrared photos without having a dedicated infrared camera. You can carry it out by simply screwing on an infrared filter to your standard DSLR camera. It’s a little more involved but the results can be remarkable. You can read our illustrated guide on this blog right here.
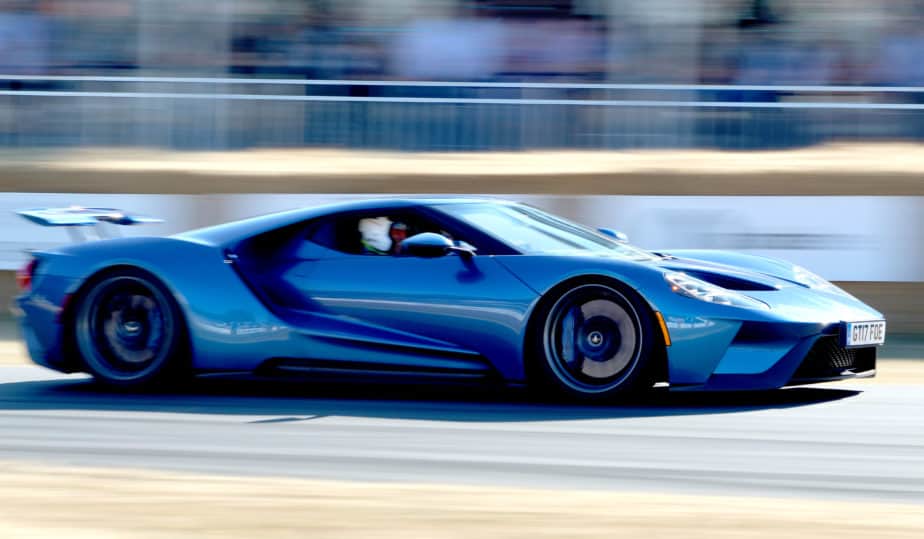
Freeze Moving Objects While Blurring The Background
How do you freeze a fast-moving object but produce a nicely speed-blurred background? It’s a great technique to learn to inject a sense of movement and speed into your photos. It requires some practice and a good technique and there will be plenty of failures along the way. Once you perfect it though, the results are very dramatic. To learn more, see our illustrated guide here.