There are three settings on your camera that determine how bright your images appear to be. This is where the analogy of the triangle originates. Two of the settings are directly related to Exposure (Aperture & Shutter Speed) and one represents the degree of amplification of the received light to make it appear brighter (ISO). All three of these settings can change and all three can make the image lighter or darker. The exposure triangle is represented by an equilateral triangle which could be said to represent balance and neutrality.
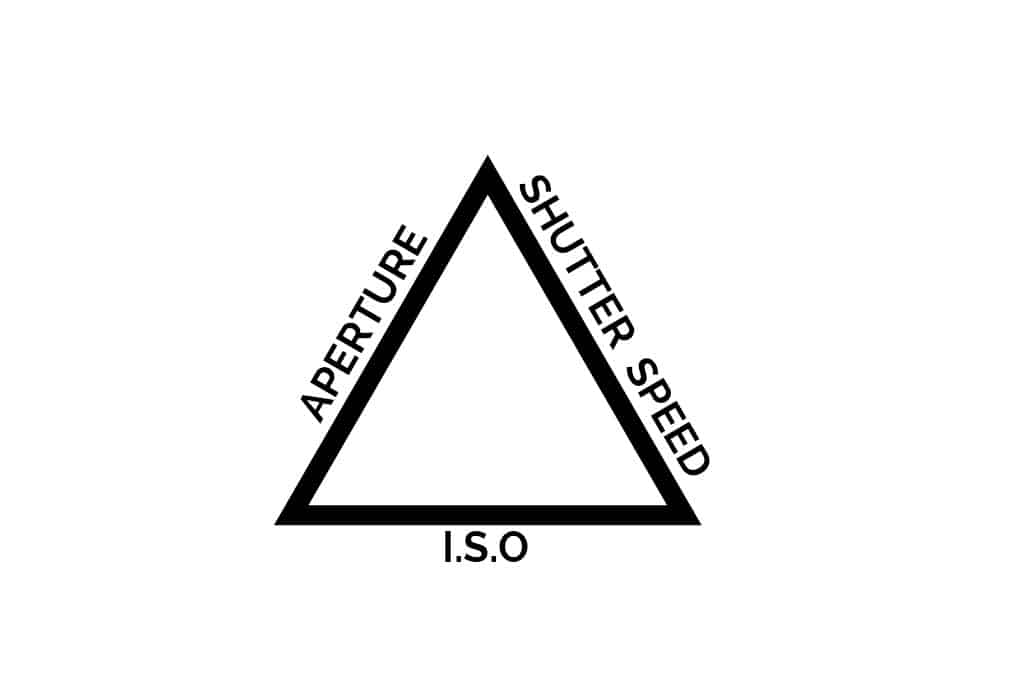
The Exposure Triangle represents a balanced arrangement of the three camera settings, Aperture, Shutter Speed and ISO to produce a neutral or perfect exposure according to the cameras light meter. Changing one setting will result in changes to one or both of the others to maintain balance.
It is very important to understand the three settings represented by the Exposure Triangle but to also understand that the relationship is not as simple as a geometric shape or graphic representation. The following guide will describe the three main settings in photography in more detail and explain how their interactions can dramatically change how your photographs appear even with the same overall exposure.
Illustrated Guide to The Elements of The Exposure Triangle And How to Understand it
Aperture
The aperture is rather like the pupil in a human eye. It allows light in to be received by the retina. The amount of light allowed in is controlled by the iris, which changes size as you move around and into brighter and darker situations. To compare this to a camera, the Aperture is the Pupil and the mechanical blades in the lens are equivalent to the Iris in the eye.
The Aperture is a variable opening inside the camera lens that permits an amount of light to hit the sensor to produce a digital image. The opening is adjustable in diameter to allow variable amounts of light in. The Aperture is numbered as an f-stop like f/5.6 or f8.
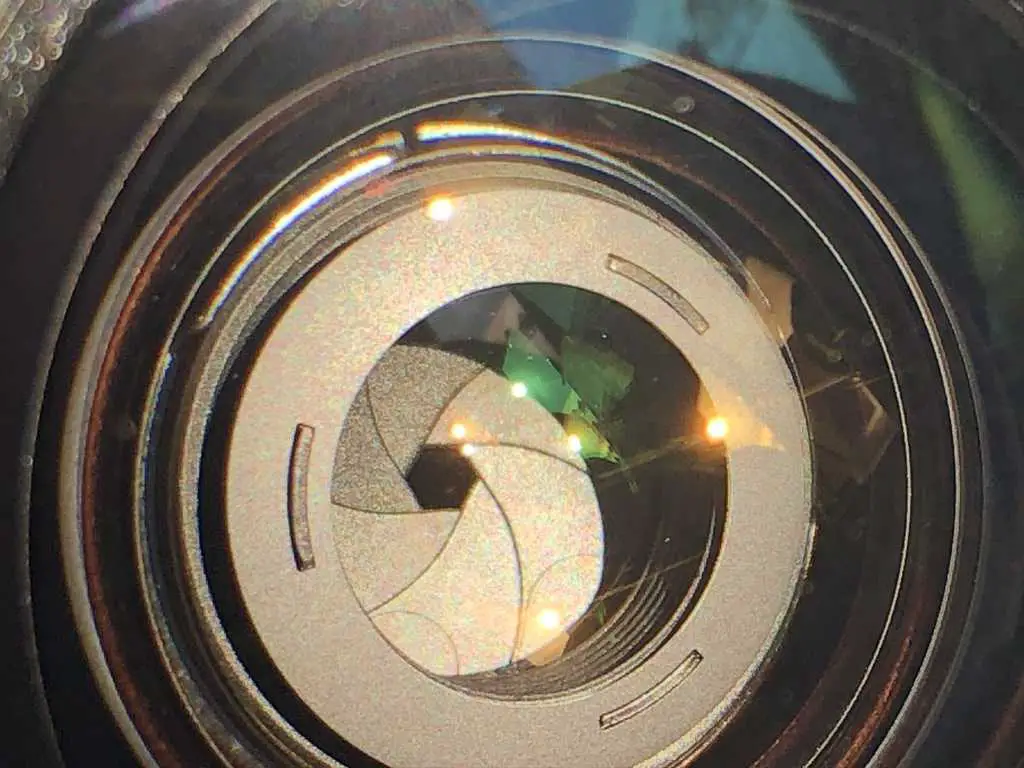
The different aperture sizes are known as f-stops. They range from the largest opening of the lens (f/1.4 for example) then get smaller by 1 stop thus: f/2, f/2.8, f/4, f/5.6, f/8, f/11, f/16, f/22, f/32. The smaller numbers have the largest opening and vice versa. You can double or halve the amount of light received by moving one position or one F-Stop either way on your camera settings.
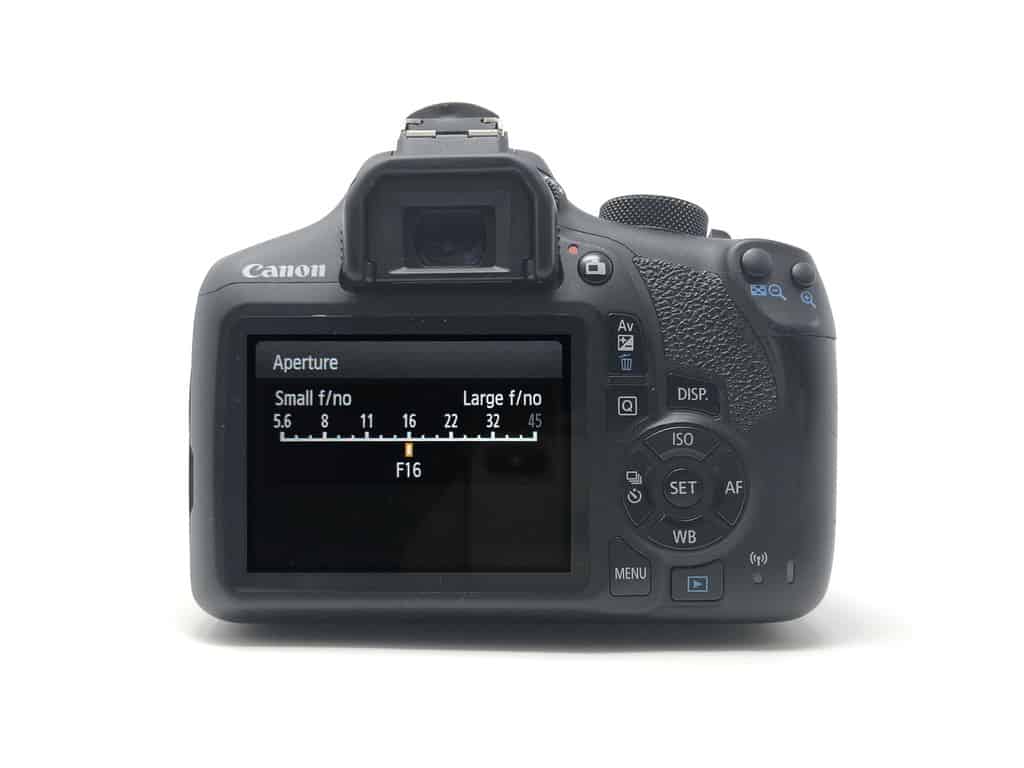
The Aperture can affect the exposure by allowing more or less light into the camera and therefore brighten or darken the image by increasing or decreasing the amount of light that hits the sensor.
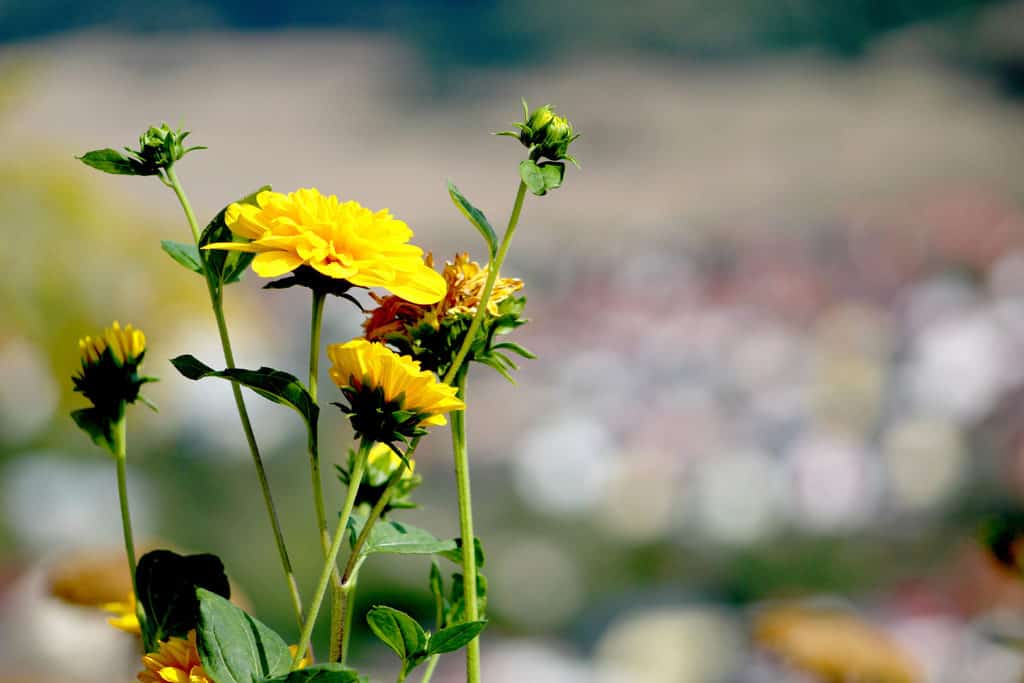
As well as the brightness of the image the Aperture controls a component of the focus of the overall image that is called depth-of-field. This is the amount of the picture that appears to be in focus from front to back as you view the scene. The depth-of-field is measured forwards and backwards from the point of focus.

Shallow Depth of Field
Large Aperture Opening
Photo by Oscar J Harper
A shallow DOF is recorded if you use a large Aperture opening; in the photo above, the background is very blurred. A deep DOF is recorded by the sensor if you use a very small Aperture opening; this sharpens everything up and the picture will appear sharp from foreground to the distant background.
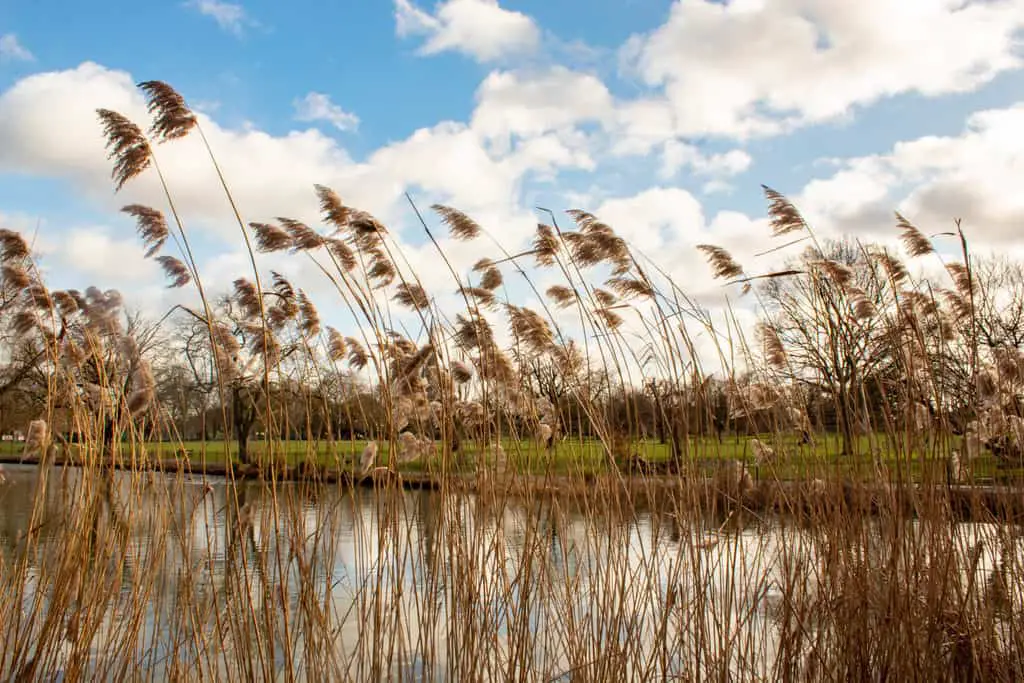
Photo by Oscar J Harper
Shutter Speed
A camera is a dark, closed box and before it can capture an image of the outside world you have to open the curtains to let some light in. The time taken to open and close the curtains is known as the Shutter Speed. This can be as short as a tiny fraction of a second, multiples seconds or even multiples minutes.
There are two curtains, a front and a rear. When you press the shutter button the front curtain opens, exposing the sensor to light. After a period of time, the rear curtain starts to close and slams shut, preventing any more light hitting the sensor. The time between the two curtains opening and closing is the shutter speed. This can happen incredibly quickly, as fast as 1/8000th of second on some cameras.
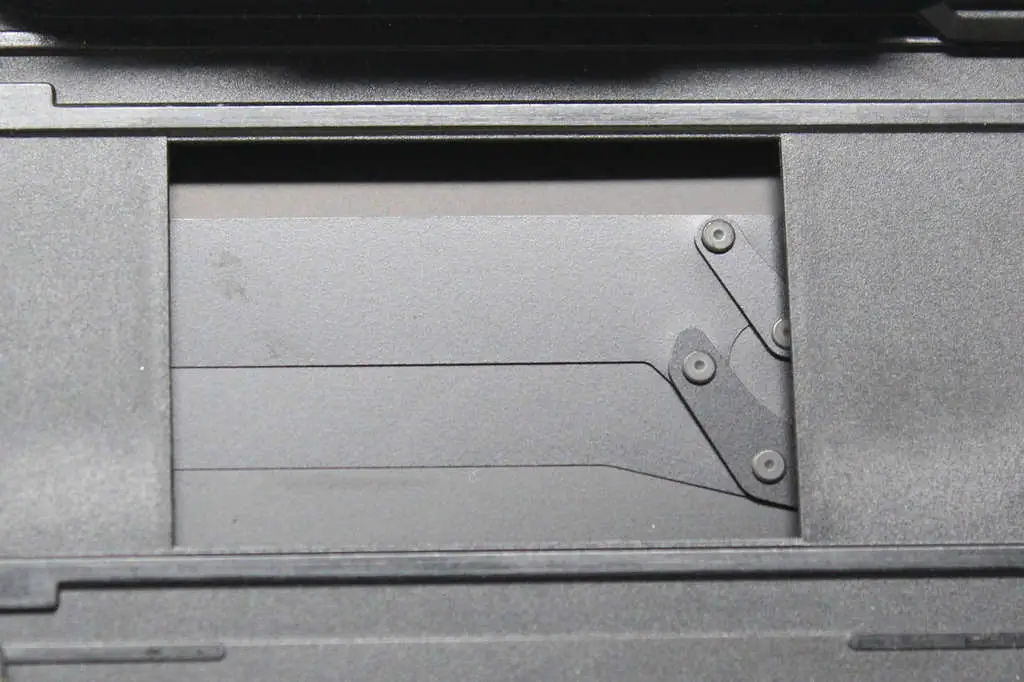
The shutter speed can have a direct effect on the exposure of the image. Using a very fast shutter speed could make the image too dark or underexposed. Conversely, a very slow shutter speed could render the image too bright and washed out. This is known as overexposure.
The available ambient light in the scene can affect the shutter speed required for a good exposure. A very bright scene would require a fast shutter speed and if it was a dark scene, a slow shutter would be needed to allow enough light to be received by the sensor.
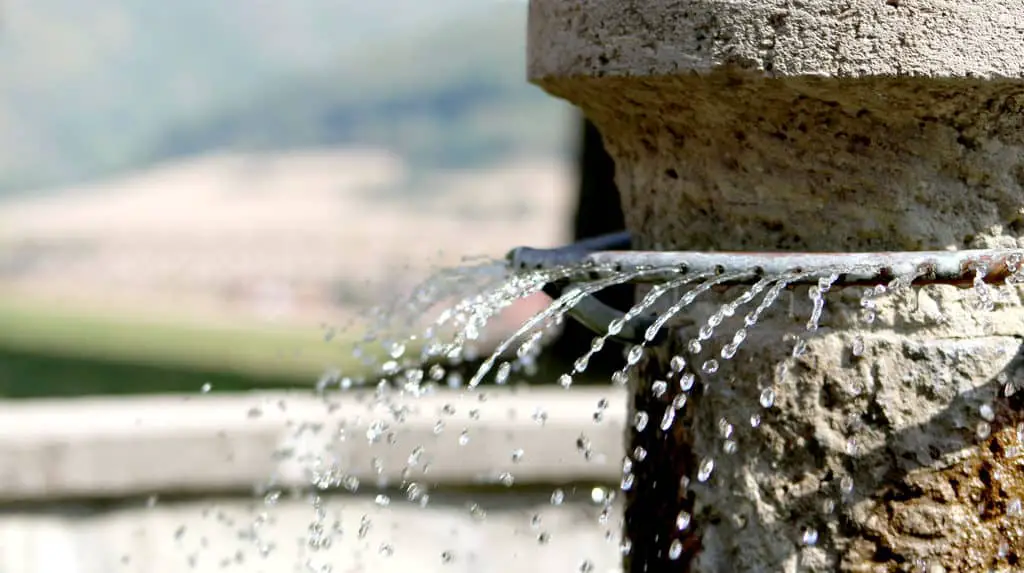
Alongside the Shutter Speeds ability to change the exposure of light it also has an interesting effect on how the camera records motion. The varying of the speed of the shutter has very different results on the same subject. Very fast shutter speed has the effect of freezing any movement no matter how fast it is moving. Fountain water can appear to be like solid ice.

Very slow shutter speeds can have the opposite effect. Any movement within the scene will be captured as a ghostly haze. This time a splashing fountain will be recorded as a misty blur.
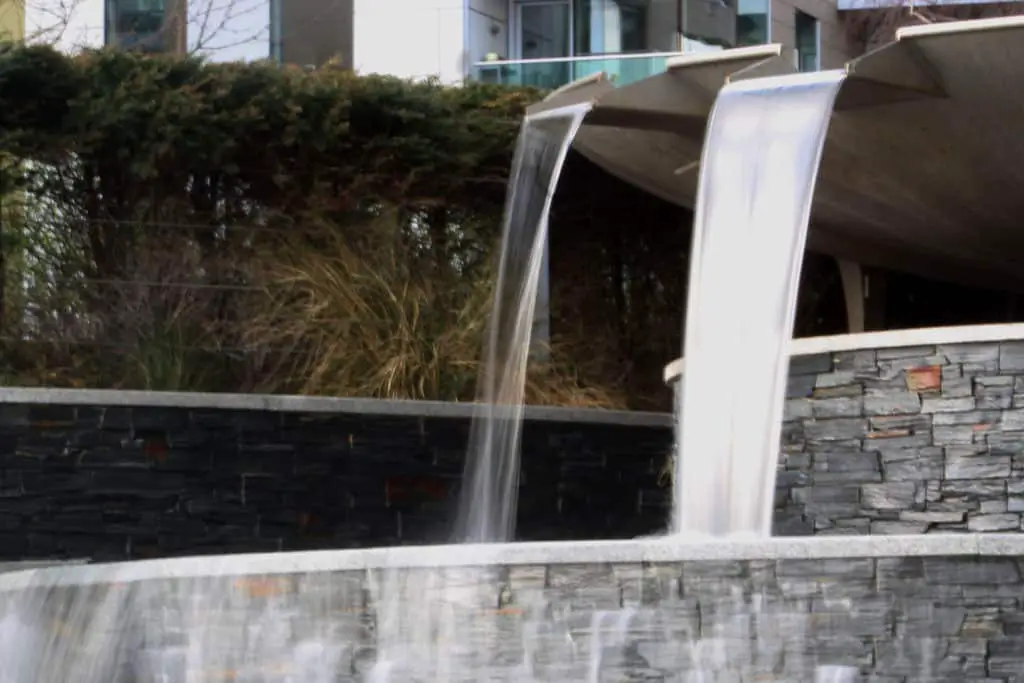
An undesirable side effect of a slow shutter is camera shake. This happens when the shutter speed is too low and you are hand-holding the camera. this will usually happen under a shutter speed of 1/30th of a second or 1/60th of a second if you have a longer, heavier lens. The result is a blurred or smudged image; at best it will have a lack of sharpness. To prevent this unwanted defect in your images you should increase the shutter speed. If that is not possible, you should fix your camera to a tripod.
ISO
ISO is a twisted acronym for “International Organization for Standardization”. A body that oversees the standardization procedures of several industries. In photography, it represents the combining of two competing standards (ASA and DIN) into a unifying set of rules for evaluating the sensitivity of chemical film for cameras. In digital cameras, the ISO standard was adopted by manufacturers to define a similar effect produced by electronic sensors. This would make the ISO setting very familiar and interchangeable to those who were used to using film cameras.
ISO is a setting that can alter the apparent brightness of an image without affecting the sum of light that hits the sensor. It actually represents the amount of digital amplification of the available light after it hits the sensor. It has the ability to make a dark scene appear brighter but can degrade the image with noise (visible grain). Although it doesn’t influence the amount of light that physically enters the camera it is still a part of the Exposure Triangle because it can contribute to the overall brightness and balance of the final image.
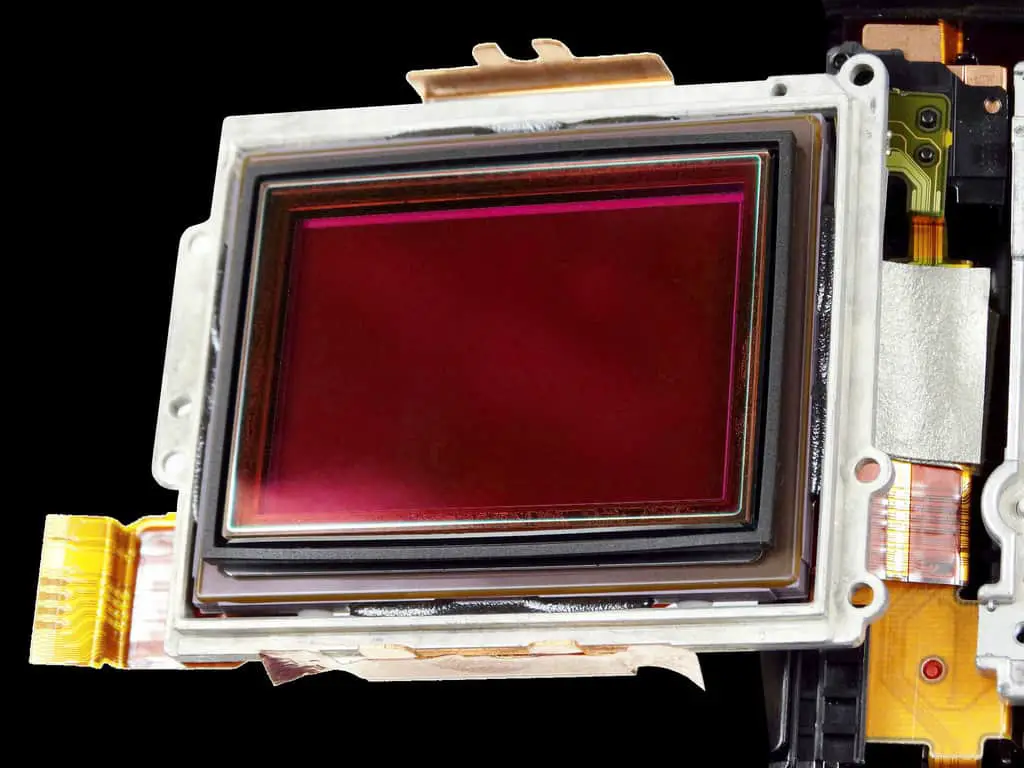
ISO can help to push the boundaries of the exposure in low-light. Once the other two, true exposure settings, Aperture and Shutter Speed have been exhausted, you can employ the ISO to amplify the available light. The units of ISO represent a degree of amplification and each step up or down represents a doubling or halving of the amplification which is 1 Stop. This is why ISO is consistent with the Exposure Triangle because the other elements can also move in 1 stop increments.
Over exploiting the higher settings of ISO can have a negative effect though. The more you amplify the light signals, the more noise is created that appears like a grainy defect in the image. It could be compared to distortion in a speaker when it is turned up too high.
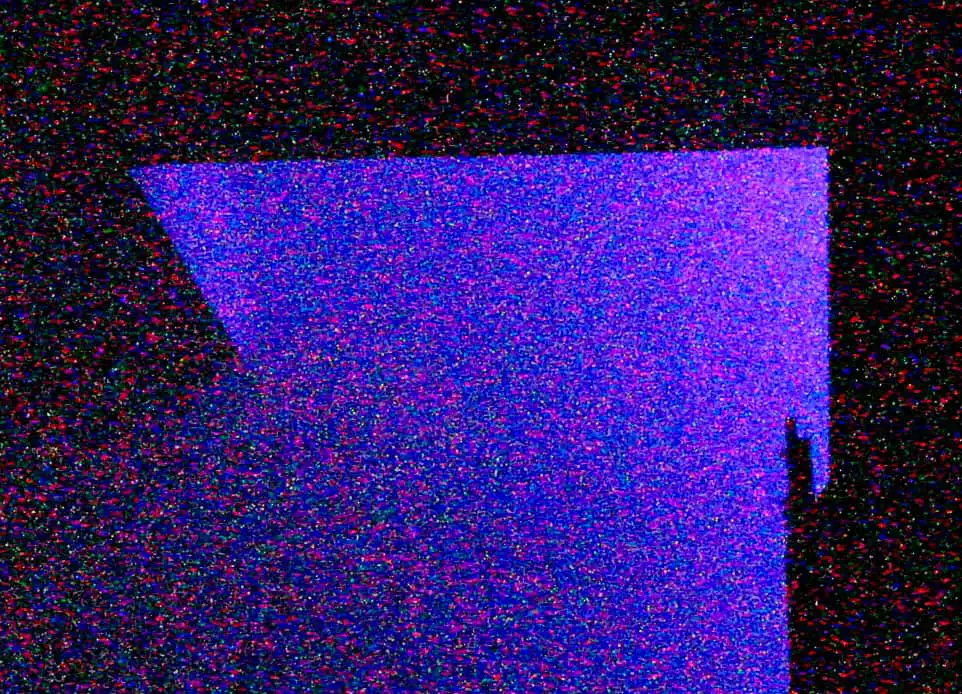
Photo by Oscar J Harper
The best way to eliminate the damaging noise is to use a low ISO number but this can only work if the other two settings of Aperture and Shutter Speed will permit a balanced Exposure. This is where understanding the Exposure Triangle comes into play.
Balancing The Exposure Triangle for A Neutral Exposure
Your camera’s light meter wants to deliver a perfectly balanced and neutral exposure based upon the light it receives through the lens and how it reads the range of light that is reflected onto its sensor. In Automatic mode, it will do that every time providing there is enough light in the first place. It will automatically select the Aperture, Shutter Speed and ISO to produce a neutrally exposed image; one where the light meter’s needle is in the centre or on the “0”.

You could say that the exposure triangle is perfectly balanced; it’s an equilateral triangle producing a neutral image that is neither under or overexposed. The images will look fine but you have no creative control over how they look. There are several ways in which you can have some skin in the game and take control of one or two sides of the triangle and actually have some input towards the creative output.
- Av (Aperture Priority Mode) – You get to select and fix the Aperture opening size according to how you want the final image to look based upon the Depth-of-Field that would be appropriate for the subject. A large aperture opening would deliver a shallow field of focus and a blurred background (perfect for a portrait). A small Aperture opening would deliver a sharp image from front to back (perfect for a large landscape). The camera would then equalise the Exposure Triangle by adjusting the Shutter Speed and ISO to produce a perfectly balanced exposure.
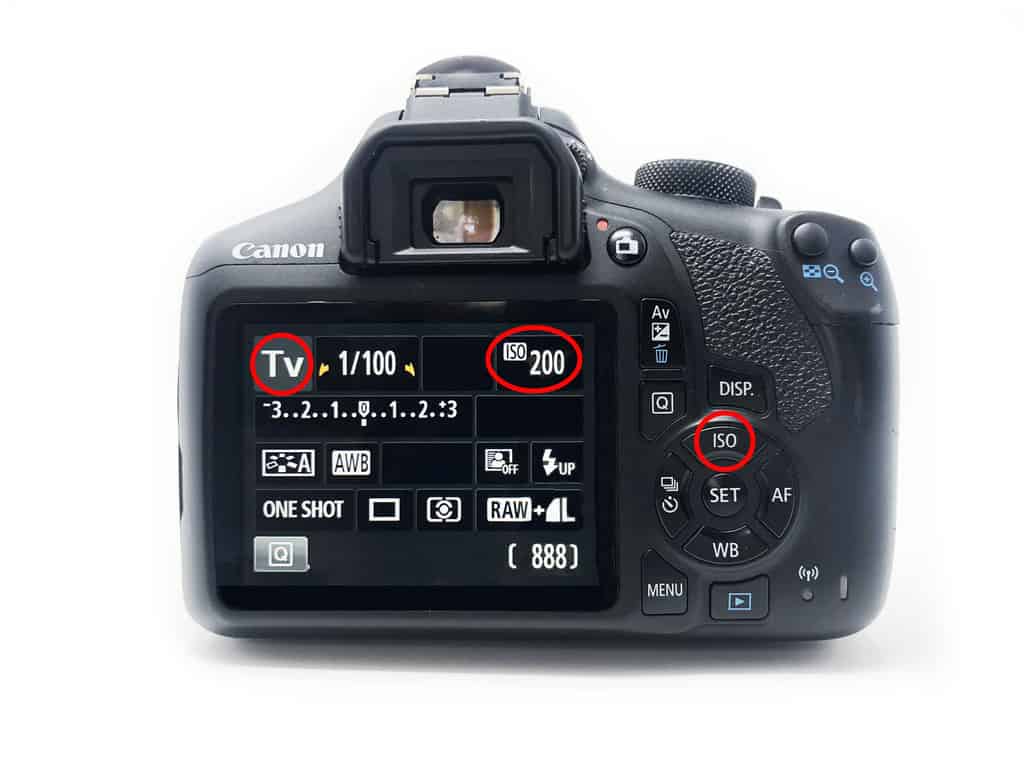
- Tv (Shutter Priority Mode) – In this mode, you can choose to take control of the shutter speed and this will give you creative control over how “motion” is captured in the images. If however, you choose to fix the shutter speed at a very slow speed such as multiple seconds, any movement within the scene would be recorded as blurred smudges or hazy mist (perfect for fountains or waterfalls). If you were to choose a very fast Shutter Speed, you would guarantee to freeze any action in the scene into a frozen moment in time (perfect for sporting events or moving water). The magic of the Exposure Triangle swoops into play again and sets the Aperture and the ISO settings to neutralise the triangle and bring the exposure back into balance.
- A Note on Priority Modes And ISO – If you want to take control of a second side of the triangle with the above two modes, (Av and Tv), you can actually switch off the Auto ISO setting and choose the ISO your self by hitting the ISO button on the back of the camera. Here you can choose to fix the ISO at between 100 and 12800. This will allow you to ensure high image quality (low ISO) or a brighter scene in low-light (high ISO). Don’t forget about the increased noise at high ISO though. This leaves the camera to take care of just one setting, Aperture or Shutter Speed. It will do this based on your choices of the other two settings and bring the triangle back into perfect harmony and a balanced exposure.
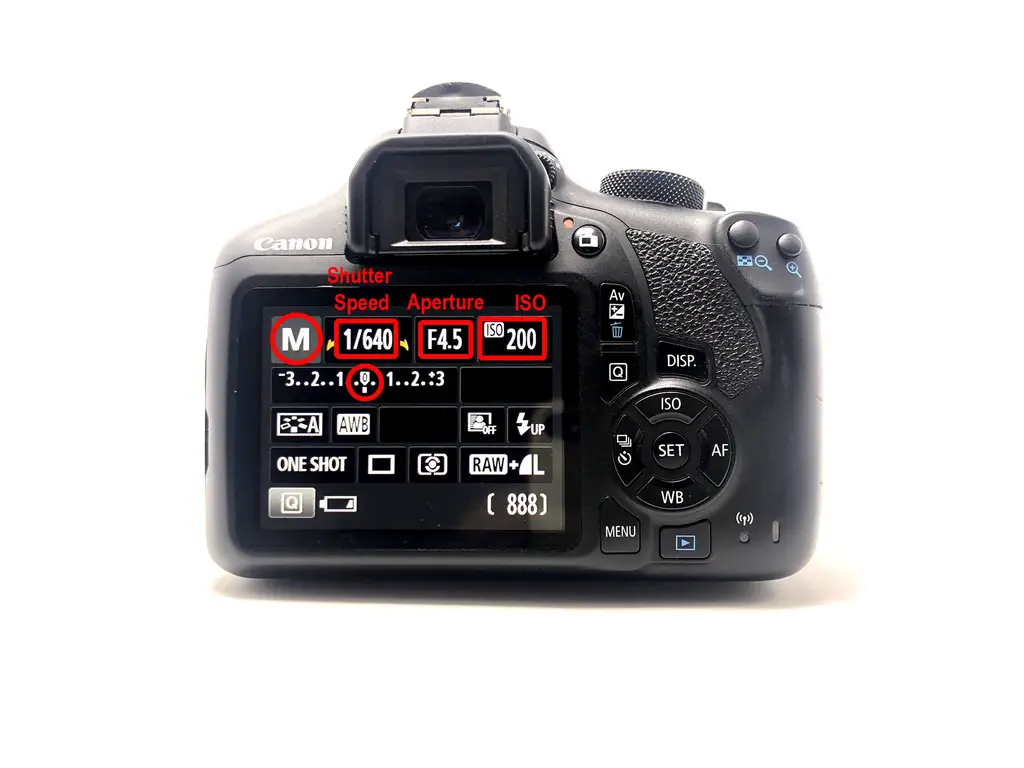
- M (Manual) – Now you have full control over all three settings so it is now your responsibility to manage the Exposure triangle and balance the three light-collecting controls. You do have some backup assistance though in the form of the light meter. When you choose your settings to create the best photo for the subject, the light meter will always be there with hints and warnings if the Exposure Triangle is not in balance. It will show you if you have unbalanced the triangle by indicating if the image is under or overexposed. It’s up to you then to make the fine adjustments to correct the exposure and achieve the creative outcome that was your goal for the photograph. This might be a little daunting for a beginner but with practice, it will become second nature.
So you can see that the Exposure Triangle is just a way of illustrating that there are three elements to the perfect exposure and they all have to be in a balanced relationship to achieve what the camera believes to be the best exposure. Sometimes the camera and therefore the Exposure triangle can be wrong though.
Ignoring The Neutral Exposure Triangle
Sometimes the scene you want to photograph may be almost entirely white (a snow scene) or entirely black (a night scene). The camera’s light meter which is hard-wired to follow the principles of the neutral Exposure Triangle will attempt to make a bright image darker or dark image brighter. This would ruin the two scenarios just described by making them look a muddy grey instead of crisp white or inky black. You have to take control and break the symmetry of the metaphorical Exposure triangle by forcing the exposure to be over or underexposed as needed to preserve the stark contrast that is required.
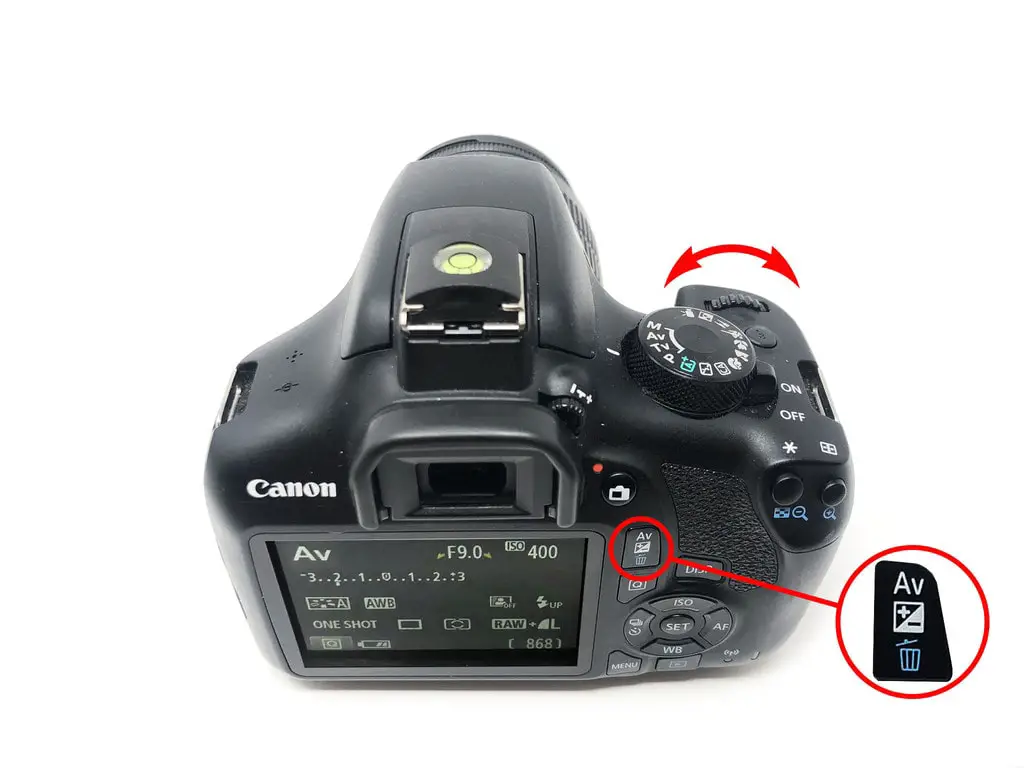
The best way to achieve this is in Manual mode and choose the most appropriate setting to distort the triangle according to depth-of-field or motion blur required. You can also achieve this in Aperture or Shutter Priority modes by selecting Exposure Compensation control and shift the exposure towards the negative or positive sides. The triangle for this exposure would be a contorted shape that I would not attempt to draw.
Related Questions
What is Exposure Compensation in Photography?
This is a useful tool to understand to take control of the light meter in tricky lighting situations. You can learn more about Exposure Compensation by clicking here.
How do You Take Grainy Photos?
Understanding Exposure is a key factor in producing deliberately grainy photos. This seems to go against the general aspirations of photography but it can add some gritty quality to the right subject. To find out more about this unusual approach click here to read our article in Photography Skool.
How do You Use The in-Camera Light Meter?
The Exposure Triangle comes together in the camera’s light meter. You can read all about its use and setup in our useful guide right here in Photography Skool.
