Your camera wants to make a perfect neutral exposure every time and that is usually OK when the lighting conditions are balanced. Sometimes that neutral goal can produce the wrong exposure for the given scene. Conditions may dictate that you want the exposure to be very dark or very bright and so you have to overrule the camera’s decision. You can achieve this by using “Exposure Compensation”, but what is that?
Exposure Compensation in photography is the ability to overrule the metering decisions of the camera to produce a deliberately overexposed or underexposed image when lighting conditions are challenging. This is done by forcing Aperture, Shutter Speed or ISO settings away from a neutral exposure.

This is a very useful skill to know and can drastically improve how your photographs look when the ambient light is less than ideal. It is a relatively easy process once you know how to do it. It varies in different program modes so keep reading for a detailed illustrated guide on Exposure Compensation and how to use.
Illustrated Guide on Exposure Compensation
Detailed Description of Exposure Compensation
The camera’s light meter wants to make a scene look neutral and on average a mid-grey tone. The precise grey that it aims for is 18% grey because this is what we perceive to be midway between black and white. This seems to work most of the time if the scene is evenly well lit and doesn’t have large areas of high contrast.

The problems start to occur when the scene is largely dark or largely bright. The light meter will want to pull the luminance of the scene towards the mid-grey of 18%. Therefore it will make a scene with large areas of shadow, lighter and scenes with large areas of highlights, darker. This will not describe the scene very accurately in the final image, it will always be too light or too dark.
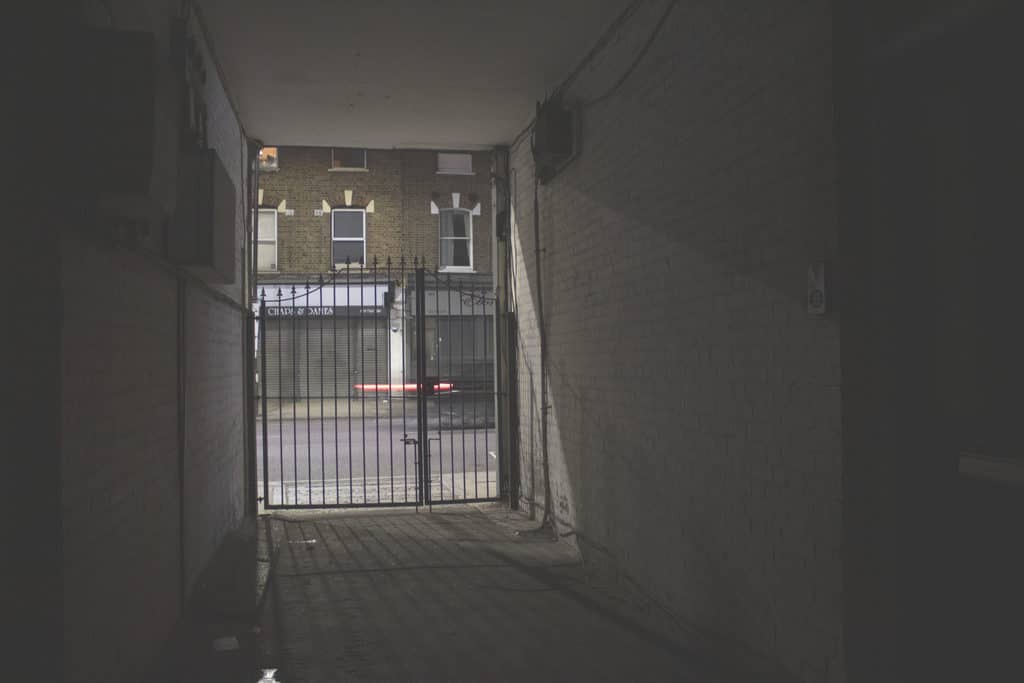
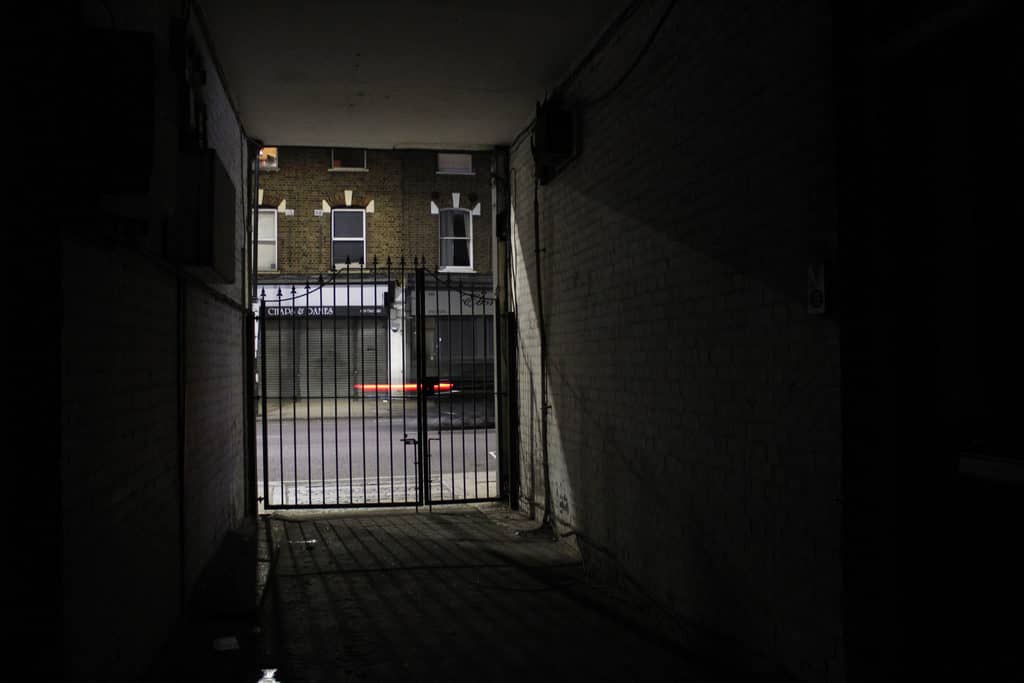
To compensate for this obvious error you can actually guide the light meter with Exposure Compensation. This is the process of overriding the natural tendencies of the light meter to shift the image towards a mid-grey tone and force it to accept a manual input from the photographer to keep the scene in the tonal range that it is predominantly already within. This is done by using the exposure tools to keep the scene dark by underexposing or to keep the scene light by overexposing. But what kind of scenes require this intervention?
When do You Need Exposure Compensation?
Exposure Compensation is required when a scene is more than averagely bright or more than averagely dark. This is because the camera’s light meter will want to return the exposure back towards the average mid-tones that it is comfortable with. A very bright scene like a snowfield or a white sandy beach will require some assistance to prevent the greyness creeping in.
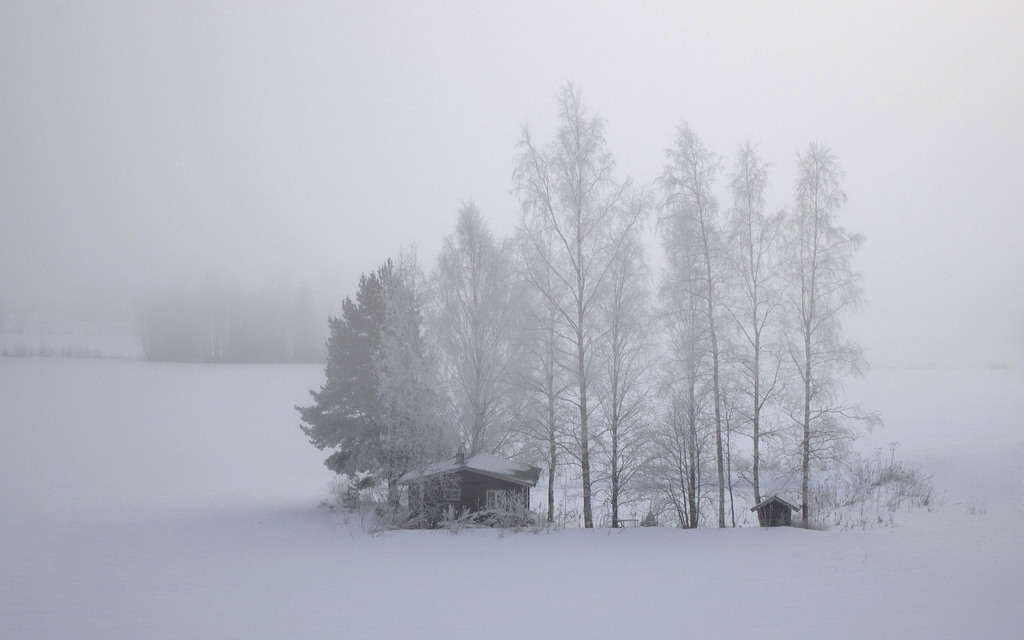

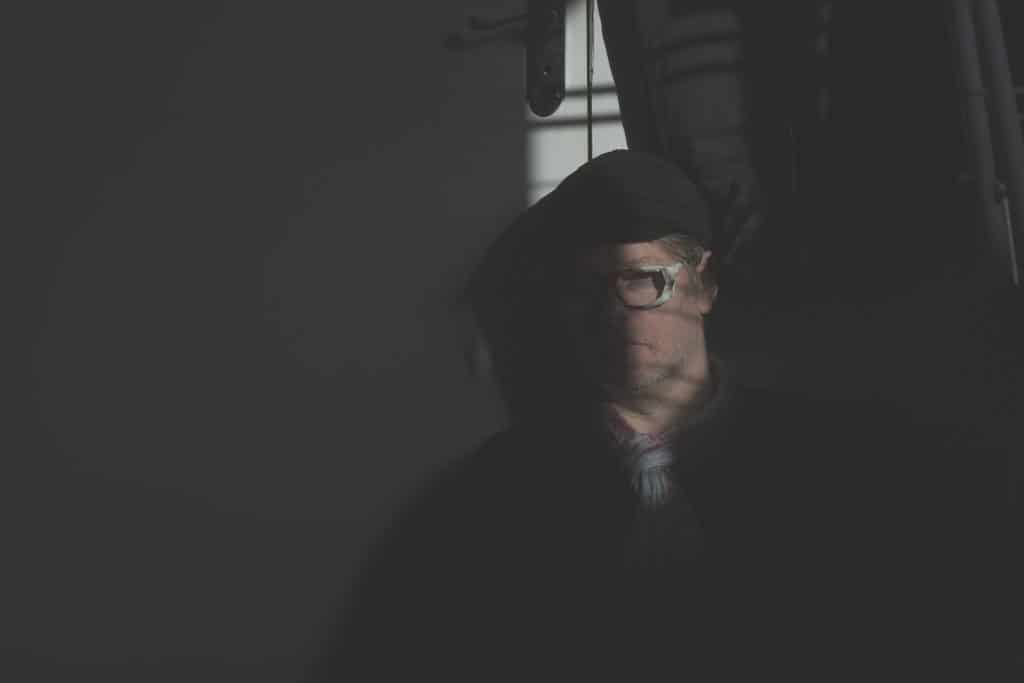
Equally a dark night scene or a shady interior will require some degree of intervention over the light meter to prevent it from destroying the intrinsic gloom that those scenes portray. Any low-key or high-key composition will benefit from a little Exposure Compensation in order to maintain the extreme, high contrast nature of the exposure.
How do You Use Exposure Compensation in Aperture Priority Mode (Av or A)?
Select the “Av” or “A” mode on the program selection dial. You should probably use a tripod especially if you are in a dark environment and you will be underexposing as well. In this mode, to achieve full control, you should not use Auto ISO but choose an appropriate fixed ISO that suits the ambient light of the scene. You have control of the Aperture so select and fix it at an opening size that is appropriate for the depth of field that you want to see. Choose an ISO as low as possible to minimise “noise” in the images.
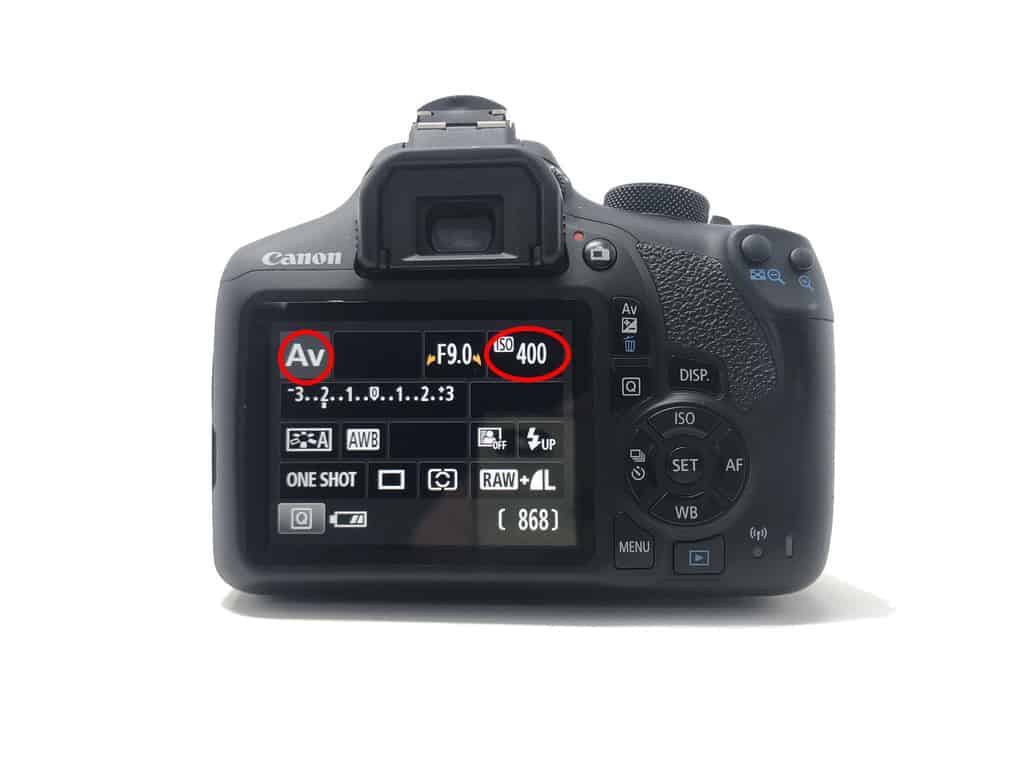
Using the evaluative metering to get an average reading of the scene, frame up your composition and half-press the shutter button to focus the scene and take a meter reading. If the scene is too featureless to lock the focus, try moving the camera around to find an edge or a line to focus on. If you are trying to capture a dark scene the camera will react by trying to lighten it up. You, therefore have to underexpose to counteract that false shift in exposure. You do this by finding the Exposure Compensation button (+/-), and while pressing it down, roll the spinning wheel until you see the light meter needle move towards the negative side.
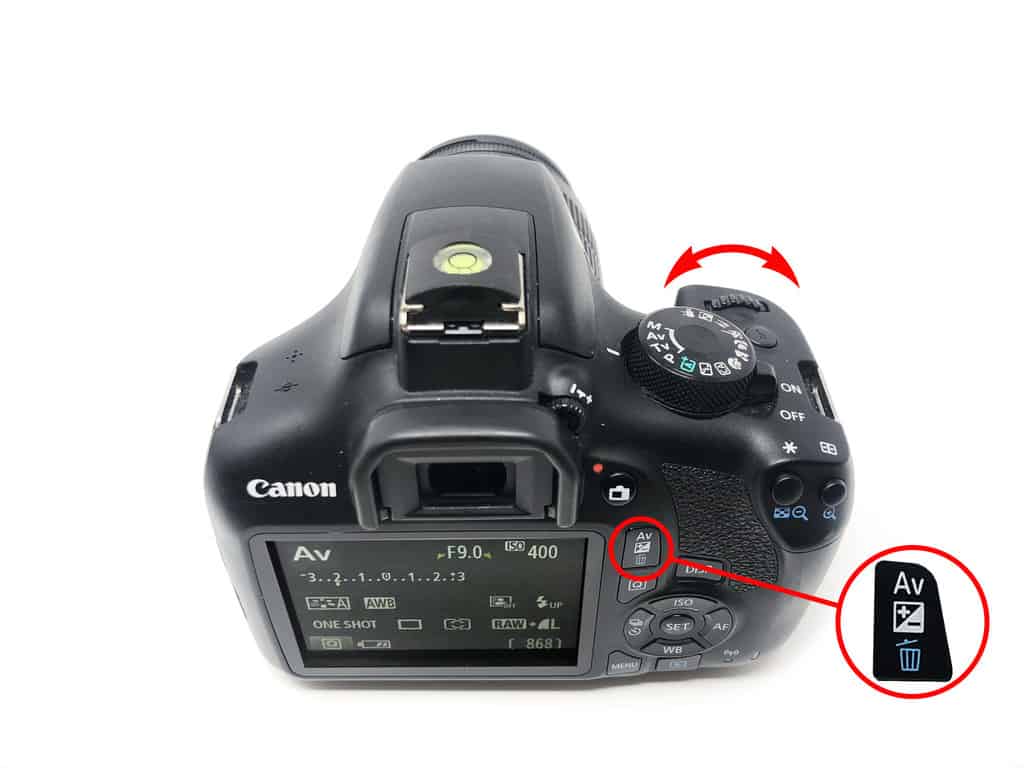
As you are in Aperture Priority mode, the Shutter Speed will be increased to underexpose the scene. Try -1 or -2 stops at the first attempt. Now refocus and meter the scene then reframe and take the shot. review the results and you should see some uncompromised dark shadows and well-exposed highlights. If it is not quite perfect, adjust the amount of underexposure and shoot again.
On some cameras, you can access the Exposure Compensation by using the rear screen controls for the shooting mode that you are in. Access the menu and navigate to the Exposure Compensation control. Now, use the spinning wheel to adjust the underexposure by -1 or -2 stops or press the “Set” or “OK” button and use the arrow keys to nudge the needle across into the negative side.
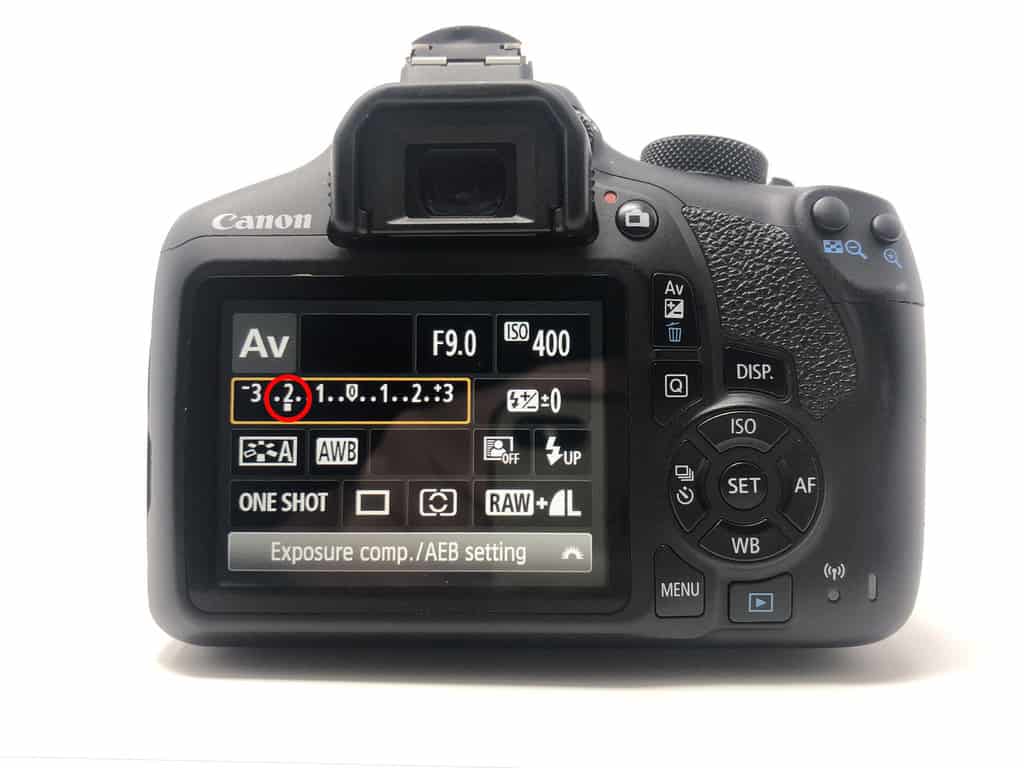
If you are photographing a bright scene, reverse the above process and overexpose to the positive side on the right. This should ensure that bright highlights and whites should be clean and bright and not a muddy grey tone.
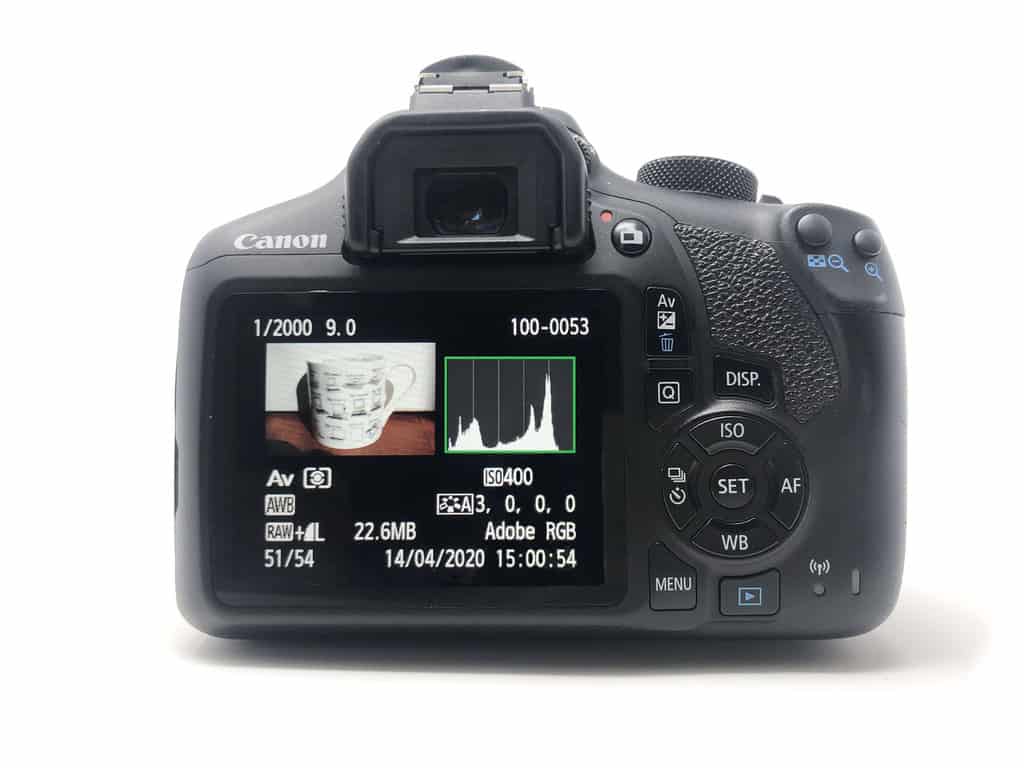
Whether you are underexposing or overexposing the scene to correct the exposure, don’t push it too far and clip the blacks or the whites. That will cause the loss of detail that will be unrecoverable in post-processing. You can check this by looking at the histogram for the image.
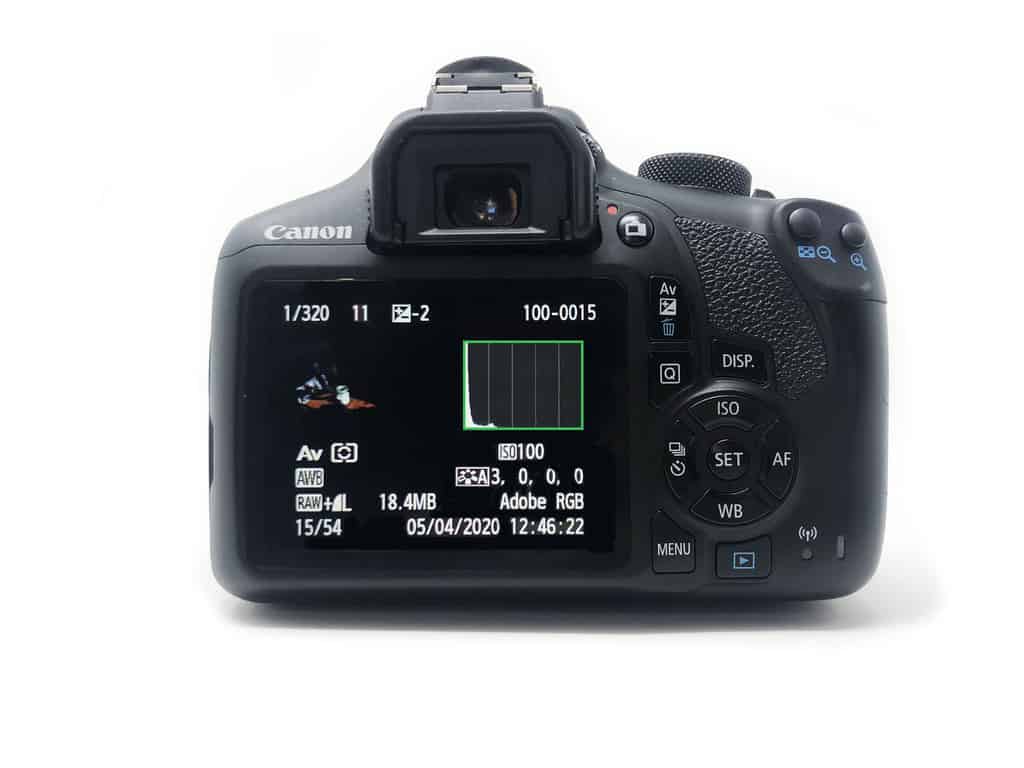
Make sure the graph doesn’t slam into either extreme edge of the diagram; that will indicate clipping. In this case, dial back the under or overexposure to reposition the histogram safely within the frame of the graph.
How do You Use Exposure Compensation in Shutter Priority Mode (Tv or S)?
Select the “Tv” or “S” mode on the mode selection dial. It would be best to use a tripod especially if you are shooting in a dark environment and you will also be underexposing. In this program, to achieve full control, don’t use Auto ISO but select an appropriate ISO that suits the available light of the scene. You have control of the Shutter Speed so select and fix it at a speed that will deliver the amount of motion blur that you want to see. To minimise “noise” in the images, select an ISO as low as possible.
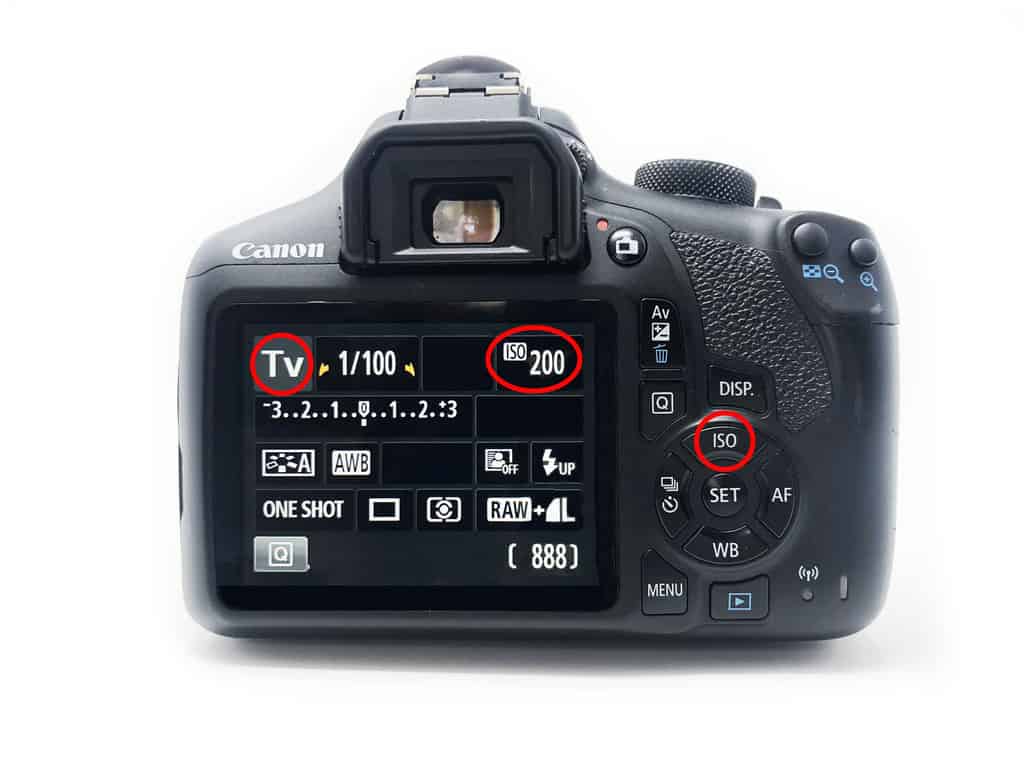
Use the evaluative metering mode and take an average meter reading of the view, compose a scene and half-press the shutter button to focus it. If you can’t lock the focus, find an edge or a line to focus on by moving the camera around. If you are trying to capture a bright scene the camera will react by trying to darken it up.
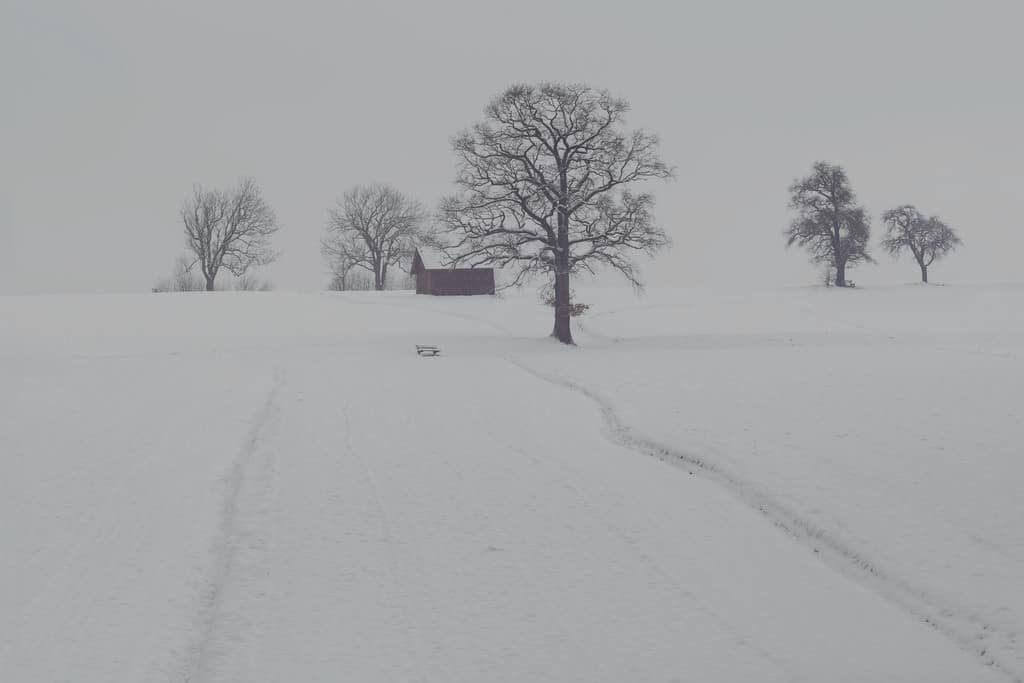
You have to overexpose to override the tendency of the camera to underexpose. Find the Exposure Compensation button, usually with a +/- symbol on it. While holding it down, roll the spinning wheel with your index finger. You will see the light meter needle move towards the positive side. As you are in Shutter Priority mode, the Aperture opening will be increased to overexpose the scene. Try +1 or +2 stops as a start. Now, refocus and meter the scene then reframe and take the shot. Review the results and you should see some uncompromised light highlights and well-exposed mid-tones and shadows.
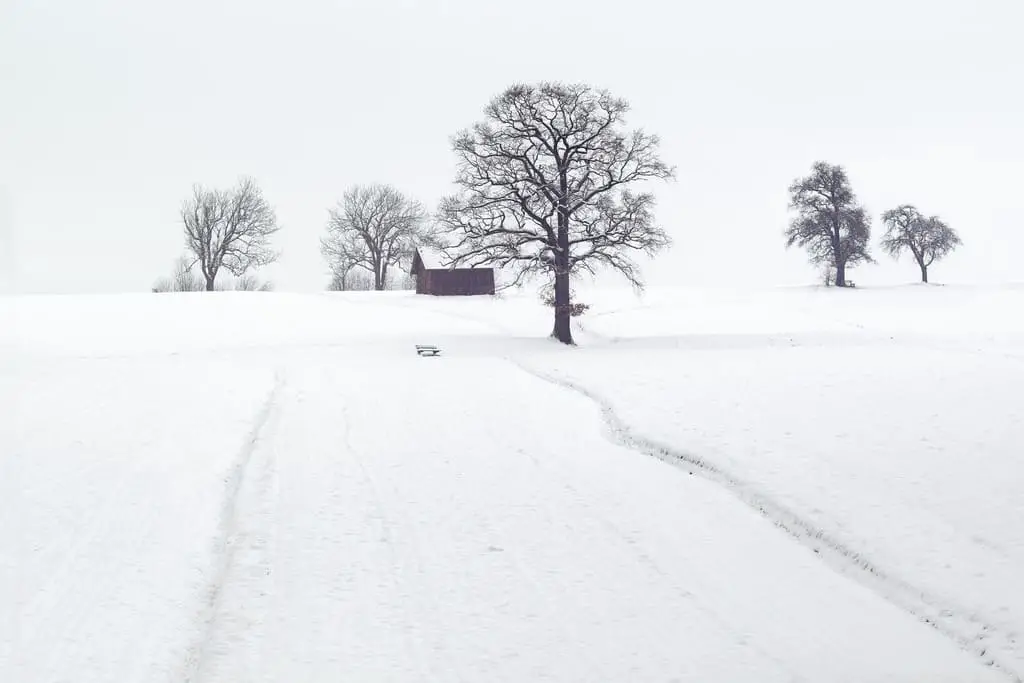
If it is not quite perfect, adjust the amount of underexposure and shoot again.
You can also access the Exposure Compensation by using the rear screen menus for the shooting mode that you are using. Gain access to the menu and go to the Exposure Compensation control screen. Use the spinning wheel to adjust the overexposure by +1 or +2 stops or use the arrow keys to nudge the needle across into the positive side.
If you are photographing a dark scene, reverse the above process and underexpose to the negative side on the left. This should ensure that the dark shadows should be crisp and black and not a muddy grey tone.
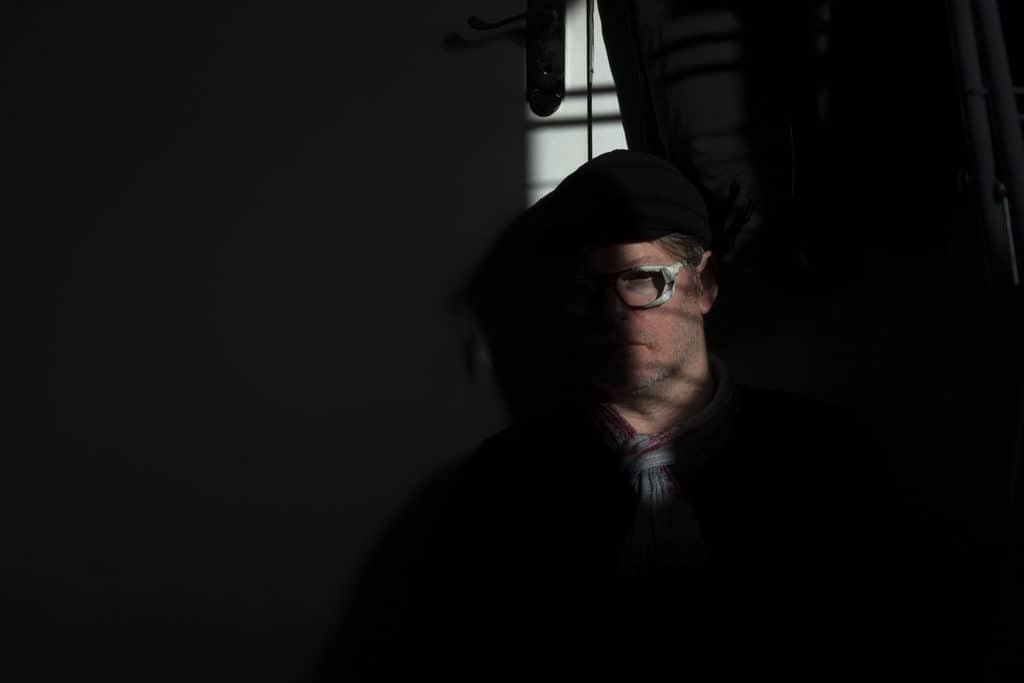
Use the histogram of the image on the camera to check that there is no clipping of the shadows or highlights. That would result in a loss of detail and make it impossible to retrieve them. Adjust your exposure to shift the histogram away from the extreme edges.
How do You Use Exposure Compensation in Program Mode (P)?
Choose “P” on the program selection dial. In this program, you control the exposure as a pair. When you roll the spinning wheel selector both the Aperture opening and the Shutter speed change but together they maintain a neutral exposure. So, if the shutter gets faster, the Aperture opening will get larger to let in more light to make up for the light lost to the faster shutter speed. This brings the exposure back into balance. You can do this up and down through all the possible exposure pairs and still maintain a neutral exposure.
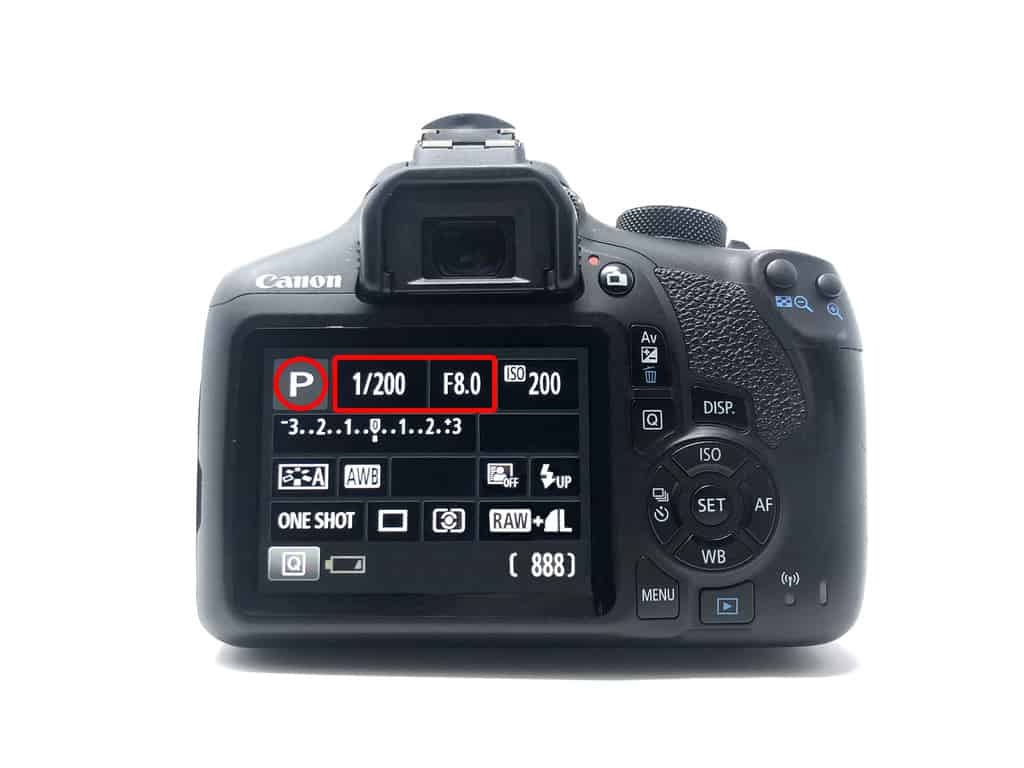
How do you invoke the Exposure Compensation though? It’s the same way as the other programs really. Ignore the Auto ISO setting and fix the ISO to the lowest setting that you can in the ambient light. Frame up the scene and half-press the shutter button to focus and to meter the scene. Move the camera around until you find something to focus-lock on then reframe the scene. Now, using the spinning wheel selector, cycle through the exposure pairs until you see a combination that works for the view. It might be a large Aperture Opening and a faster Shutter Speed for a shallow depth of field and a blurred backdrop. It might be the opposite to freeze some moving action. Once you have the desired exposure pair, find, press and hold down the Exposure Compensation button, it usually has a +/- symbol on it. With that held down, roll the spinning wheel selector again and you will see the meter needle move towards the negative side or the positive side to indicate how much the image will be under or overexposed.
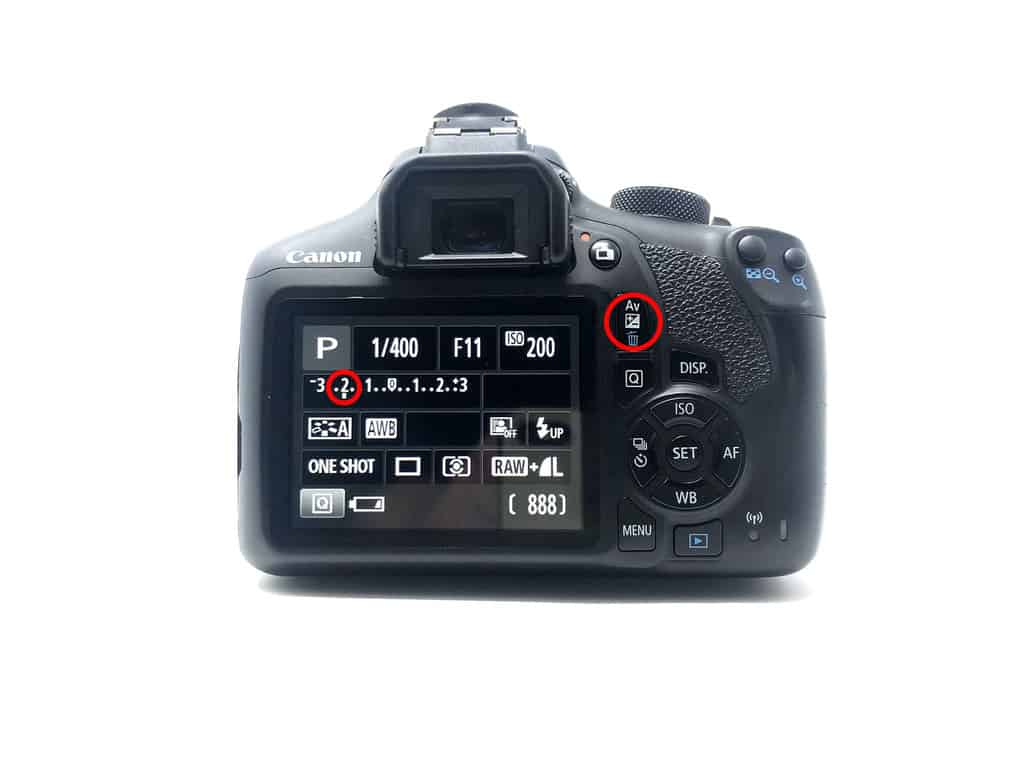
If your scene is dark then you should roll the needle over to the negative side to underexpose the scene by -1 or -2 stops. You will see the shutter speed changing to let in less light. Sometimes both settings will be altered so that the exposure pairs are not too divergent. If the scene is very bright, reverse this process to overexpose the it by +1 or +2 stops. This is not a bad program to use but you have less control over the final outcome than the other two programs.
How do You Use Exposure Compensation in Manual Mode (M)?
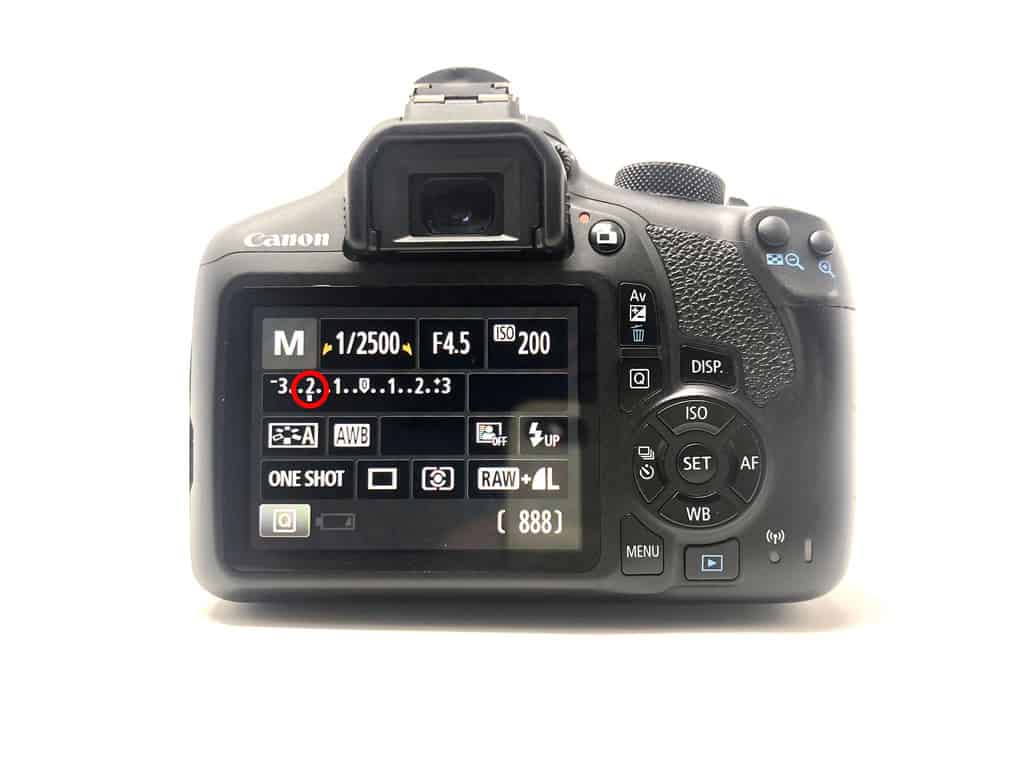
When you choose the “M” program you are entering the realms of fully Manual. You control everything here and there is no assistance except if you employ the Auto ISO, then it will compensate for your exposure choices as long it is within the ISO range of the camera. So, in this mode, you can’t use the Exposure Compensation button to apply a negative or positive adjustment to the exposure, you can do it manually. Firstly, disable the Auto ISO by selecting a fixed ISO that is suitable for the ambient light. Using the Evaluative averaging meter setting, frame up and meter the scene (use a tripod if it is dark or low-light). You will now have to alter the Aperture and Shutter Speed to bring the meter needle back to the centre.
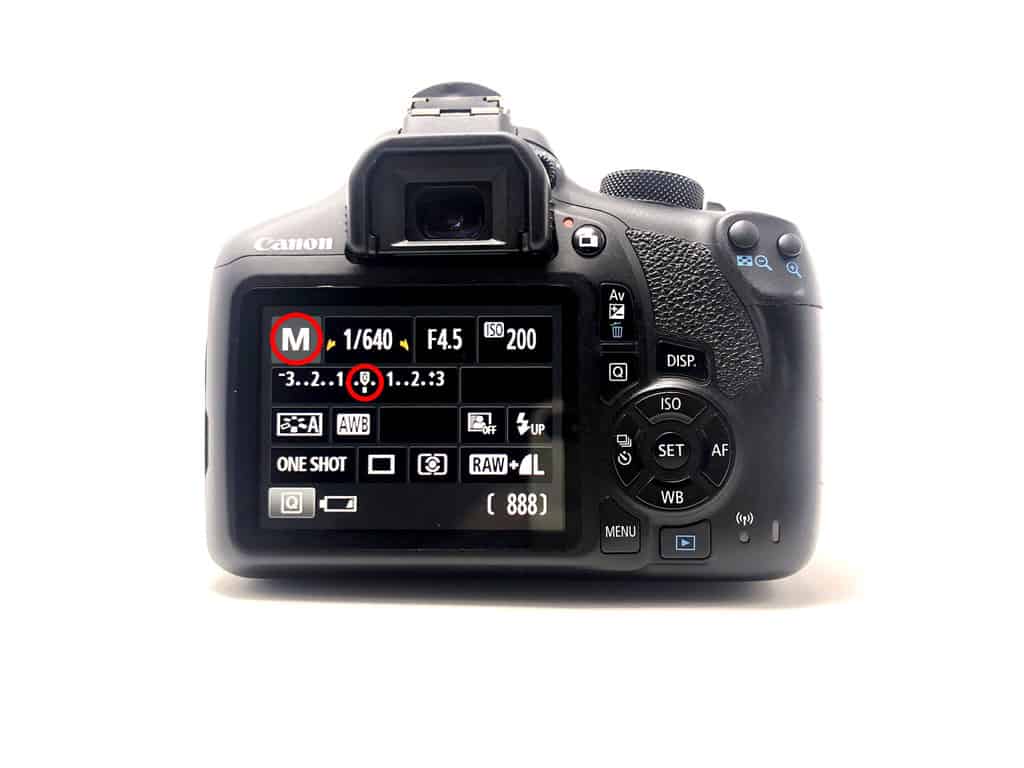
Choose appropriate settings for your desired depth-of-field and motion capture. You now have a good neutral exposure setting for the scene. It’s time to manually adjust the Exposure Compensation. Choose which setting you want to prioritise and adjust the other one. If the Aperture setting is the most important then use the Shutter Speed to under or overexpose the scene. Shoot the scene, review and adjust if necessary.
A Note on Auto ISO
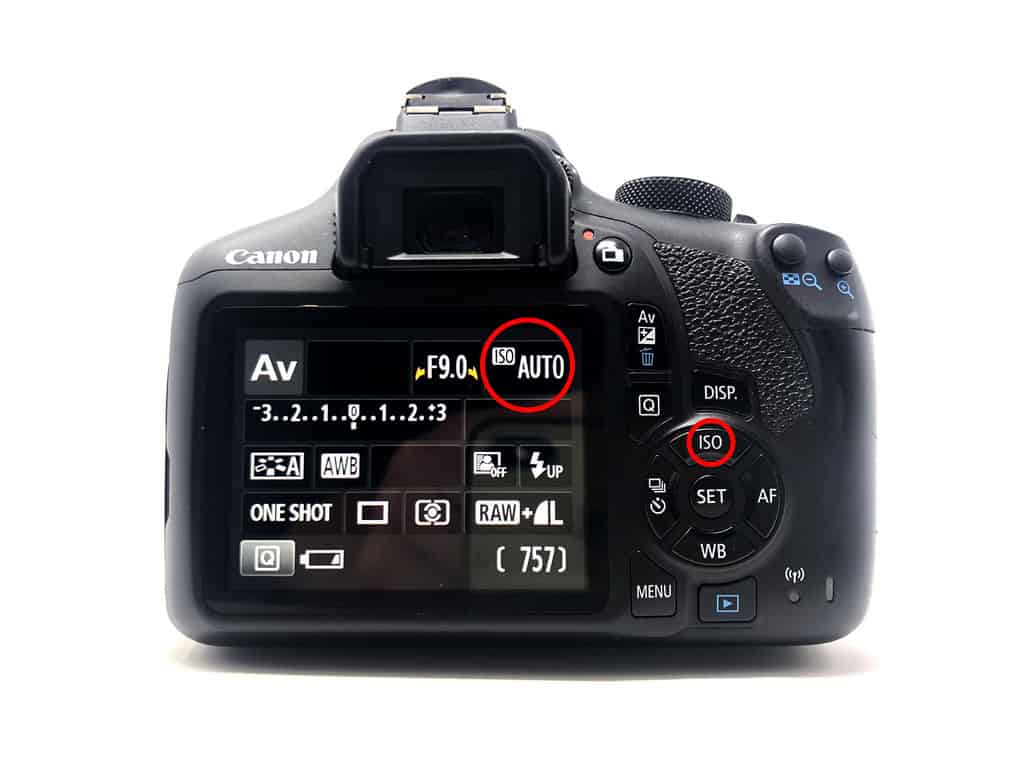
If you have Auto ISO selected while using any of the above 4 modes, It will change along with the other settings when you are trying to perform the Exposure Compensation. It muddies the water of the precise exposure control that you have when it is disabled. It can also drastically change the image quality by introducing “noise” if it is allowed to creep up to a very high ISO. It’s probably good practice to disable the Auto ISO and choose a low ISO fixed setting to maintain control over the Exposure Compensation process. If you still can’t get a reasonable exposure then bump up the ISO in controlled increments.
A Note on Spot Metering (or Partial Metering)
The spot meter will allow you to meter on a tiny portion of the scene and ignore the large areas of light or dark that would otherwise influence the exposure by using the Evaluative (or average) meter setting. It would be best then to focus on and meter the part of the scene that you want to be well exposed. That might be a bright spot in a dark scene or an area of mid-tones in a very bright scene.
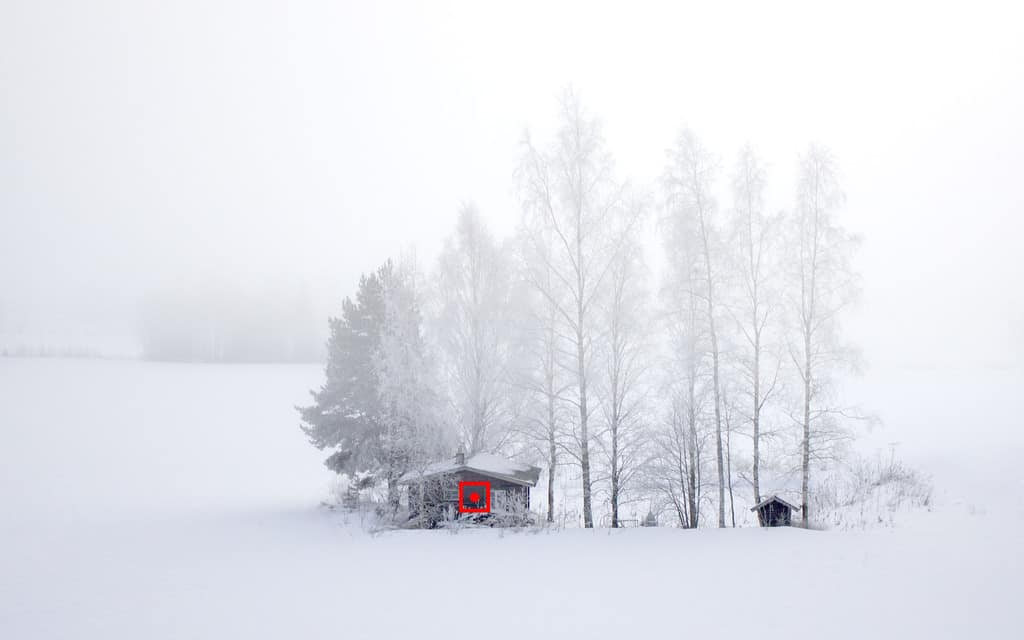
The meter might actually do a good job of setting the exposure in this case; depends on the size of the area that you can meter on. It might not be perfect though so you can expect to have to apply some degree of Exposure Compensation although it will probably be more subtle than what the “whole-scene-average” meter reading correction suggests.
020 photo – camera back showing partial metering selected
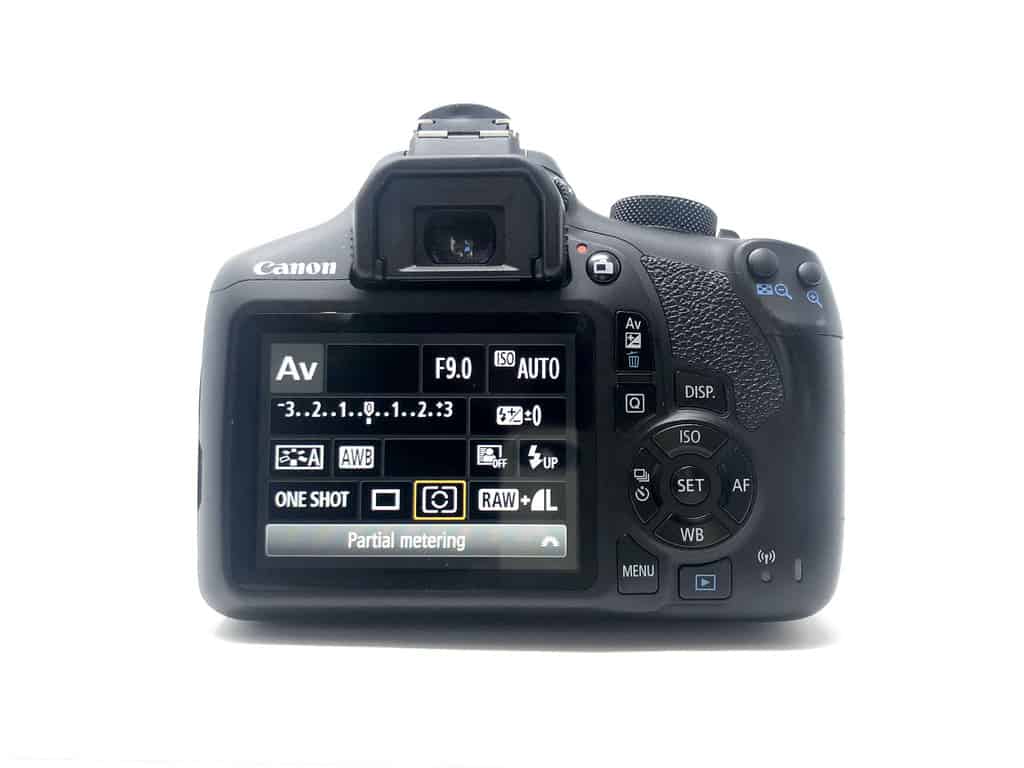
Photo by Oscar J Harper
Conclusion
So you can see that the Exposure Compensation process can save certain images from being highjacked by the light meter’s need to return the world, as it sees it, to a drab, mid-grey. It’s quite an advanced technique and requires a little practice and experiment but it will soon become second nature to use it quickly. You will become so adept that you won’t even have to remove your eye from the viewfinder as you instinctively find the compensation button, hold it down and spin the selection wheel to dial in the required correction.
Related Questions
What is Aperture in Photography And How to Use it?
This is a very important aspect of exposure in photography. It’s important to understand it so that you can manipulate it in creative ways. You can learn more about it by clicking here.
What is Shutter Speed in Photography and How to Use it?
Another very important aspect of exposure in photography. Understanding this will give you insight into how to manage motion-control in your photos. To understand more about shutter speed click here.
What is ISO in Photography and How to Use it?
Although not technically an aspect of Exposure, as it doesn’t control how much physical light enters the camera, understanding ISO will allow you to minimise noise (grain) and take better photos in low-light. To find out more click here.
How do You Use The in-Camera Light Meter?
Exposure compensation can be the resulting outcome of a good understanding of how the light meter works and how it tries to hijack the exposure in difficult lighting conditions. You can read all about its use and setup in our useful guide right here in Photography Skool.
