Along with the Key and Fill Lights, we may want to introduce this third light to assist in defining a particular area of the subject. It is a special kind of supplementary light and its name describes the exact element that it will be highlighting.
The Hair Light in Photography is a type of Separation or Kicker Light that targets the hair and sometimes the shoulders, adding shine and revealing detail. It is usually placed above and behind the subject but shouldn’t cast extra shadows on the face. Avoid lens flares by adding a modifier or flag.
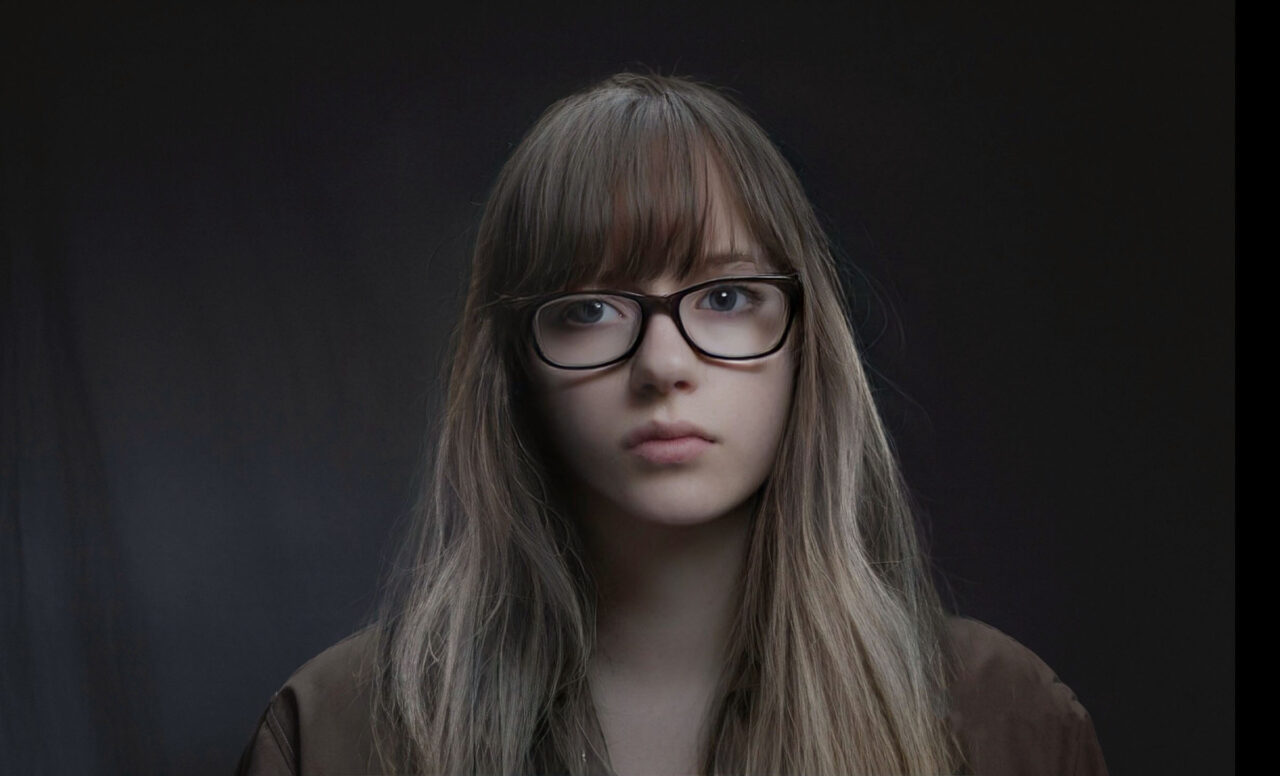
This is a supplementary light that is not always necessary but its introduction can help to make our portraits look more accomplished and pleasing. Let’s take a deeper dive into the use of a Hair Light, the positioning, relative brightness and when to introduce a Hair Light.
Do You Need a Hair Light in Studio Photography?
It sometimes may not be necessary to add in the sophistication of a Hair Light. If the hair is highly visible against the backdrop, for example, if the hair is blond against a dark background or dark hair in front of a light backdrop.
Depending on the position of the Key Light it can often naturally cast shadows on the opposite side and top of the subject’s head. If this is undesirable, the introduction of a Hair Light into this shadowy side may add balance and depth to the form.
Proceed carefully if our subject has very little or thinning, wispy hair as this could result in the effect of backlit candy floss. Try moving the Hair Light to a steeper angle above the subject and lowering the power.
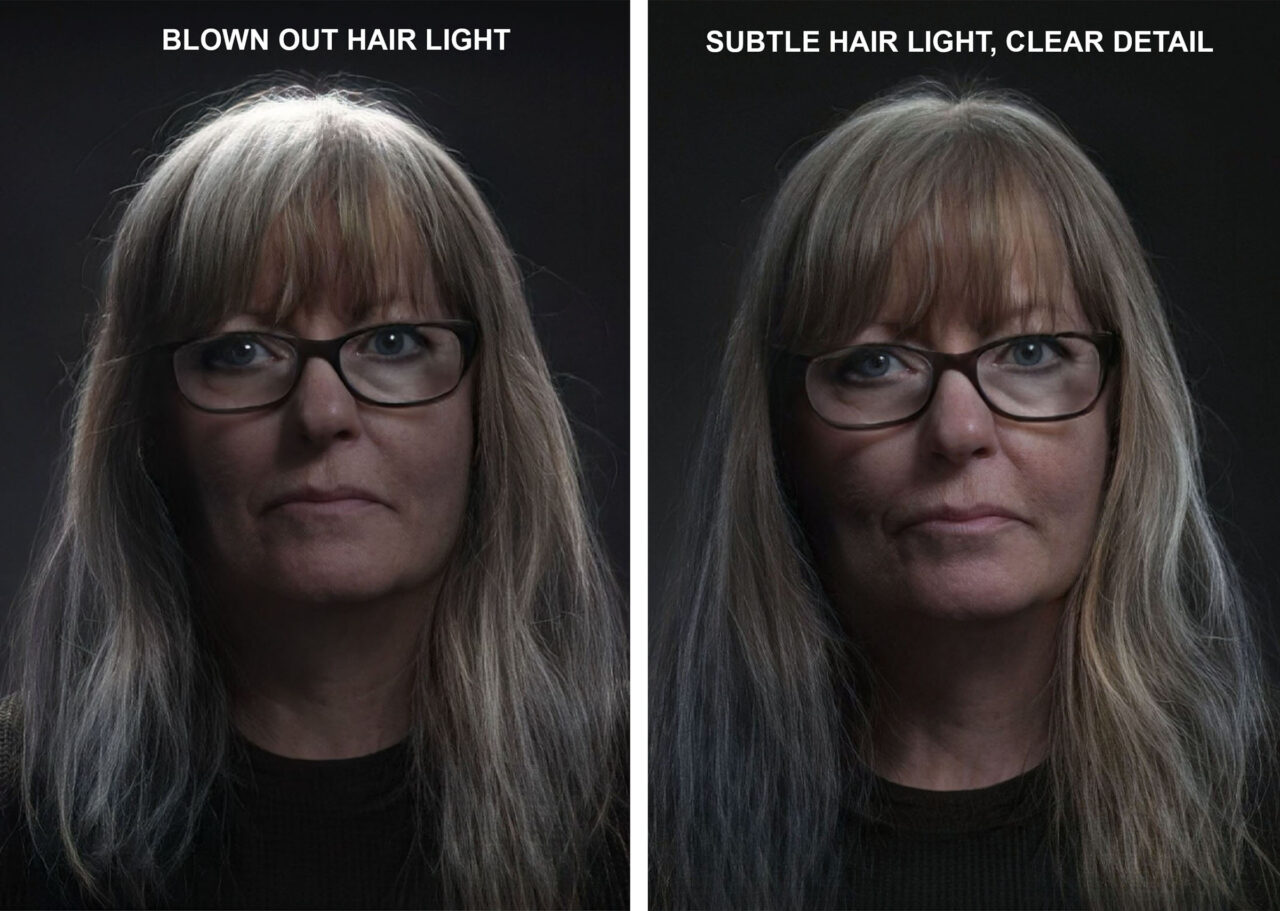
For blond and white hair be careful not to overwhelm the top of the head with light that will cause a blown-out highlight. Experiment by toning down the power of the Hair Light.
For bald subjects, there is the possibility of a strong, clipped, bounced highlight that could look distracting. To improve this outcome, apply a broad diffusion material to the light and try lowering the power compared to the Key Light.
If however, we want to create some three-dimensional separation between the subject’s head and backdrop, the introduction of a Hair Light can be very beneficial. This is particularly important if the subject has dark hair against a dark background.
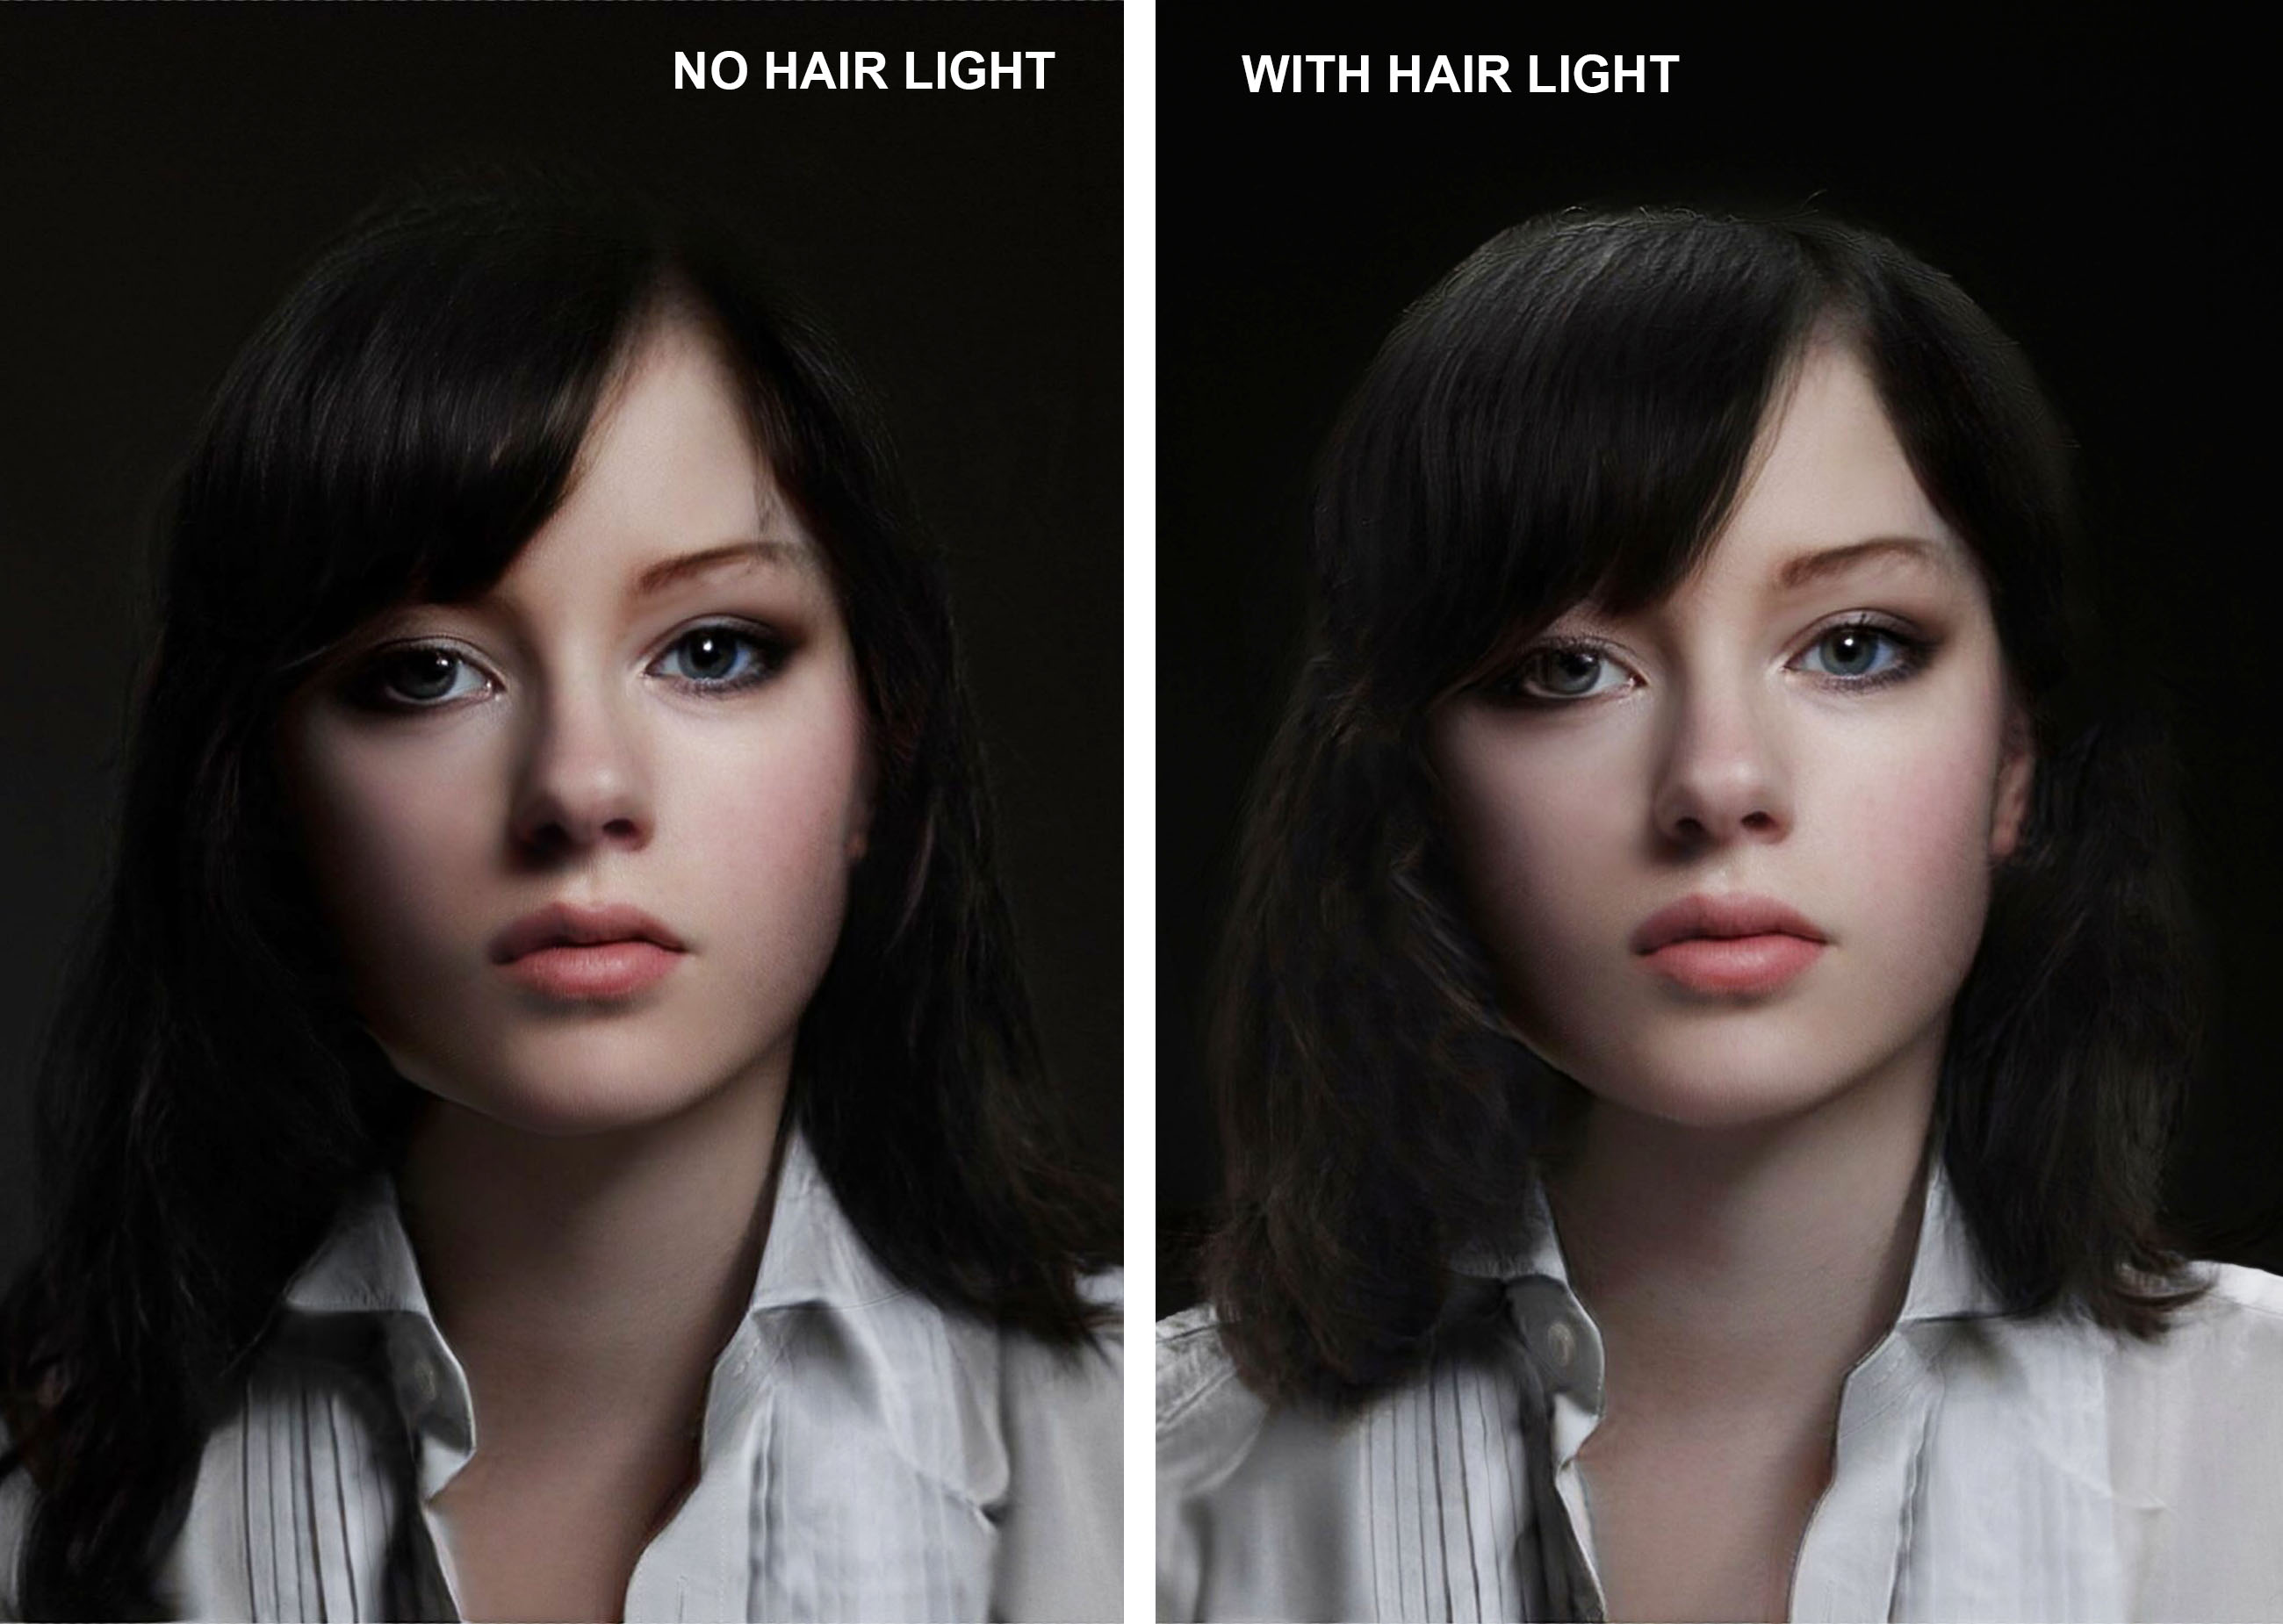
Without a hair light, there is a danger that the hair and the edge of the head will simply merge into the gloom of the background. This may be the desired effect in a low-key image but otherwise, a Hair Light can be employed to reveal the shape of the head and hair and effectively pull it away from the background.
What Does Adding a Hair Light do to Your Shot?
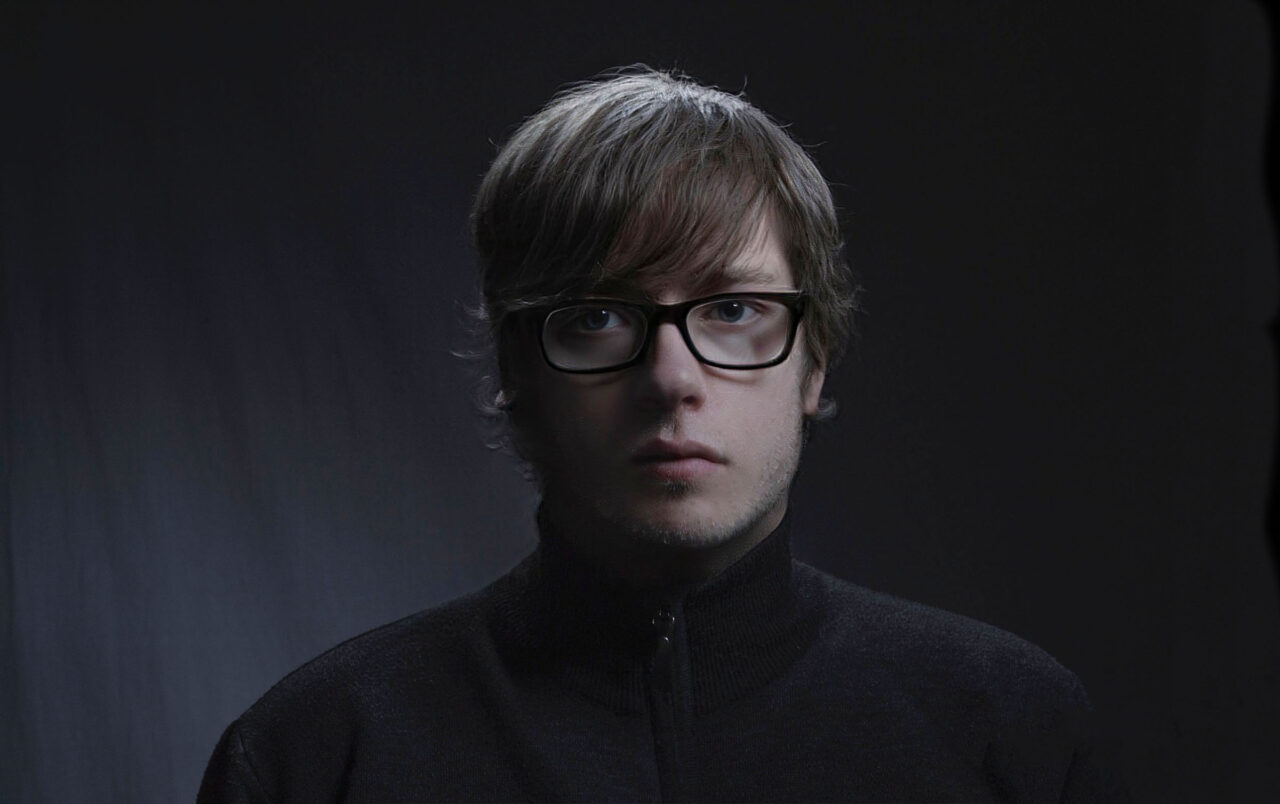
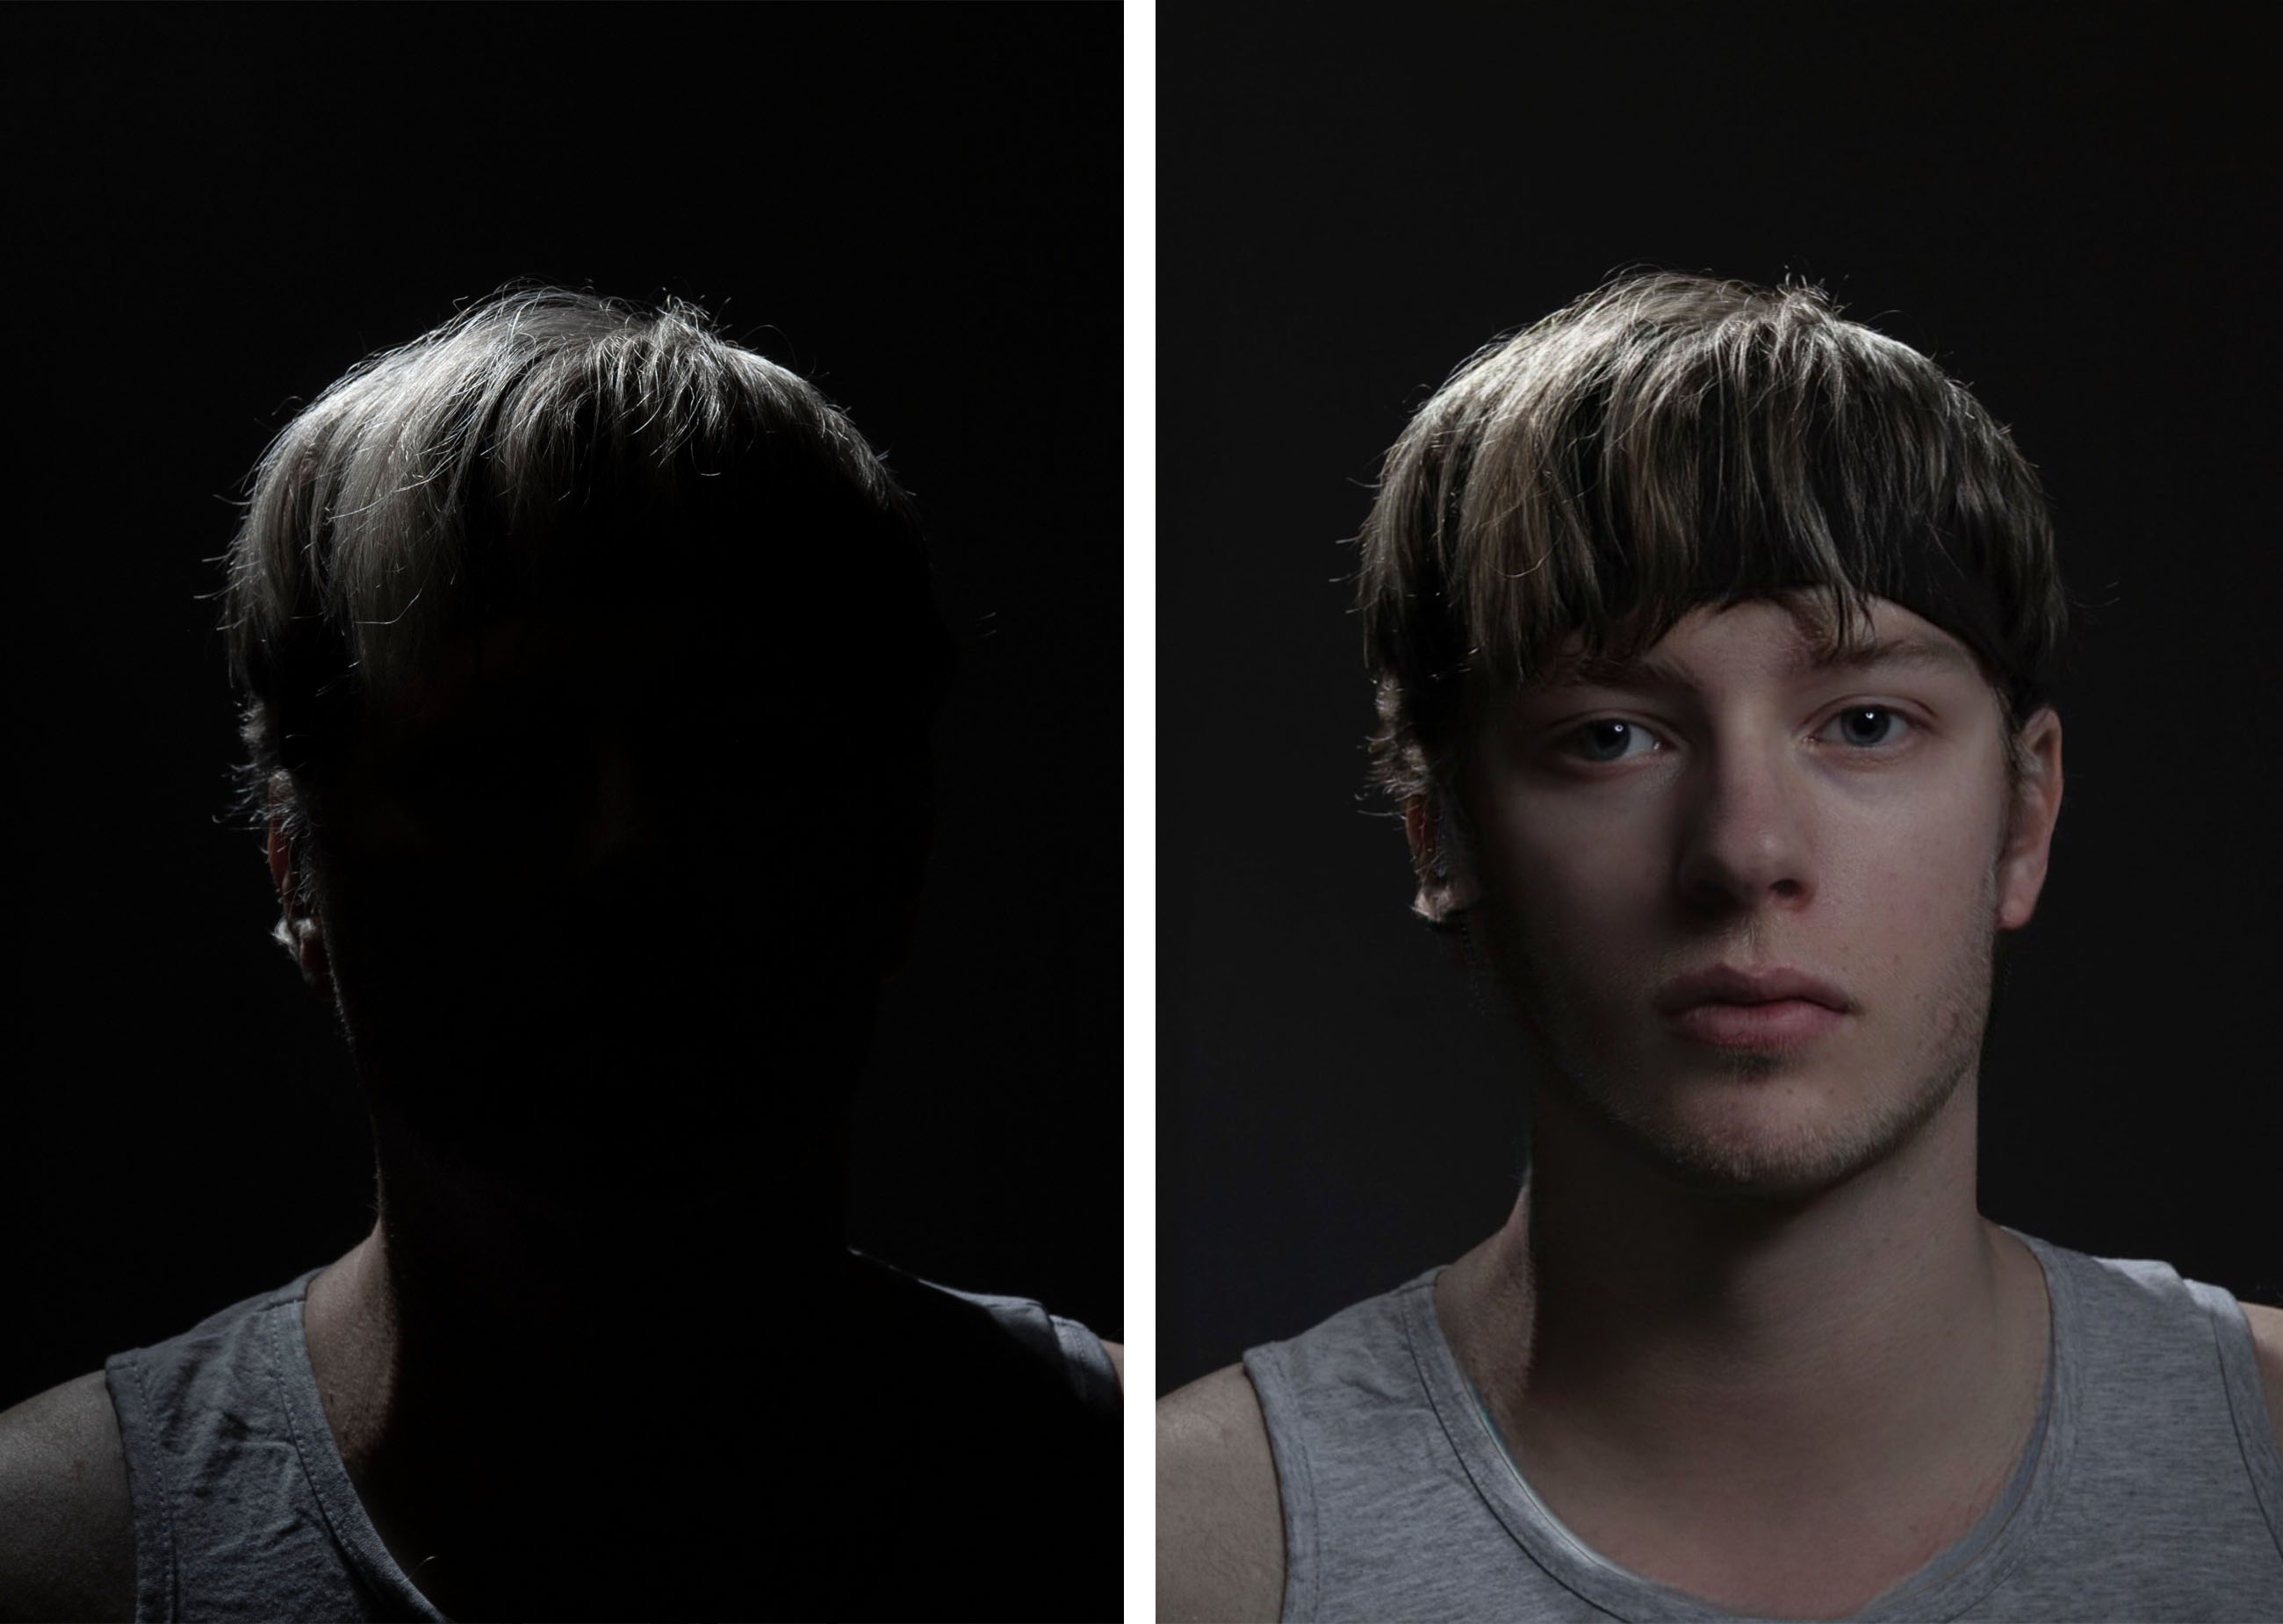
Adding a Hair Light into the mix can help to give a lift to our portrait image by introducing crisply defined edges to the head and hair. If this is implemented correctly it will have the triple benefits of separation from the background, 3-dimensional depth and adding definition to the hair strands.
Creating separation from the backdrop with a Hair Light helps to define the shape and form of the head and helps the viewer to read and understand the overall outline of the model.
This apparent separation gives the illusion of some distance between the backdrop and the subject and therefore creates an impression of 3-dimensional depth. The fall-off of light from back to front also helps to reveal the 3-dimensional curved form of the head.
The revealed details of the hair will help it to appear more natural and less like a hairband of solid tone. If done correctly, the Hair Light should indicate the texture of the hair strands. This may be aided if the hair is well brushed or contains products like wax to increase the specular highlights.
What Can I Use as a Hair Light?
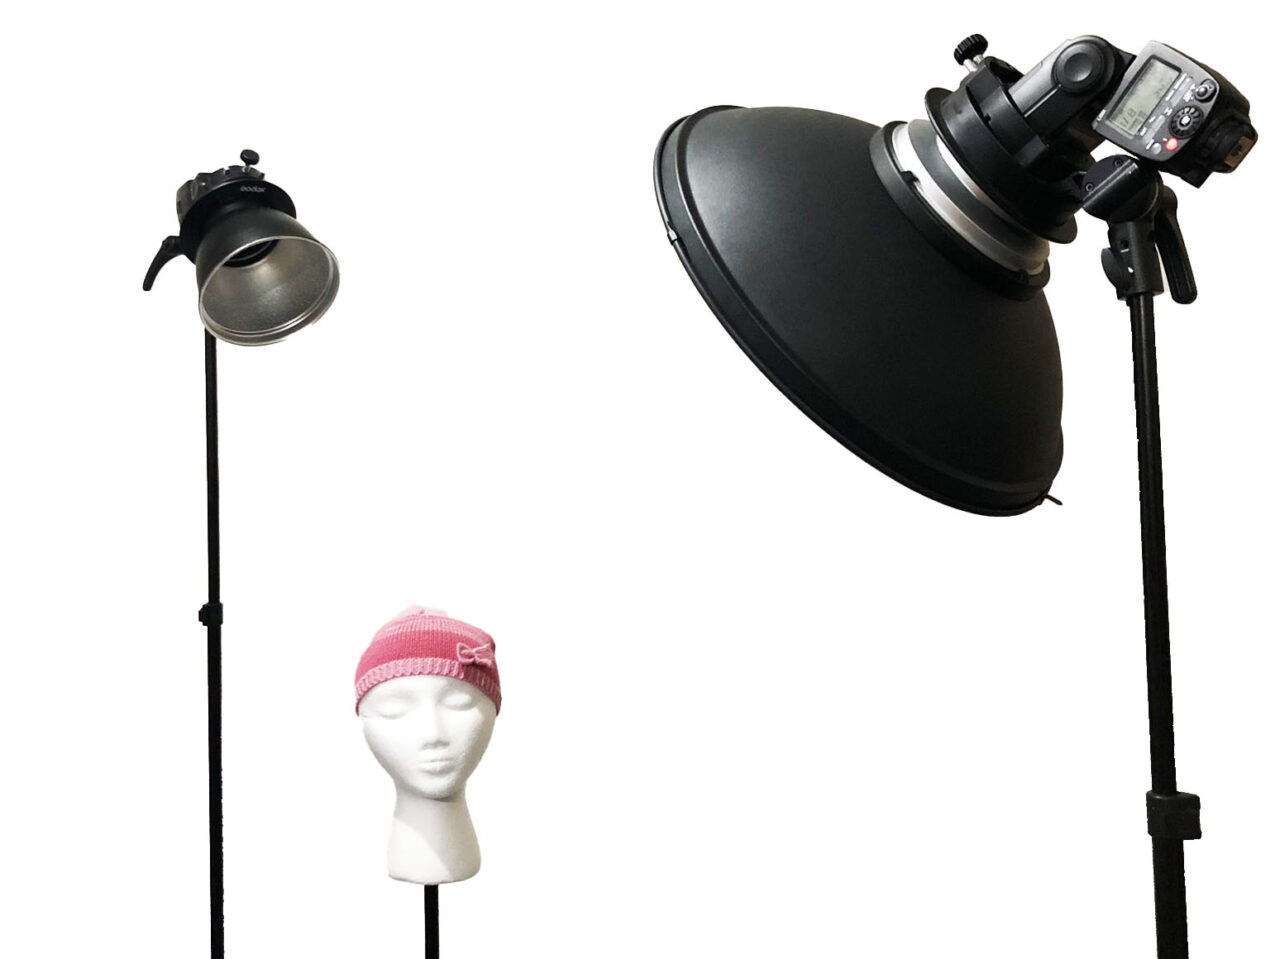
In the studio, we could use a bare flash Speedlight or strobe head for the Hair Light. These would give a good twinkle and show detail and texture very well. The raw, unmodified light would be very powerful and hard though, so some tinkering with the power output may be necessary to prevent blown-out highlights. The other problem is that the spread of light would be uncontrolled and could bounce everywhere, possibly interfering with the Key and Fill lights or bouncing off reflector panels.
If our lighting was a constant light setup, the use of an LED panel could prove to be highly suitable for the Hair Light. The bright, punchy, concentrated light source would add a good degree of sparkle to the shiny hair and help to pick out the texture.
Where do I Put The Hair Light in Studio Photography?
The Hair Light is usually above the subject but its location above can vary depending on the effect we require. To illuminate the whole top of the head, It can be placed virtually directly above. We must ensure that it doesn’t cast additional shadows beneath the features of the face, particularly if it is a hard light source. This could cause confusion with the shadows produced by the Key Light. We should move the Hair light backwards a little to avoid this problem.
To see more of a glowing rim on the hair, we can move the light even further back and tilt it towards the camera position. Feather the light as required to achieve the degree of edge highlight desired. There is the real potential of lens flare as we move the light backwards and point it towards the camera. It’s an interesting side effect but it can degrade the overall exposure of the image.
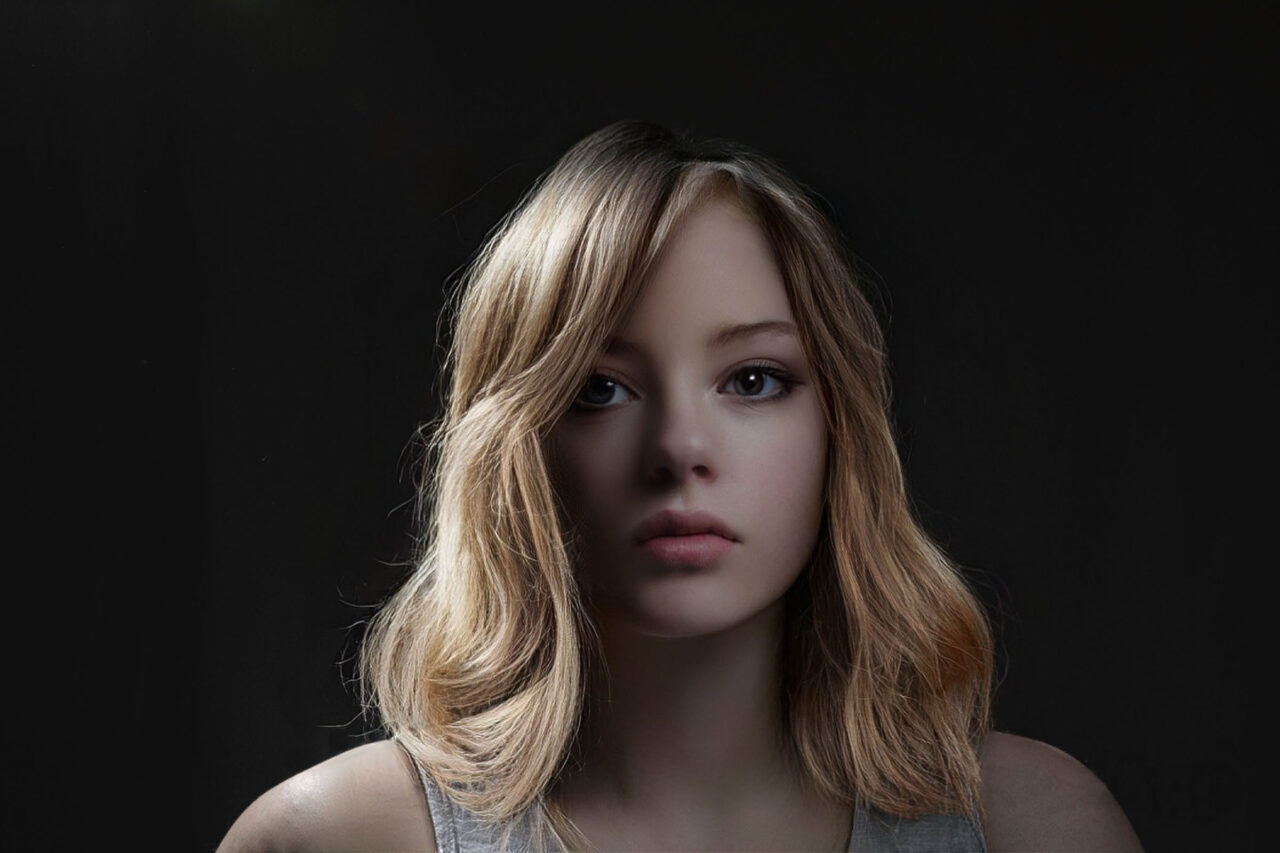
If our Key Light is in front and to one side of the subject, we may want to place the Hair Light off centre and opposite to the Key to backfill the shadows created by it. This will highlight the hair on the dark side of the subject and create some separation. This is particularly useful if the subject has long hair as the side position of the Hair Light can pick out the long strands of hair down to the shoulder.
What Type of Modifiers Are Best For The Hair Light in Studio Photography?
The Hair Light is often behind the subject and pointing back towards the camera lens, so if it is set to the wrong angle there is great potential for lens flares that could negatively affect the exposure of the image. Therefore, it may be helpful to introduce a light modifier to control the spread of light.
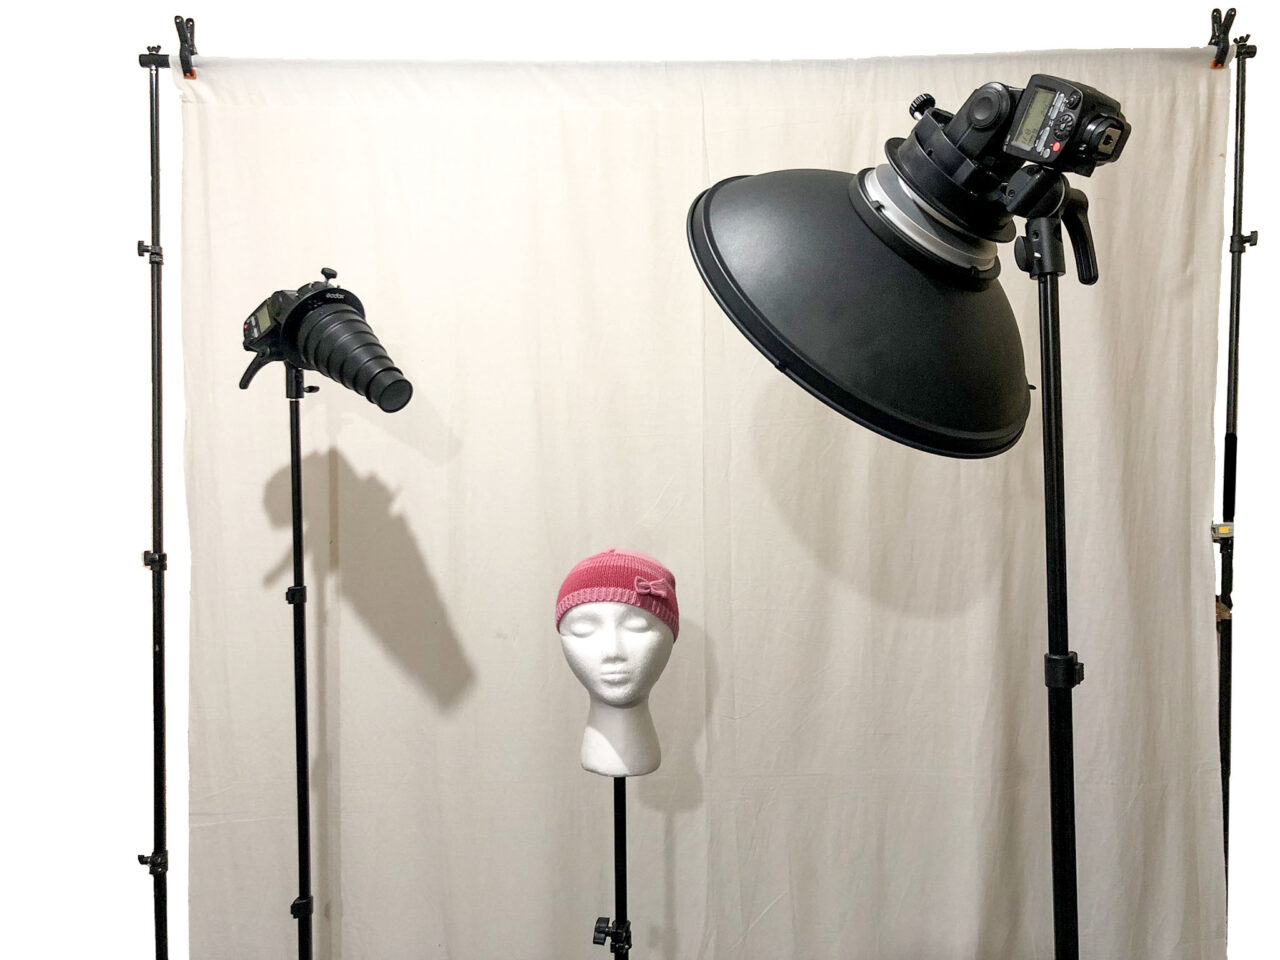
If we favour a hard light for the Hair Light we could attach a standard 7-inch reflector to the light. This allows harsh, raw light to reach the subject but sideways spread is contained within a 7-inch wide, metal lampshade.
The spread of light is still quite wide though at 120° or more (including the partially lit band around the main beam). This could still possibly cause lens flare so to mitigate this we can add a honeycomb grid that can reduce the cone of light to a fixed angle, typically, 10°, 20°, 30°, 40°, 50° or 60°.
Another way to apply creative control over the spread of light for the Hair Light is to add a Barn Door attachment to the 7-inch reflector. This is an adjustable lampshade made up of four swinging doors that allows the light output to be shaped into a square shape or multivarious rectangular slots.
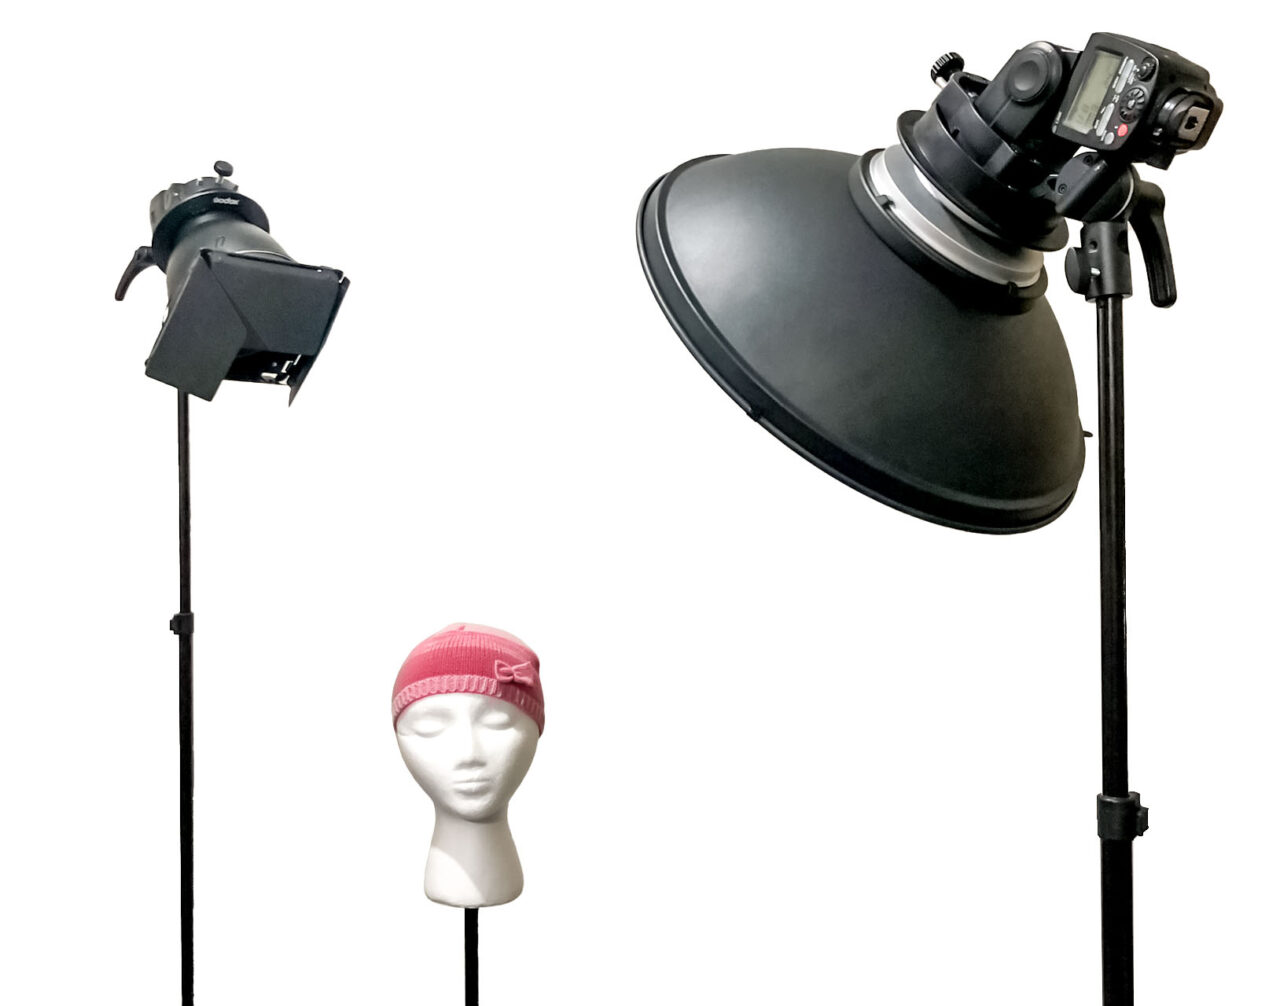
This extension to the reflector with the barn doors can drastically cut down on the uncontrolled spread of light and also carefully prevent lens flare by flagging (blocking) the light from hitting the camera’s lens.
For a more subtle hair highlight, we can introduce a softbox. These are generally larger than a reflector and so have a wider spread of light. This is useful if we want to highlight the whole head and shoulders or if there are several subjects in the photograph. The light output is softer but it will reveal the texture and be less likely to blow out the hair with unsightly hot spots.
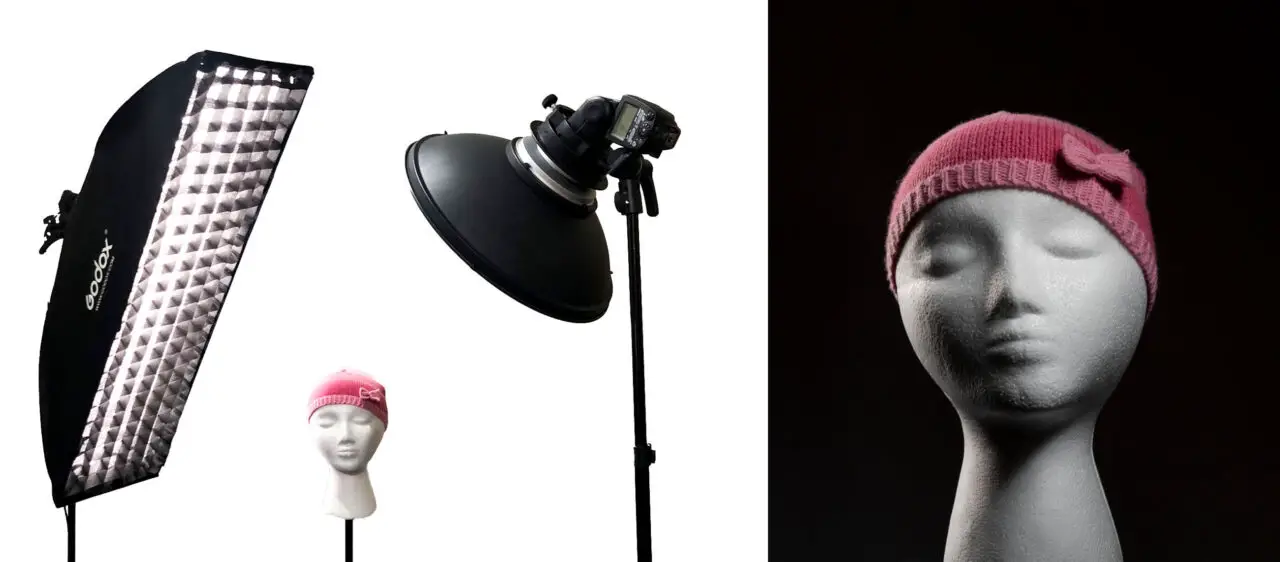
The softboxes often have a raised lip of about two inches to help stop the sideway spread of light. Within this raised edge we can often insert a soft grid attached by velcro to maximise control of the direction of light and to prevent lens flare.
We may want to have a very precise placement of the Hair Light on the head. For this we can use a Snoot; a matt black, tapering metal tube that fits over a light source. It can pick out very specific areas for full creative control of our hair lighting. They even come with a honeycomb grid and a full set of colour gels.
How Bright Should a Hair Light be in Studio Photography?
The objective of the Hair Light is to gently reveal the shine and texture and if necessary, to separate the edge of the head from the backdrop. If the Hair Light is too powerful it can result in distracting highlights, particularly on light coloured hair.
Start with the Hair Light set to the same power as our Key Light, take a test shot, review and adjust the power to suit. If the highlight looks like a solid block of white with no texture, we probably need to dial down the power until we see some detail in the hair.
Different coloured hair will require different degrees of illumination compared to the Key Light. Here is an approximate table of settings for hair colours and the relative degrees of brightness required:
| HAIR COLOUR (SHADE) | LIGHT STOPS DIFFERENCE TO KEY |
| Black | +2 |
| Brown | 0 |
| Blond | -1 |
| White | -2 |
These are not hard and fast rules, just a guide to set a starting point for our exposure. There is a myriad of hair colours and shades so a little experimentation may be required. Even hair products like gels and waxes can have an effect on the specular highlights produced by the hair light.
How do You Set up a Hair Light?
Placing the Hairlight can sometimes be tricky as the stand is often directly behind the subject and may be visible in the final shot. Unless we don’t mind cutting out the light stand in PhotoShop, the easiest solution is to place the light on a boom stand. This can support the light on a counterbalanced boom coming into position from the side and thus, staying out of frame.
The other option, if we are using a suspended backdrop is to place the stand behind the sheet and have the light unit and modifier peaking over the top. This ensures that the stand won’t be visible in the final shot and the model has freedom of movement beneath it.
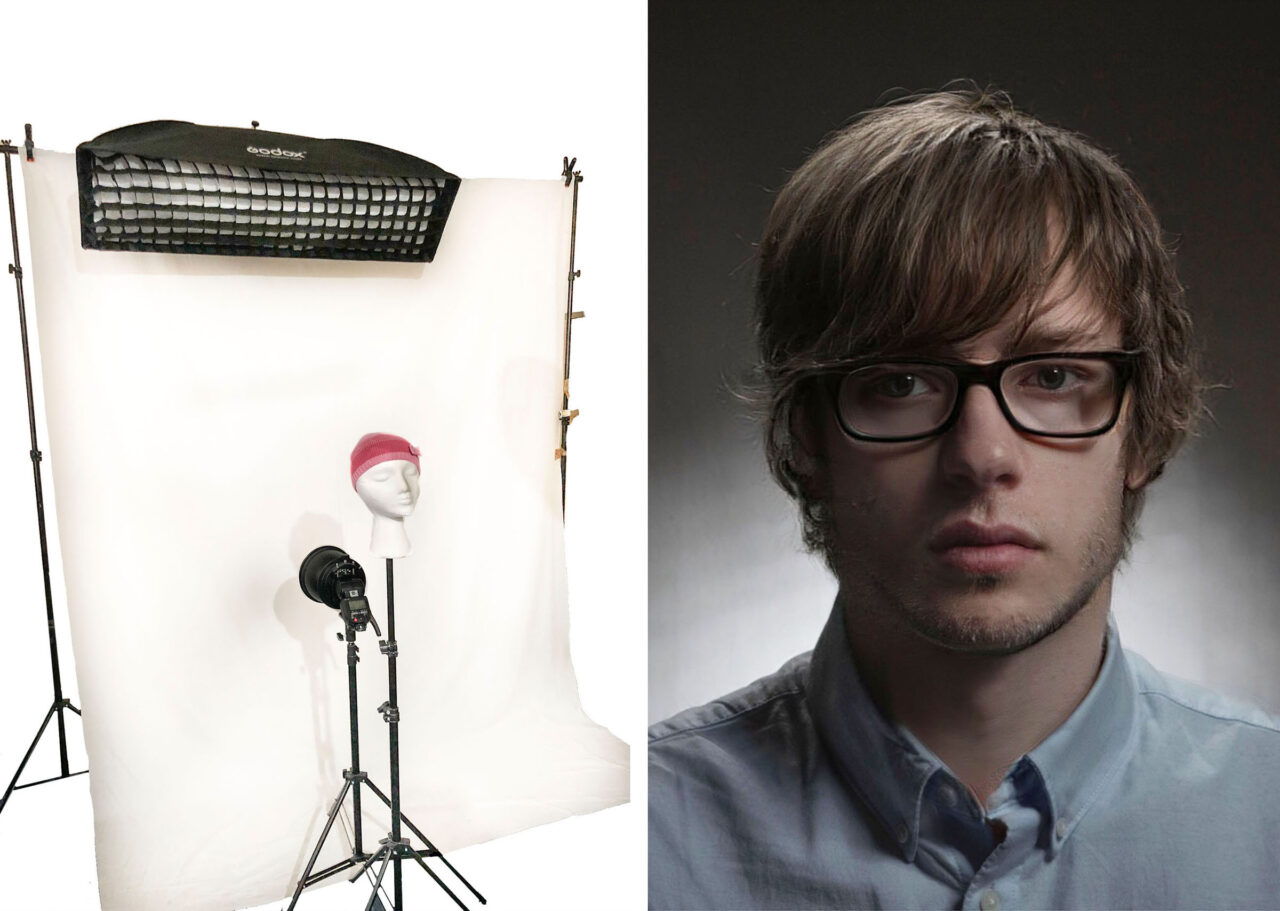
The Hair light should be high enough to be out of shot as it will be pointing slightly towards the camera. It should also have a modifier or flag fitted to help avoid lens flares that could compromise the exposure.
The astonishing transforming effect of the Hair Light may not be obvious at first especially if we are using it quite subtly. Try turning off the other lights in the setup and take a test shot with just the Hair Light. This will indicate the coverage and definition revealed by the Hair Light and allow us to make adjustments to exposure and positioning.
Related Articles
Ultimate Guide To The Different Indoor Studio Lighting Setups!
For a comprehensive look at all the different types of principal lighting positions and 18 studio lighting setups, check out our illustrated guide right here in Photography Skool.
