Taking photos in a room with a source of light or lights can be difficult and often leads to shadows in the final image.
It’s hard to avoid shadows in the room, so that means you might see them in your photos. Scenes, where the location and number of light sources are uncontrolled, can lead to unwanted shadows that can ruin the picture. This could be particularly problematic in product photography.
Follow the helpful tips and tricks for indoor photography in the following article in order to avoid unwanted shadows, particularly in portrait photography.
(This post may contain affiliate links which means I may receive a commission (at no extra cost to you) for purchases made through links. Learn more on my Privacy Policy page.)
Let’s first briefly describe how to avoid shadows in indoor photography for great images:
To avoid shadows in photography, correctly position the light source in relation to the subject and backdrop. Avoid built-in flashes, use off-camera lights instead. Change your viewpoint and keep the subject away from the wall. Use one light source and bounced or diffused light.
What You Will Discover in this Article:
- Introduction: Why Do We Have Shadows in Indoor Photos?
- Good and Bad Shadows (Shadows On and From the Subject)
- Don’t use On Camera Flash or Built In Flashes to Prevent Shadows in Photography.
- Use Off Camera Flashes to Prevent Shadows in Photography.
- Change the Camera Viewpoint to Prevent Shadows in Photography.
- Move the Subject Away from the Walls to Prevent Shadows in Photography.
- Use Only One Type of Light Source to Prevent Shadows in Photography.
- Use Fill Flash or Reflectors to Minimise Shadows in Photography.
- Bounce the Flash Light Source to Prevent Shadows in Photography.
- Diffuse the Light Source to Prevent Shadows in Photography.
- Conclusion – Summary of Prevention of Shadows in Indoor Photography.
“As an Amazon Associate, I earn from qualifying purchases.”
Check out the latest Canon DSLR cameras on Amazon US here.
Check out the latest Canon DSLR cameras on Amazon UK here.
Introduction: Why Do We Have Shadows in Indoor Photos?
Sometimes, shadows in photos can be very distracting and take away focus from the main subject. In most cases, shadows are a result of the bad positioning of the light source and subject in relation to the backdrop/floor.
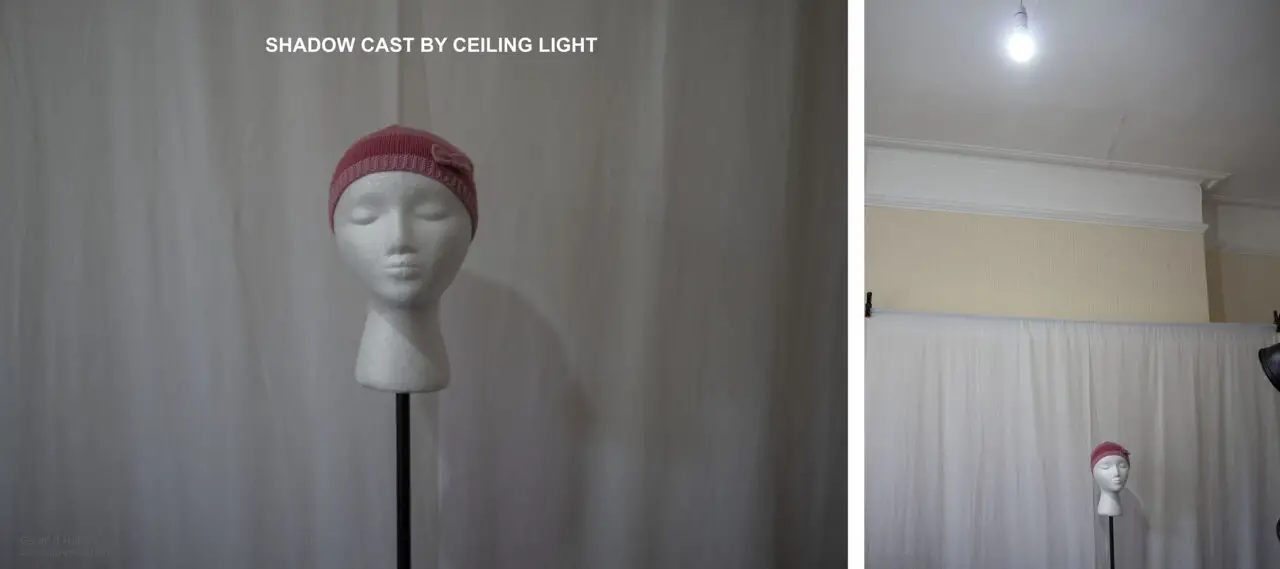
Other times, the shadows are caused by natural light on a sunny day coming in through windows or other artificial sources in the room.
Good and Bad Shadows (Shadows on and From the Subject)
Shadows can be considered to be Good or Bad depending upon how they affect your desired outcome. There are generally 3 types of shadow scenarios that can be considered Good or Bad:
- Shadows are cast on the subject by their own facial features.
- Shadows are cast on the subject by other objects outside of the frame.
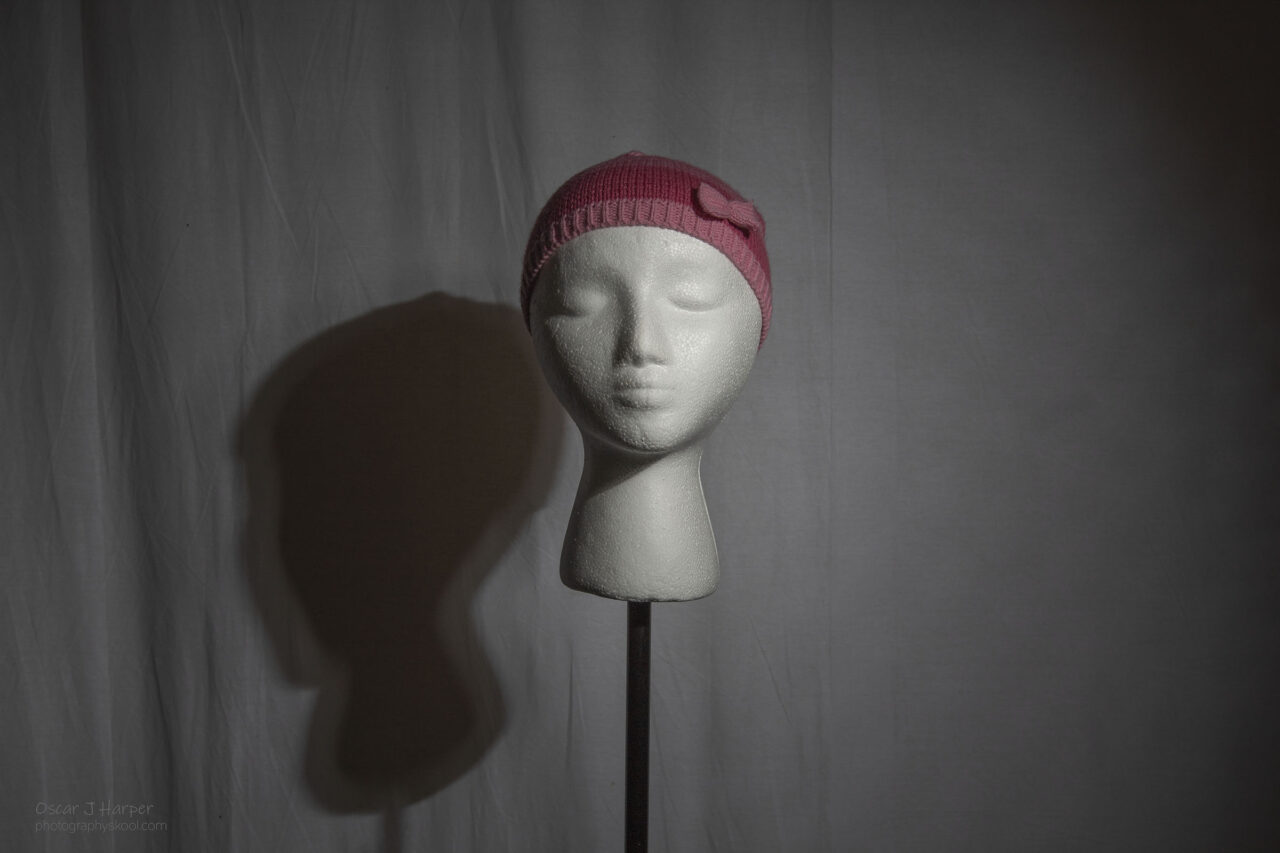
- Shadows are cast by the subject onto surroundings such as walls, floors and ceilings.
- GOOD – The shadows cast onto the subject by their own features can be considered good as this is how we produce the established lighting patterns such as:
- Butterfly Lighting
- Loop Lighting
- Rembrandt Lighting
- Split Lighting
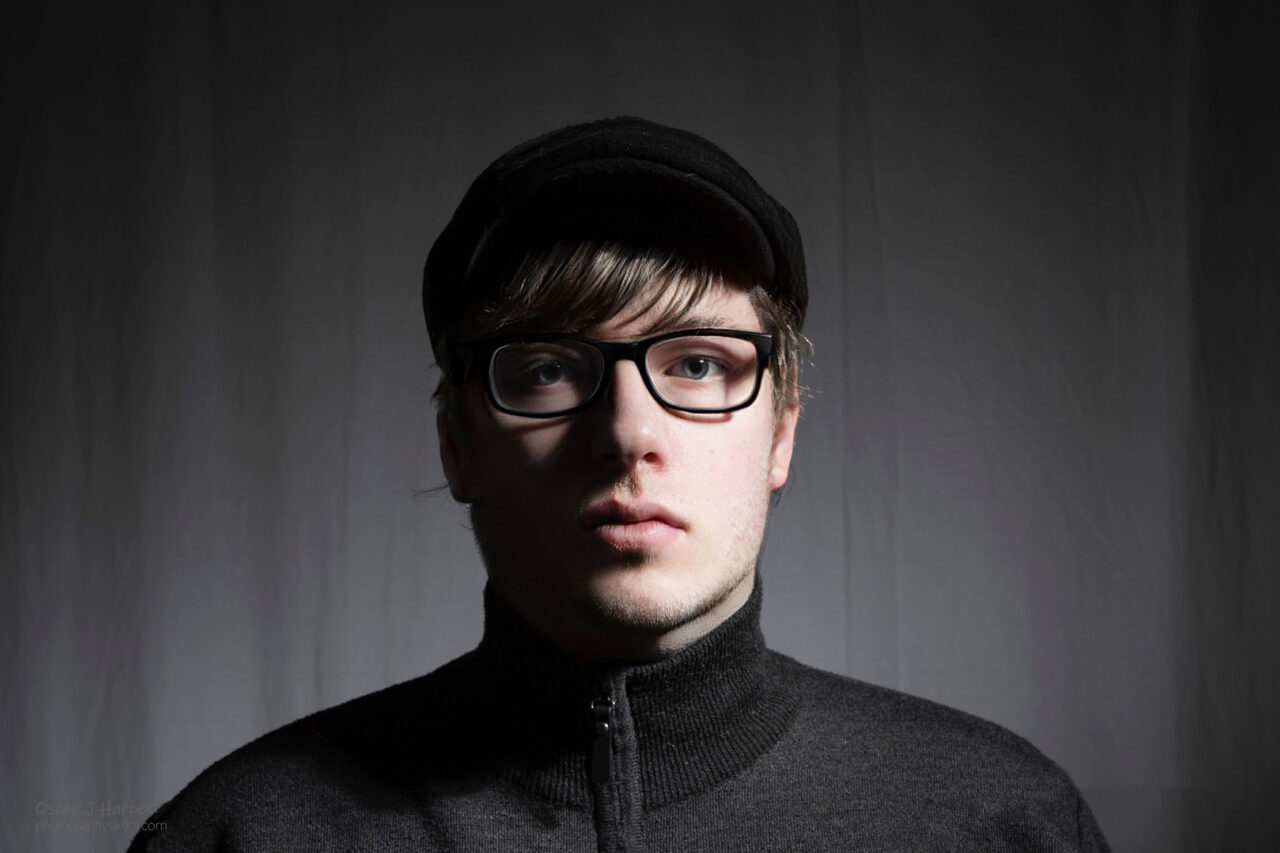
Photo by Oscar J Harper
These are tried and tested lighting setups used successfully by photographers to add a little 3-dimensional depth and dramatic contrast.
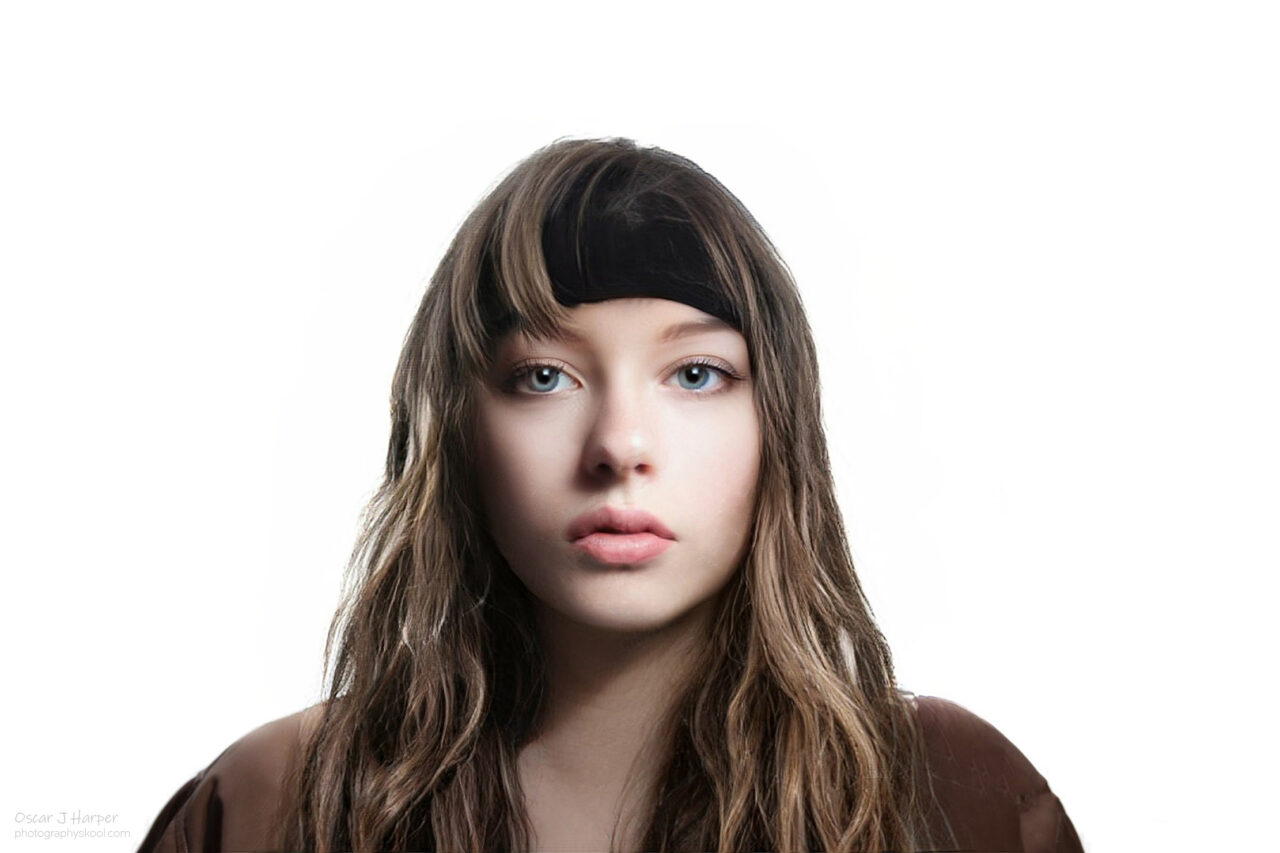
- BAD – Facial feature shadows may be considered bad if they are distracting and unflattering and when the photographer desires an almost shadow-free beauty shot. In this case, you can employ one of the more flattering lighting setups such as:
- Key and Fill Lighting
- Flat Lighting
- Clamshell Lighting
- Cat’s Eye lighting
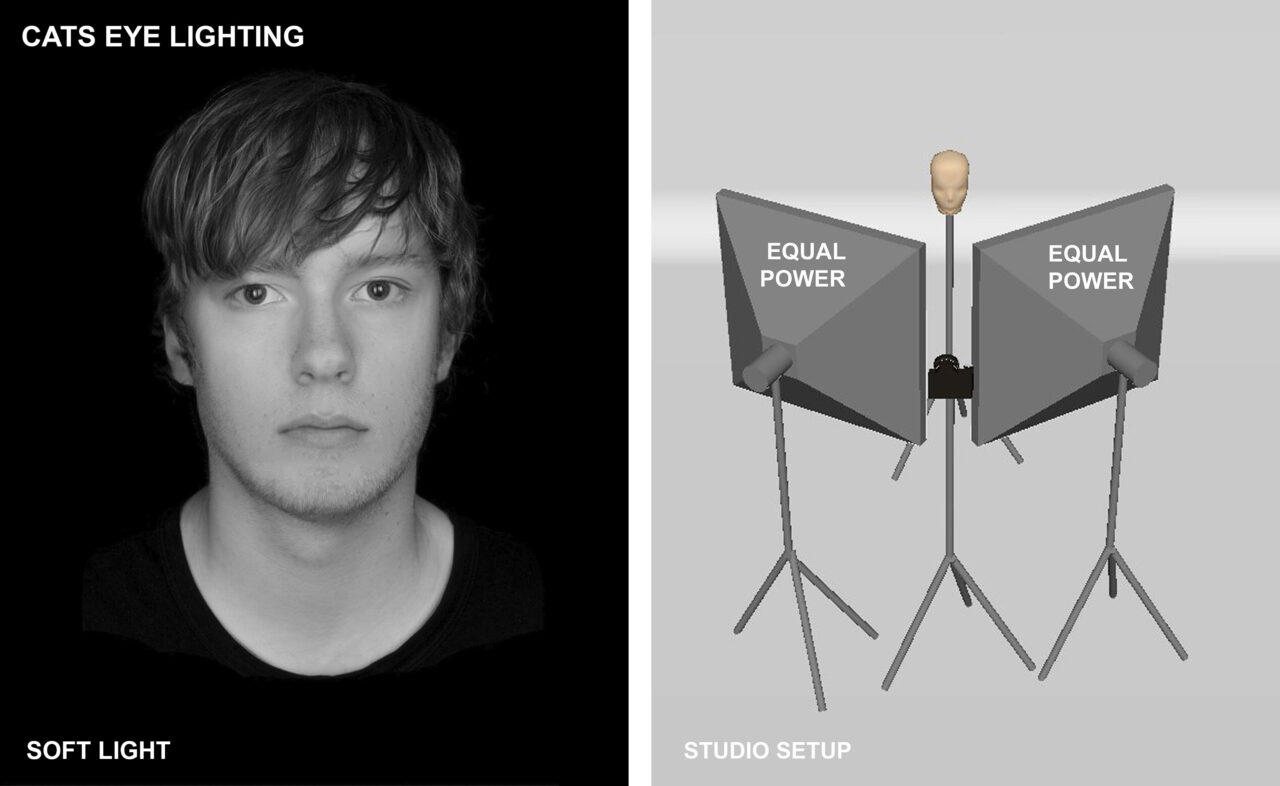
Photo by Oscar J Harper
“As an Amazon Associate, I earn from qualifying purchases.”
Check out the Godox products I use, on Amazon US here.
Check out the Godox products I use, on Amazon UK here.
These are considered to be complimentary lighting setups that eliminate or minimise facial shadows by washing the subject with light from multiple directions or with a large, soft light source set face-on to the subject.
2. GOOD – If the shadows cast on the subject by other objects are intentional, they may be considered to be Good shadows. This may be accomplished to add a little texture or mystery in the form of partial shadows on the subject. It could be achieved simply by holding an object up between the window light source and the subject. The other great way to achieve this is to introduce a Gobo (Go between object) on the artificial main light source.
2. BAD – If these object-cast-shadows are striking the subject and interfering with the composition, they may be considered to be Bad shadows. In this case, you should move the offending object from the line of the light source. If that’s not possible, move the light source away from the object.
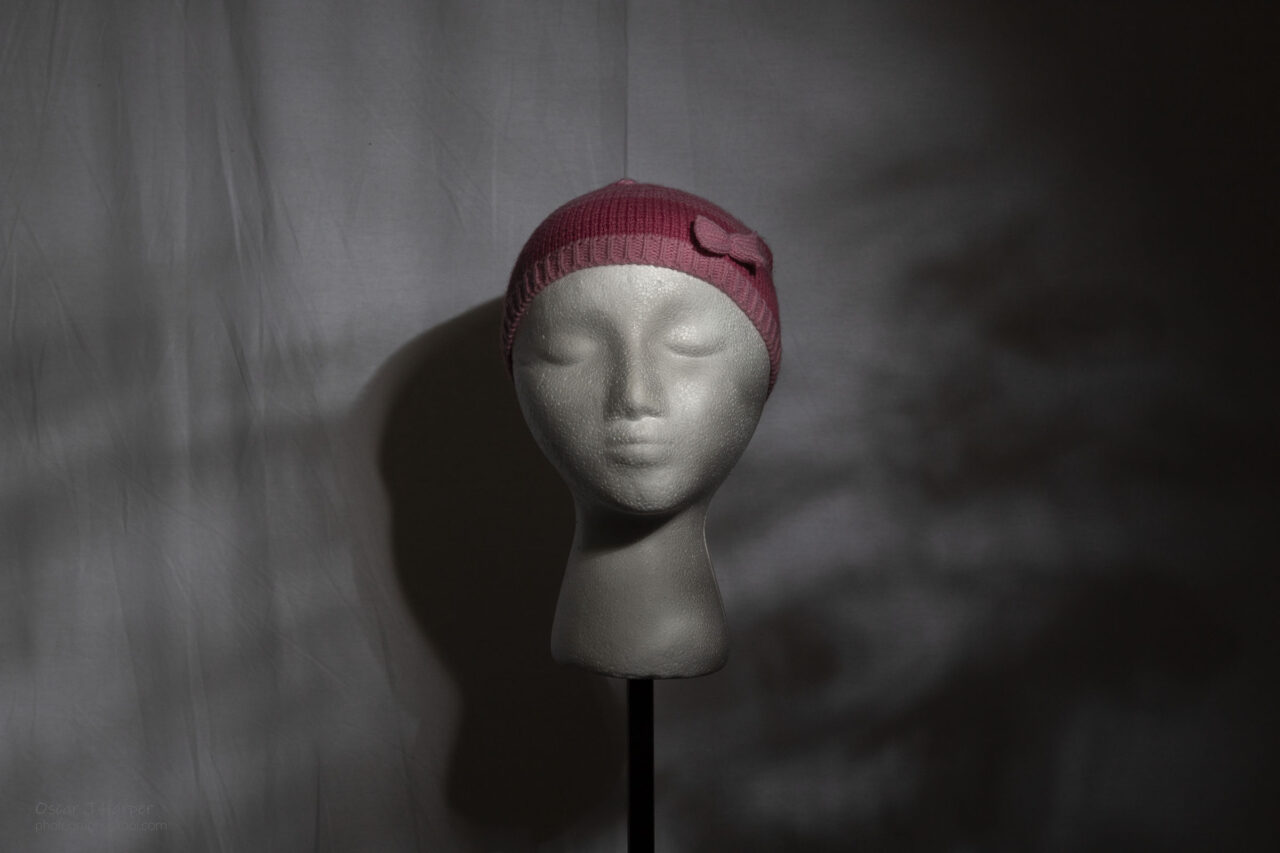
3. GOOD – If the shadows cast by the subject onto the surroundings add some balance or unity to the composition, they could be considered to be Good shadows.
3. BAD – If however, that merely adds a distraction from the main subject you can say they are Bad shadows and you must attempt to eliminate them.
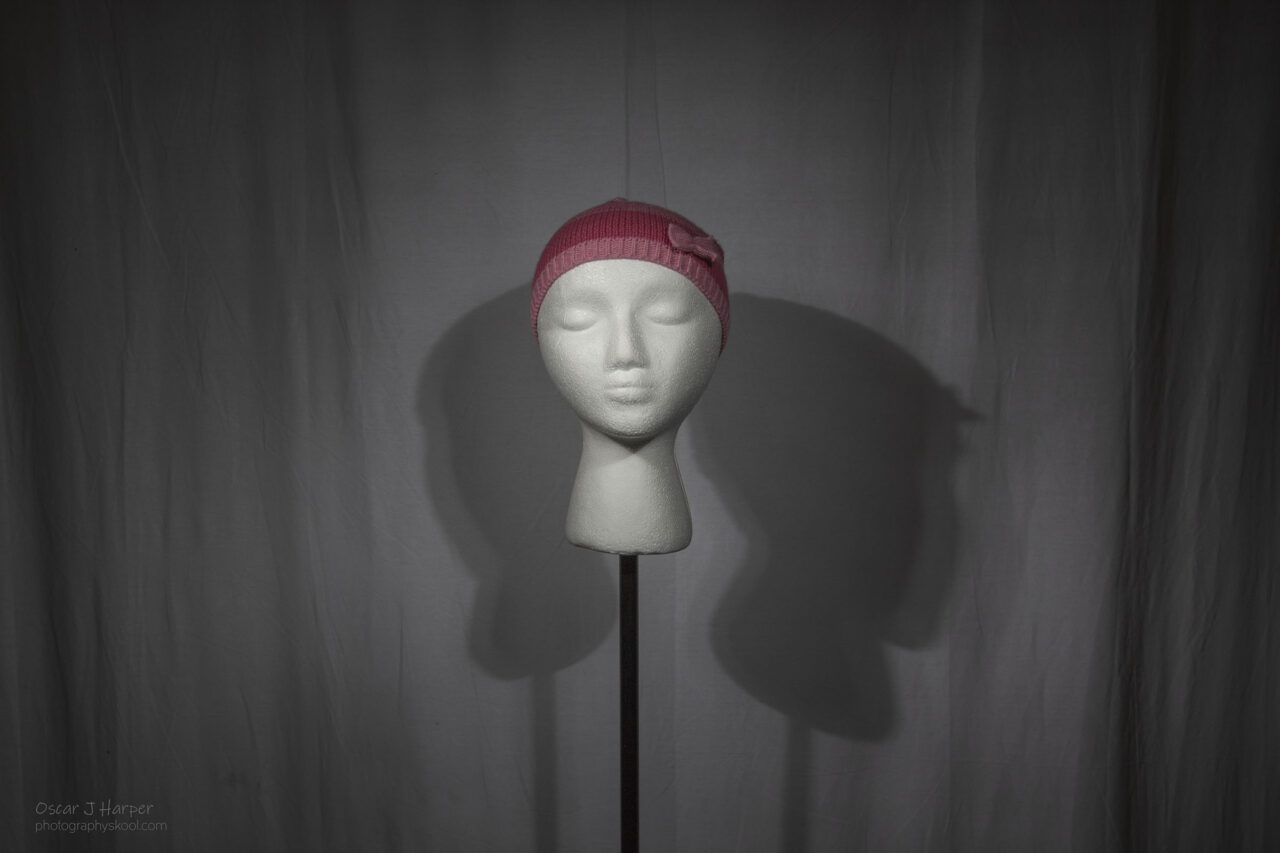
Don’t use On Camera Flash or Built In Flashes to Prevent Shadows in Photography
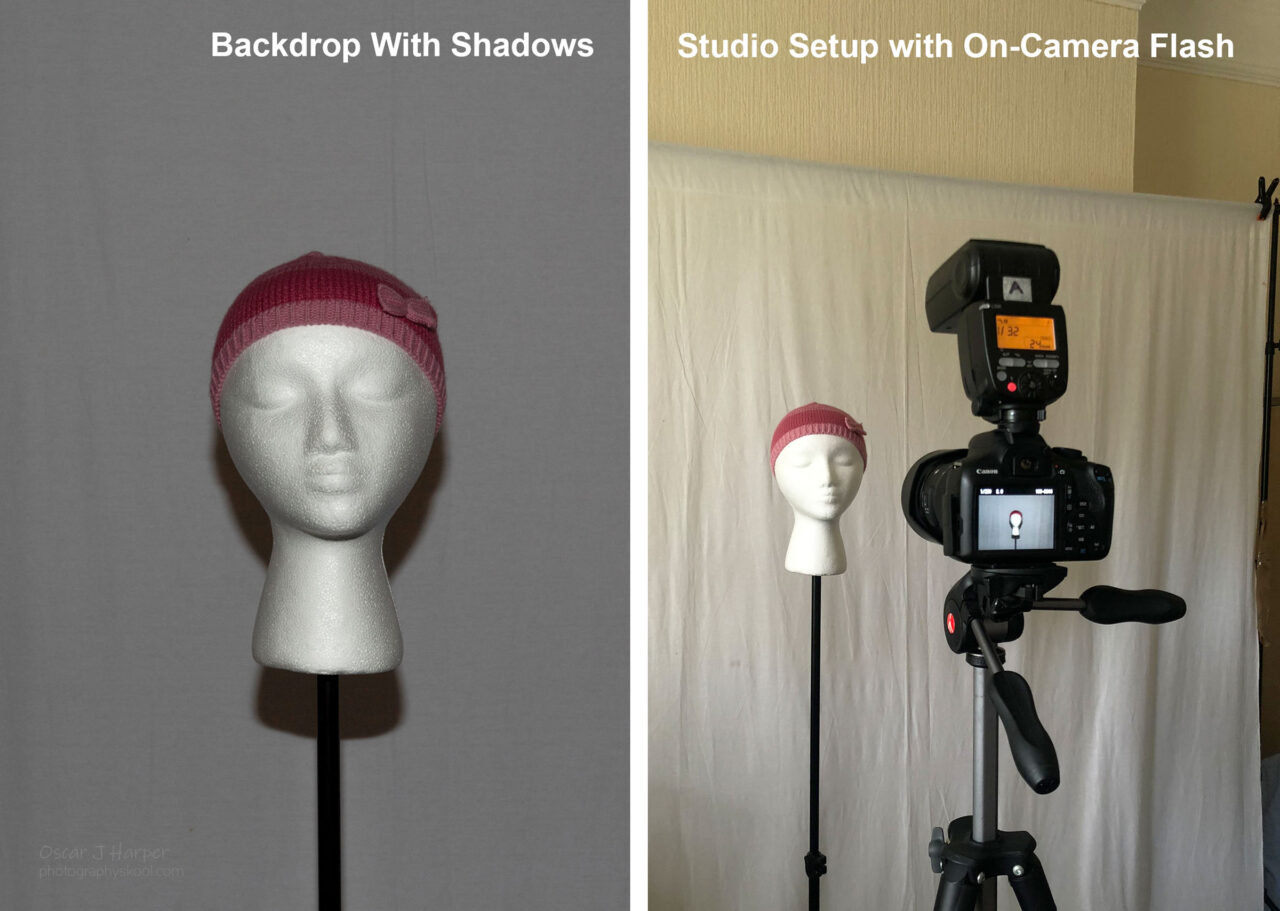
The first place to look for problems with unwanted shadows is your own camera. Does it have a flip-up or built-in flash? If so, there is a strong possibility that if you use it to illuminate the scene, it will cast a hard light shadow directly behind the subject onto the wall.
This is because the flash is very close to the axis of the lens and shoots directly out at the subject and may cast a strong shadow on whatever is directly behind them. As it is almost on axis with the lens there will be almost no shadows on the face of the model as it delivers a harsh, flat light.
The problem is that any shadows cast by the subject will always appear in the frame as the camera and flash are in virtually the same place. This is where the use of off-camera flashes helps to eliminate this problem.
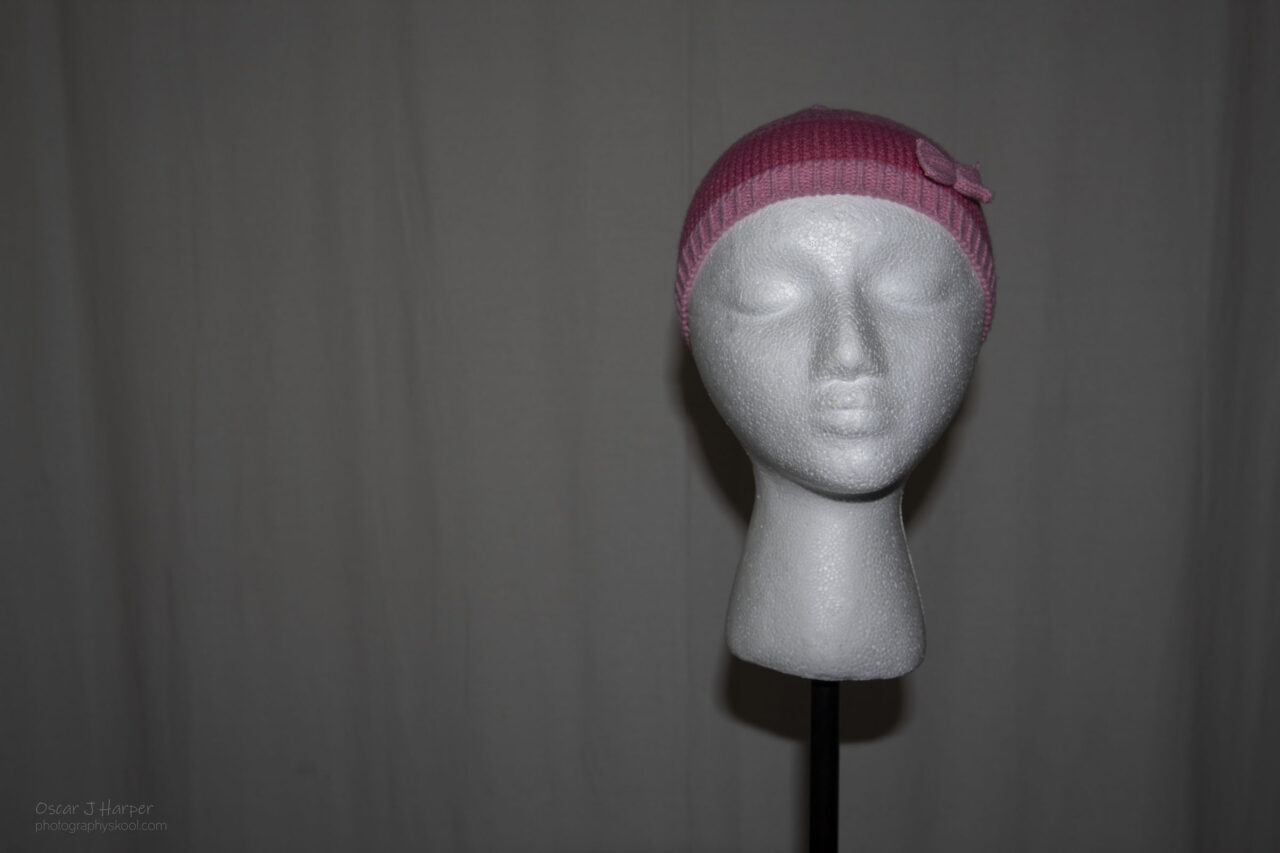
Use Off-Camera Flashes to Prevent Shadows in Photography
This is where you have much more flexibility as you can place the flash head virtually anywhere to get the correct amount of light. This means that it is possible to place the light in a position that will cast a shadow that will fall outside of the frame of the camera. You do this by rotating the light around the subject until the shadow cast is no longer visible in the framed scene.
You will of course require slightly specialised flash lights that can receive a “fire” signal from a radio trigger that will be mounted on the camera’s hotshoe. The good news is that if you choose a Speedlite, they are quite affordably priced.
“As an Amazon Associate, I earn from qualifying purchases.”
Check out the affordable Yongnuo products I use, on Amazon US here.
Check out the affordable Yongnuo products I use, on Amazon UK here.
Change the Camera Viewpoint to Prevent Shadows in Photography
The simplest and most obvious way to remove shadows from the frame in the first instance is to just change the viewpoint of the camera. So you just move the camera to a slightly different location whilst still pointing back towards the subject. In the frame, you should see the offending shadow disappear as you change the viewpoint.
This is not always convenient, though, as other distracting elements may appear in the background.
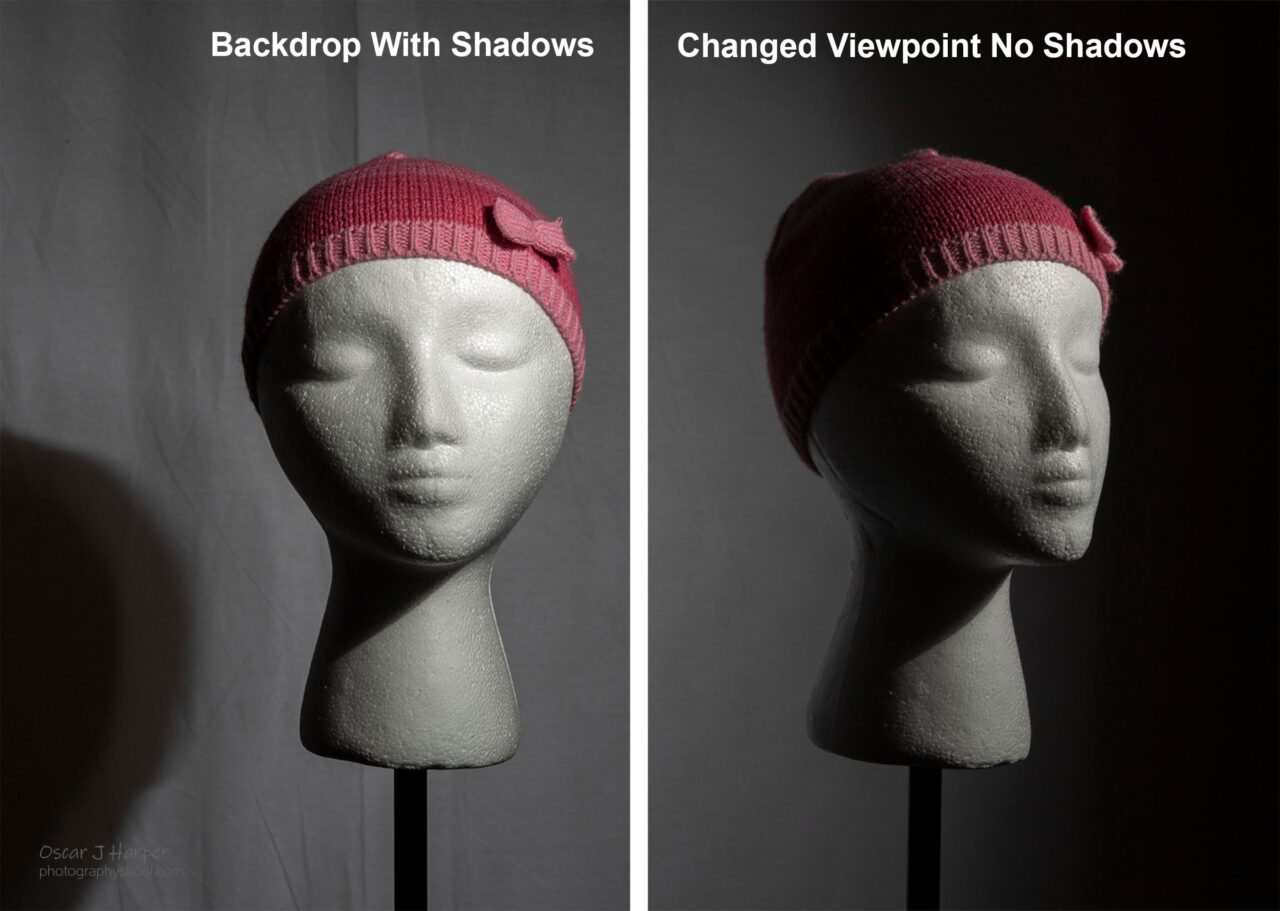
Photos by Oscar J Harper
Move the Subject Away from the Walls to Prevent Shadows in Photography
Instead of changing the viewpoint of the camera, it may be that the subject is simply too close to the nearest wall and the proximity of the shadow is visible in the frame. In this case, you simply have to move the subject further away from the wall so the shadow falls outside of the frame unless you are trying to achieve some kind of shadow photography. Of course, you will have to move the camera and tripod the same distance away from the wall to maintain the original composition.
Use Only One Type of Light Source to Prevent Shadows in Photography
A common problem is using too many different light sources. This can lead to multiple dark shadows or other unwanted effects in the photo. To avoid these problems, it’s best to only use a single light source for your indoor lighting when taking pictures.
There are a few different types of light sources that you can choose from: natural light (depending on the time of day), ceiling lights, and other artificial light. These constant lights can all contribute to the overall ambient light in the room.
There are also studio flash lights that come in the form of studio strobes and Speedlites. Which one you should use depends on what you’re trying to create with your photo and what type of equipment you have available. There should always be enough light to achieve your photographic goals.
Unless you are deliberately intending a multi-light setup, you should avoid using more than one type of key light source, especially if they are placed in different positions around the subject. This could lead to confusing, multiple shadows on facial features or cast on the walls behind.
There is the additional problem of a different color temperature if you use different types of light source. This can lead to unexpected colour casts in your photos if the white balance is set to flash or daylight temperature (direct sunlight or available light).
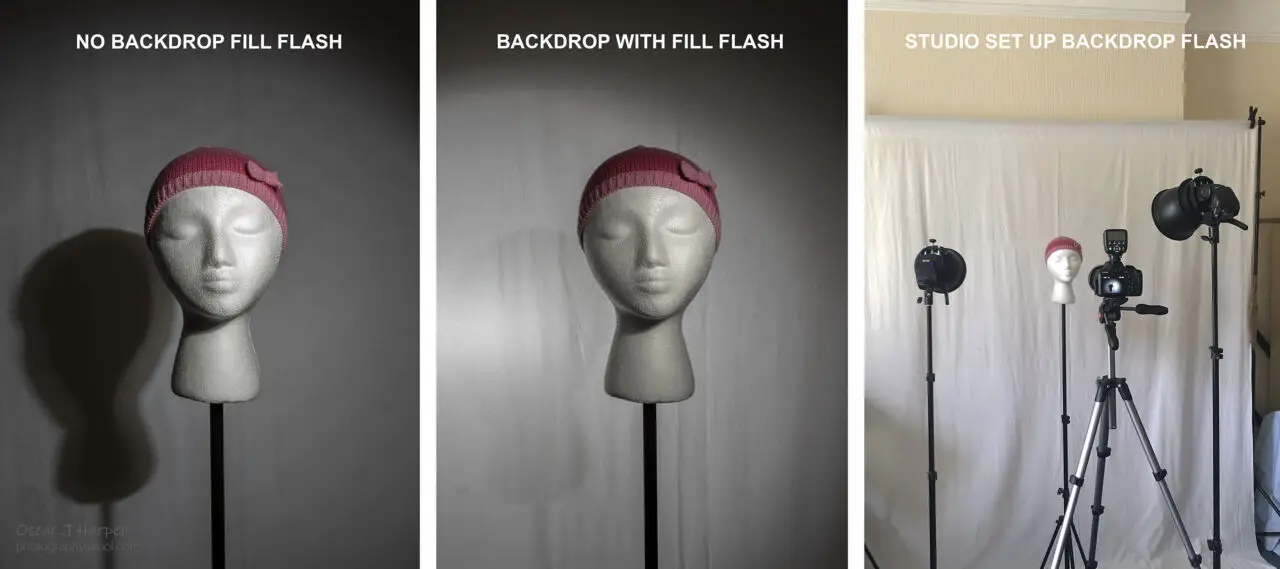
Use Fill Flash or Reflectors to Minimise Shadows in Photography
In photography, shadows are often a problem that can be solved by using fill flash or reflectors. Fill flash is the setup where the photographer uses a flash to illuminate the shadow side of the subject. This additional light is usually used when there is too much contrast between the two sides of the face.
Reflectors can be used by photographers in a similar way to bounce light from other sources onto the subject or the backdrop, which helps reduce shadows and contrast.
You could also use a Fill Light pointing at the backdrop to dissolve away any background shadows. In this case, it actually may be called a Backdrop Light.
Bounce the Flash Light Source to Prevent Shadows in Photography
The best way to bounce light is to aim it at a large white object. A white object will reflect the most light and minimise any shadows with soft lighting.
A flash is a common photography tool that can be used to create a well-lit photo. However, if you are using the flash on your camera, you will notice that it can create some unwanted shadows in your photos. To prevent this from happening, you should bounce the flash off of an object above you or to the side of you instead of pointing it directly at your subject.
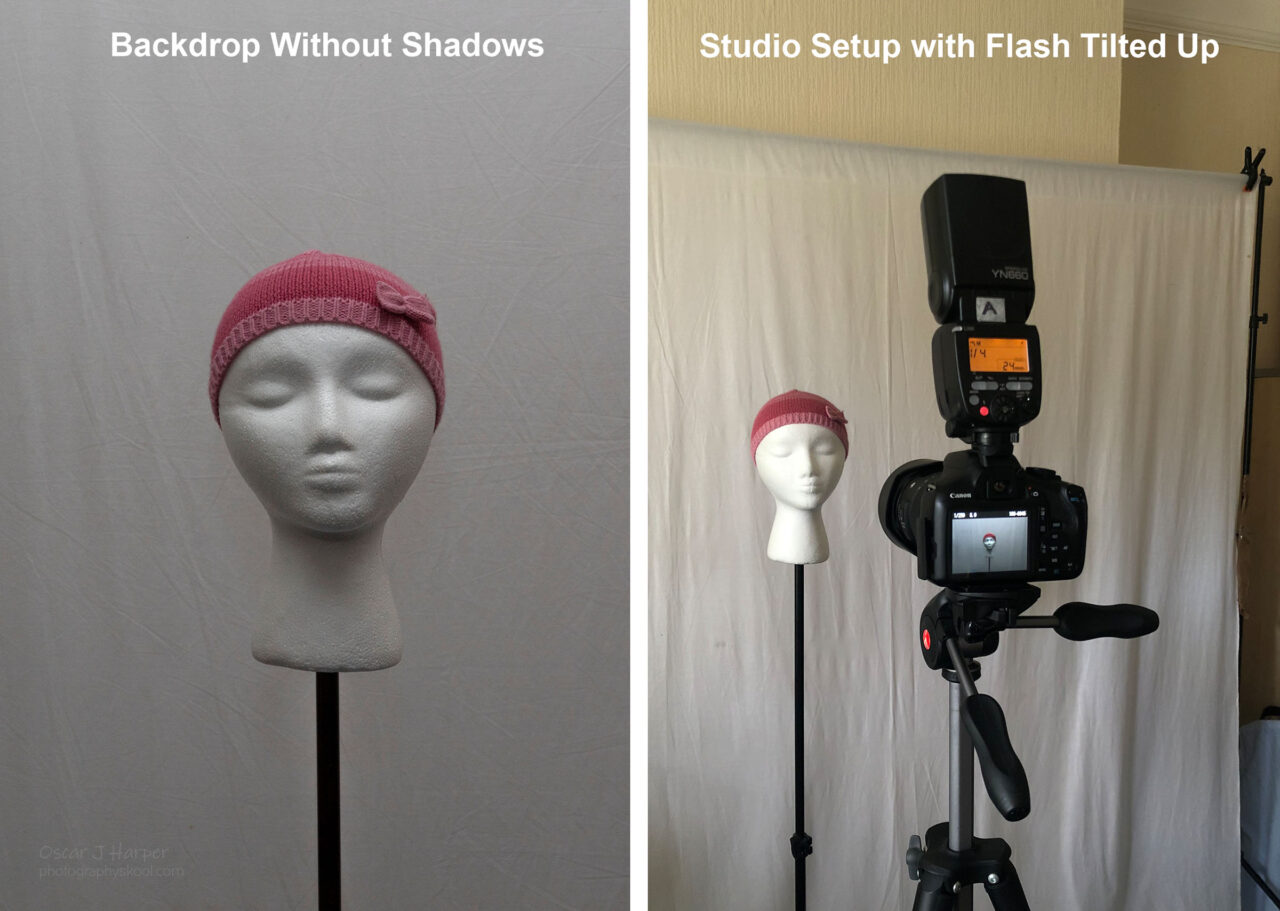
If you are fortunate enough to have a Speedlite with a tilting/rotating head you could aim it at the ceiling or a side wall.
These would be most optimal if they are white and uncluttered with pictures or hangings. This process effectively changes the direction from where the light source is coming from.
So instead of face-on from the camera position, it now appears to come from above or from the side. This in turn means that any shadows cast by the subject will now fall outside of the camera’s frame of view.
The other fortunate side effect is that your light source is now huge; the size of the ceiling or wall. This will provide a much softer and more flattering, wrap-around light source that will diminish if not totally eradicate any backdrop shadows. The quality of light is improved with more subtle contrast and softer edges to the shadows.
Photos by Oscar J Harper
Diffuse the Light Source to Prevent Shadows in Photography
The light source can be diffused to prevent shadows and create a more natural-looking image. Natural light through a window would be naturally diffused if the lighting conditions produced an overcast day.
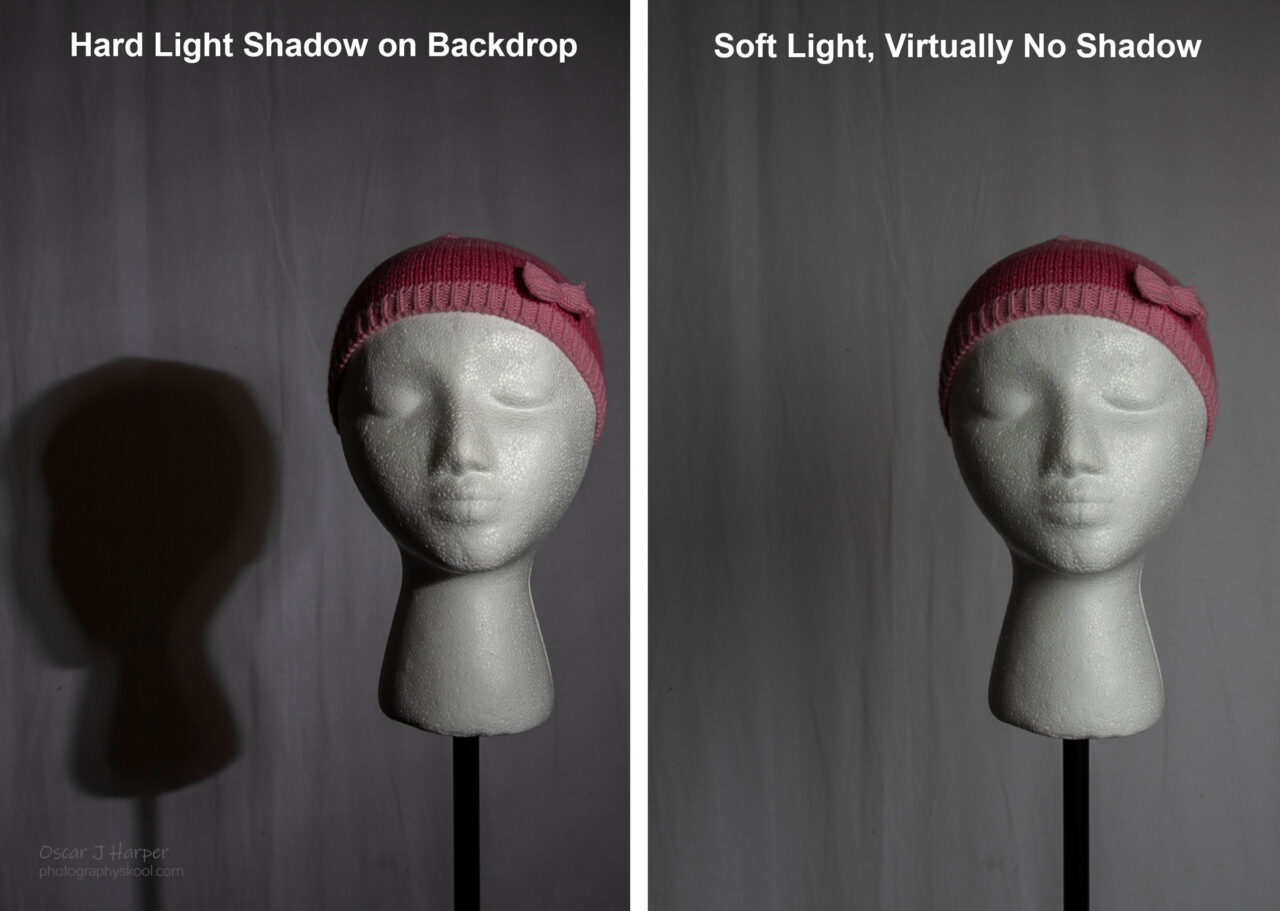
The use of diffusion materials such as white cloth, a sheer curtain or modifiers such as umbrellas and softboxes will help diffuse the light source and avoid any harsh shadows on the subject.
The diffusion material should be placed between the subject and the light source to get softer lighting on your subject’s face.
The use of a diffuser effectively increases the size of your light source which minimises the facial shadows for a more flattering look. It can also wrap around the subject and drop some fill light onto the backdrop.
Photos by Oscar J Harper
Conclusion – Summary of Prevention of Shadows in Indoor Photography
In this article, you looked at the different ways that you can avoid problems with shadows in your photography. The important thing is to minimise the presence of shadows in places where they shouldn’t be. Here’s a helpful summary of the indoor photography tips discussed in the article for your reference:
- Shadows are caused by bad positioning or multiple incidences of light sources.
- Shadows can be considered Good or Bad (Wanted or unwanted) and can occur in 3 scenarios
- Shadows are cast on the subject by their own facial features.
- Shadows are cast on the subject by other objects outside of the frame.
- Shadows are cast by the subject onto surroundings such as walls, floors and ceilings.
- Built-in flashes are generally bad and can throw harsh shadows on the wall behind the subject.
- Off-camera flashes can be placed anywhere to cast the shadow outside of the frame.
- Changing the camera’s viewpoint can effectively edit out the shadows from the scene.
- Moving the subject away from the wall will prevent shadows from being cast onto it.
- Keep it simple – Use only one type of light source from one position.
- Introduce Fill Lights or Reflectors to overpower any shadows.
- Bounce the flash off large white surfaces to soften and diminish the shadows.
These are the most commonly used ways to avoid shadows in indoor photography. It may not always be necessary to eliminate the shadows in an image as they may provide some balance or unity. It’s just a matter of your personal judgement.
Related Articles
Ultimate Guide To The Different Indoor Studio Lighting Setups!
Learn how to light portraits so they look their best. Check out these 18 lighting setups and 5 Main Light positions along with helpful tips right here, on our blog.

