There is an Auto White Balance setting on the Rebel T6/1300D/X80 that does a pretty good job of preventing heavy colour casts on your images. Sometimes though it can get confused if there are multiple light sources with different colour temperatures hitting the scene. You can, of course, apply the presets of Daylight, Shade, Cloudy, Tungsten and Fluorescent but they could also get a little confused in a complicated lighting scenario.
(This post may contain affiliate links which means I may receive a commission (at no extra cost to you) for purchases made through links. Learn more on my Privacy Policy page.)

As a way to get around this problem, you can assign a custom white balance to the camera that will set a chosen target to “white” and balance all the other colours in the scene to match correctly. So how do you set a custom white balance on a Canon EOS Rebel T6 (in the USA) or 1300D (in the UK) or Kiss X80 (in Japan)?
How to set Custom White Balance on Rebel T6/1300D. Take a photo of a white or 18% grey card in the ambient light of the scene. Go to the “Custom White Balance” in the second settings menu and assign the image as the default. Choose Custom White Balance from the WB button on the rear of the camera.
That was the quick answer for those in a hurry but read on for a more detailed explanation! It is important to get this right and it can really transform your photographs and make them look much more accomplished.
“As an Amazon Associate, I earn from qualifying purchases.”
Check out the latest Canon DSLR cameras on Amazon US here.
Check out the latest Canon DSLR cameras on Amazon UK here.
Illustrated Guide to Setting The Custom White Balance on a Canon EOS Rebel T6 / 1300D / X80
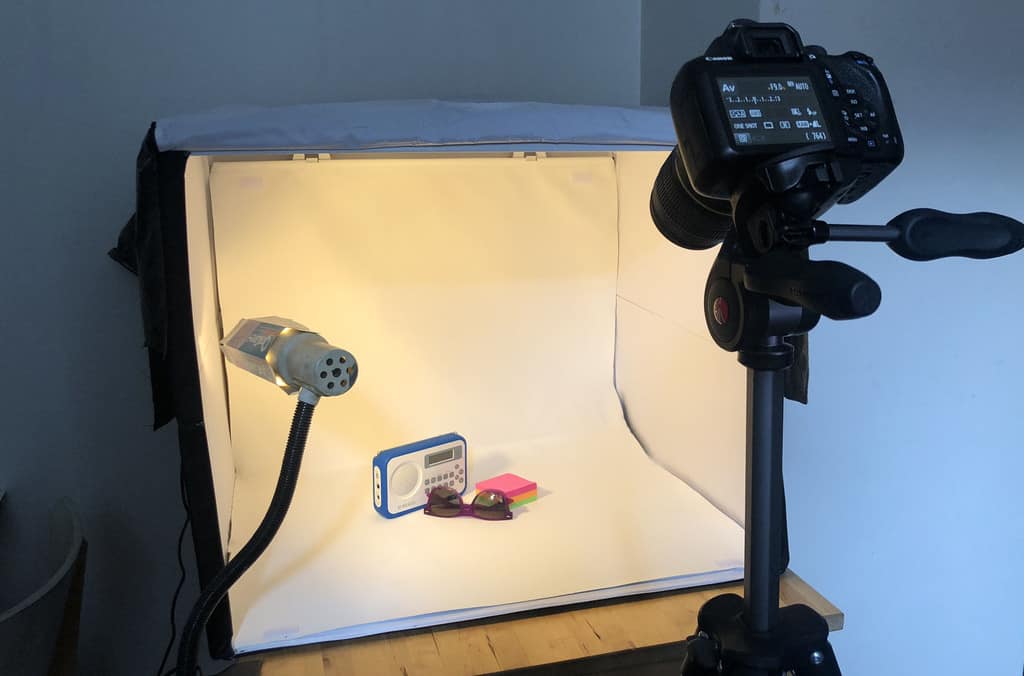
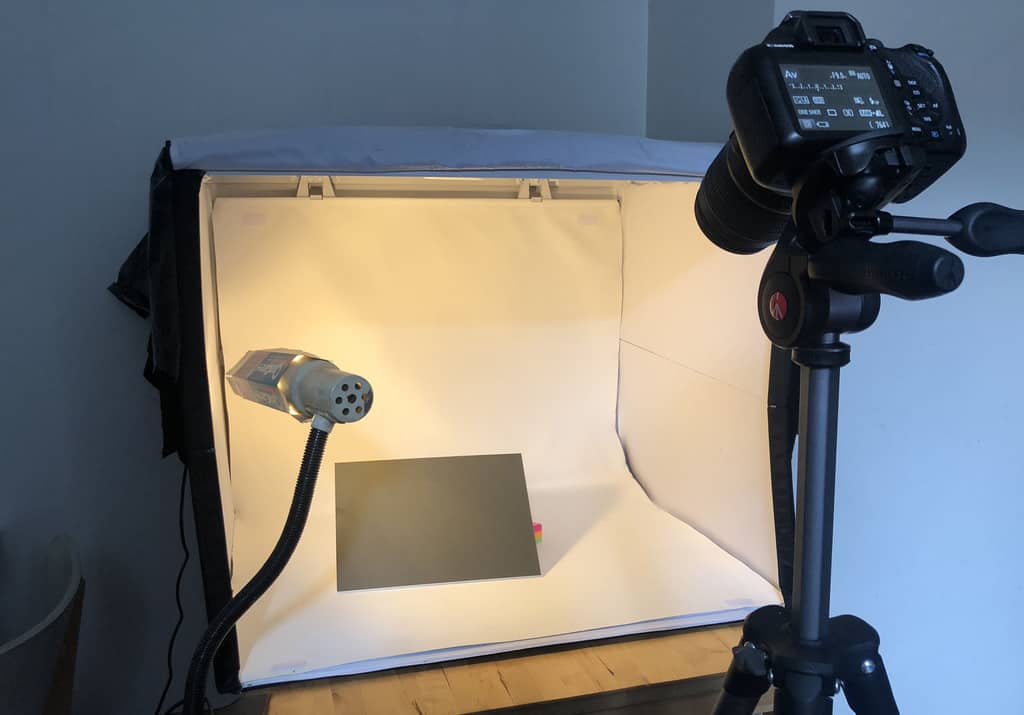
Once your scene is set up, whether it is indoors or outside, place a white card or an 18% grey card right in the scene facing the camera so that it is receiving exactly the same amount of light as everything else in the scene.
We can use an 18% grey card because that is how your cameras light meter sees a perfectly neutral exposure in any kind of light.
“As an Amazon Associate, I earn from qualifying purchases.”
Check out some Grey Cards on Amazon US here.
Check out some Grey Cards on Amazon UK here.
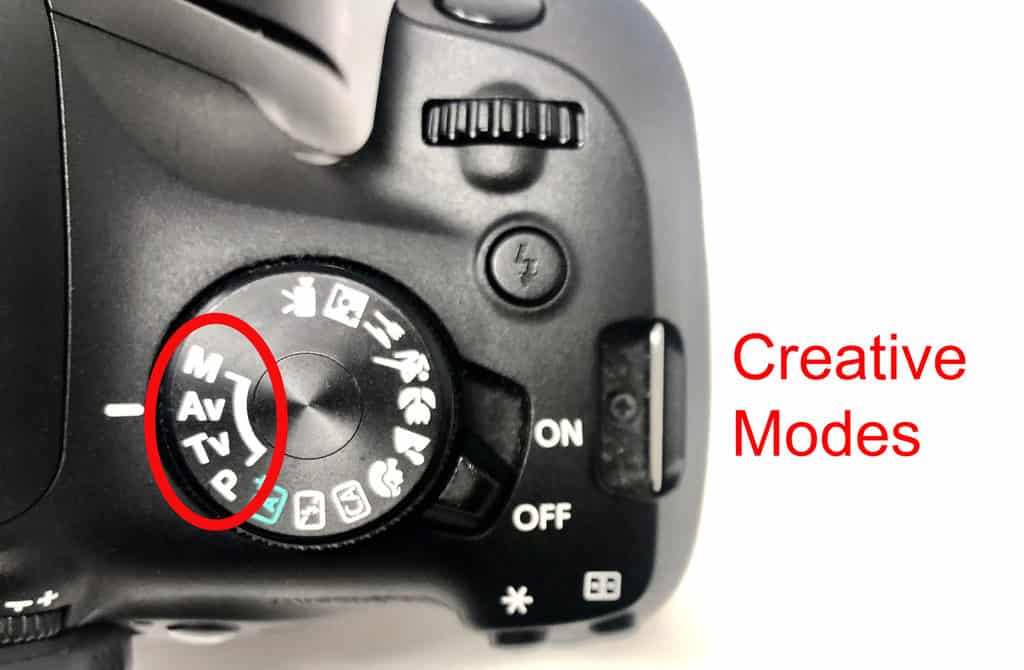
Choose one of the “Creative Modes” on the top program dial.
- M (Manual)
- Av (Aperture Priority)
- Tv (Shutter Priority)
- P (Program Shift)
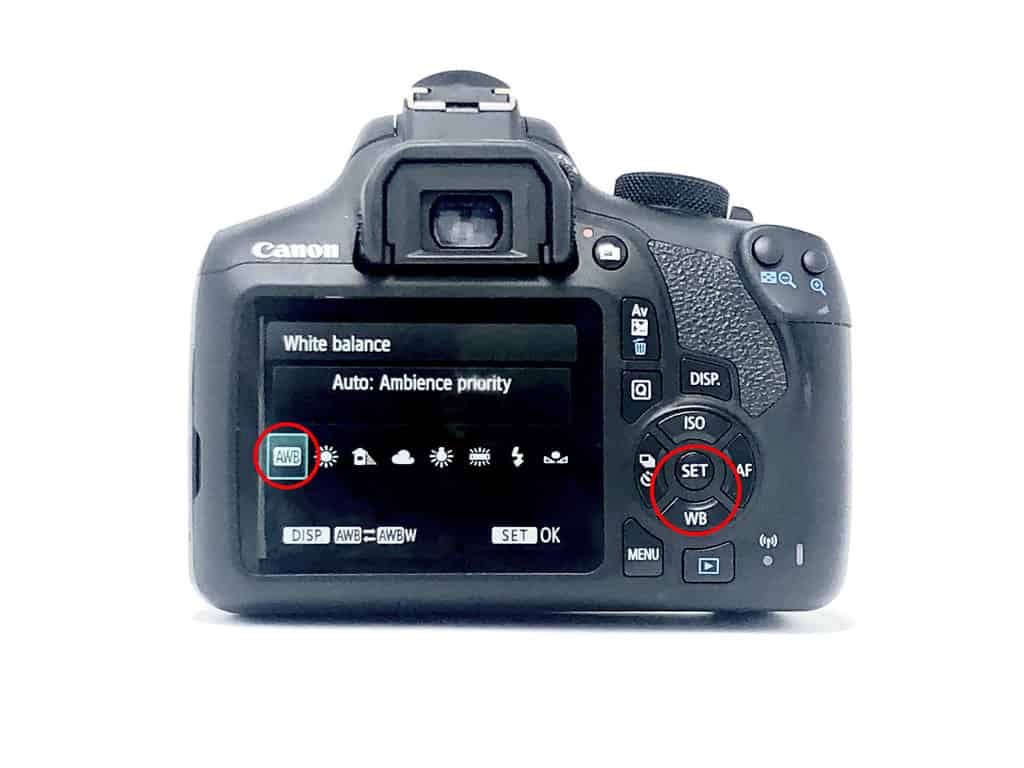
Set your camera to “Auto White Balance” using the bottom button of the circle buttons on the rear of the camera.
Now, take a photograph of the target card in your chosen program mode. Fill the frame with it by zooming in or moving closer, making sure not to cast any shadows on the card. It doesn’t even have to be in focus, this is just about setting the tonal value to a neutral setting.

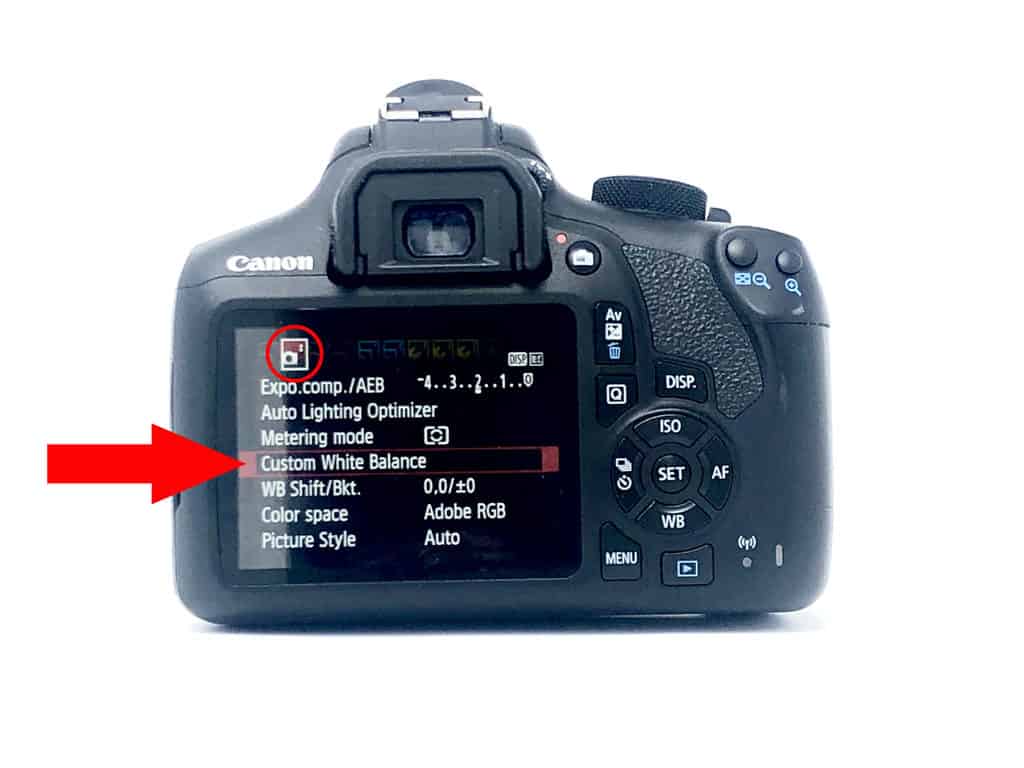
Now you have your candidate image to set your “Custom White Balance” with. We have to find the right menu to assign the image to, this can be a little daunting on a DSLR as there are so many menus and hidden settings. But let’s keep it relatively simple. Just press the “Menu” button which can be found at the bottom right of the rear camera screen. Press it and you will be presented with a series of menus defined by some red, blue, yellow and green tabs at the top of the screen.
Using the arrow keys on the back of the camera (the 4 round keys that make a circle), navigate to the second red menu. Now use the up and down buttons of the circular buttons, to get to the menu setting called “Custom White Balance” and select it with the “Set” button in the centre of the circular buttons.
You should now see the last photo you took which is your candidate photo of the white or grey card.
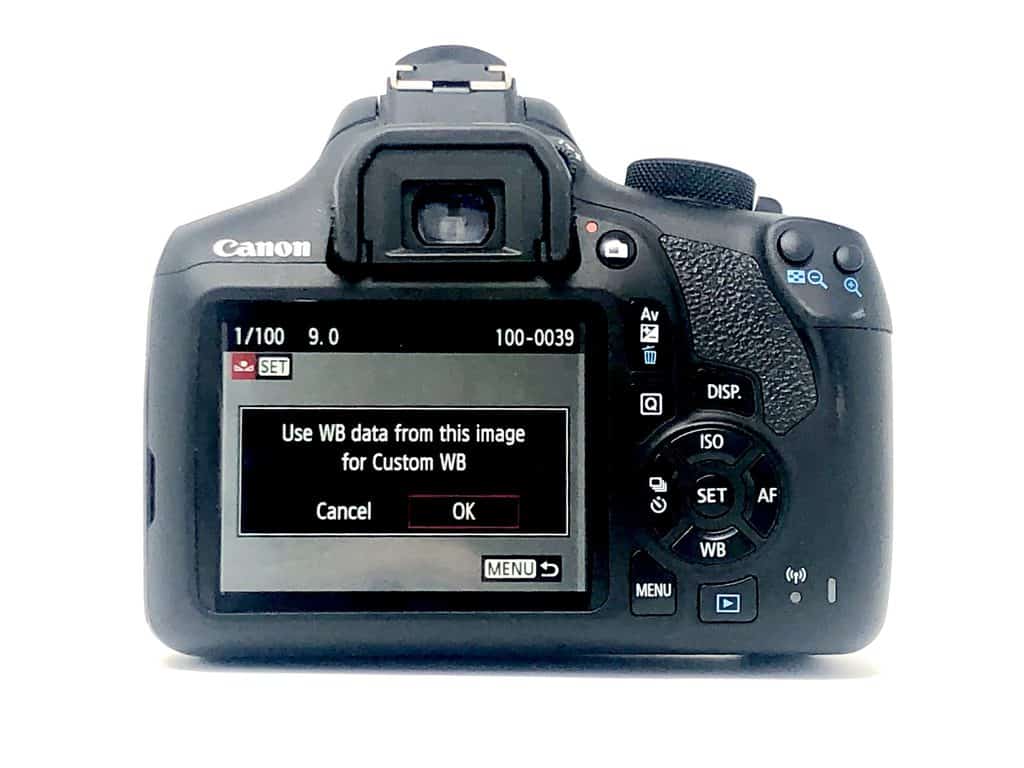
If you don’t see that then scroll through with the Left and Right buttons until you see the candidate photo. If you used a white card it will look 18% grey because that is how the light meter wants to see it tonally and it is always trying to make everything in the scene, 18% grey. That is perfectly fine, that’s what you want to see. So go ahead and choose “OK” and press “Set” to assign that photo as the default white balance.
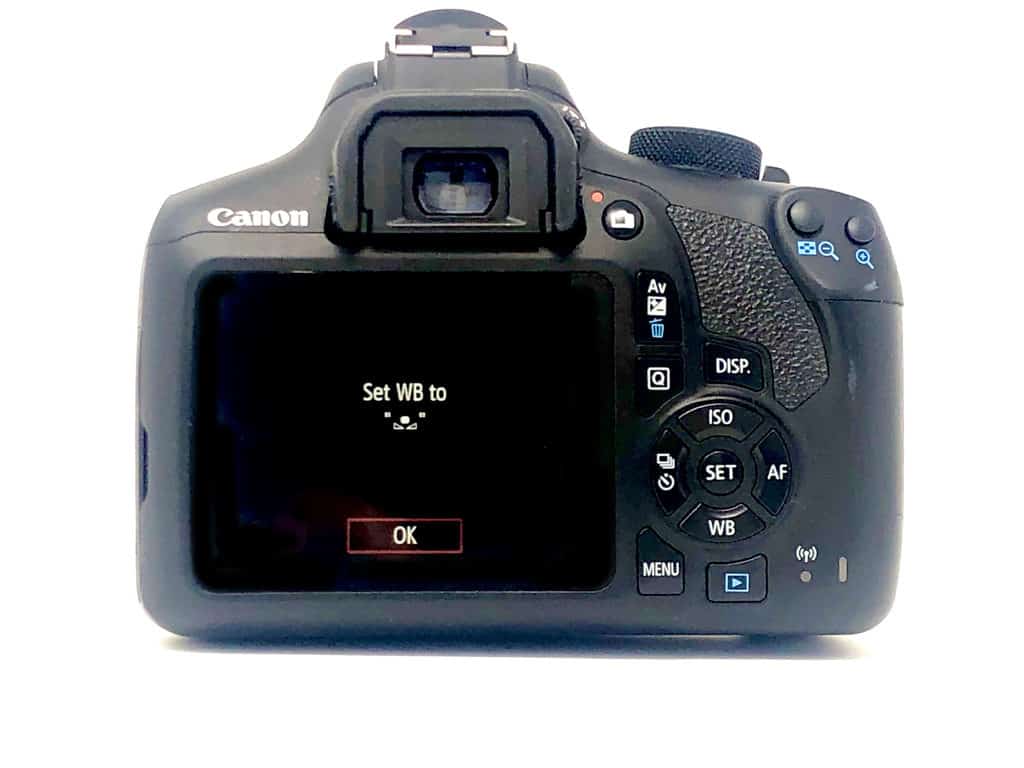
You might now get a prompt to remind you to “Set WB to Custom”. The Custom WB symbol looks like two triangles with a circle in the middle. Say OK to that by pressing the “Set” button.
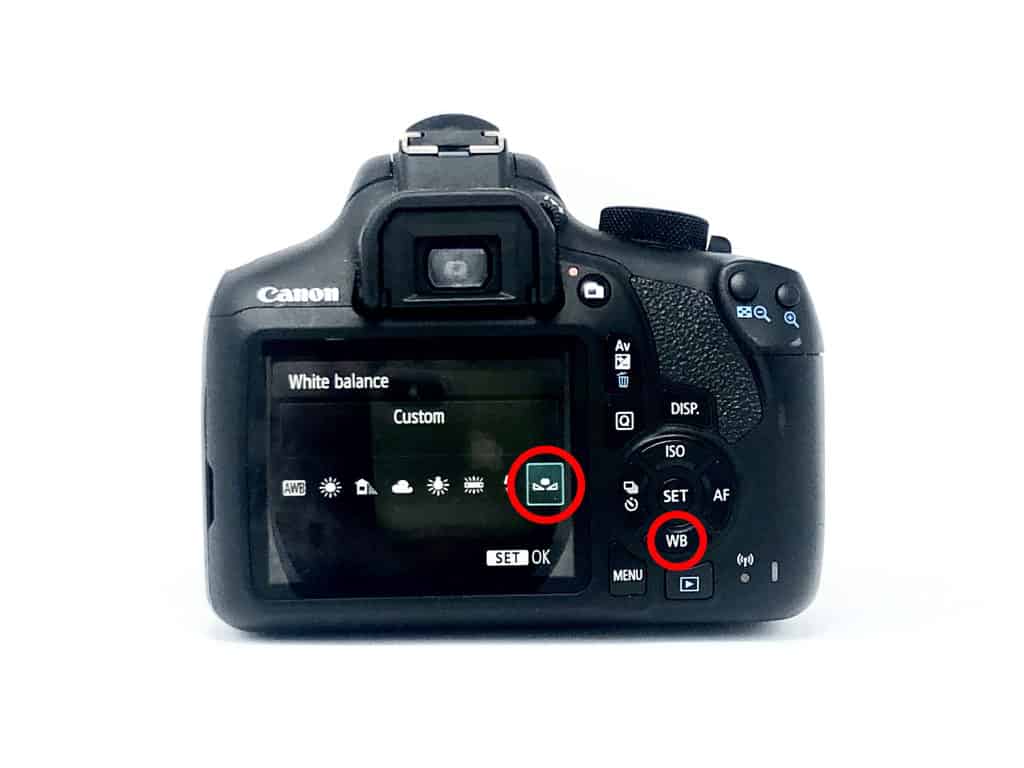
Now clear out of the menus by pressing the “Menu” button again. You can now press the “WB” button on the back of the camera and you will be presented with all of the white balance presets. Using the arrow keys, go all the way over to the far right and select the “Custom” setting (that looks like two triangles with a blob in the middle). Press the “Set” button once more and you have created a custom White Balance for the ambient light of the scene before you.
When you shoot from now on the camera will use the custom white balance that you have set up. Please be aware that if the light levels change or other light sources start to pollute the scene it will effect the custom white balance and you may start to see a colour cast creeping into images.
If this occurs simply place your white or grey card back in the scene and, re-photograph it. Then use that image to set the custom white balance and carry on photographing in the new ambient light source. If you change locations or the time of day, don’t forget to disable the “Custom White Balance” or set up a new one for the new location.
You should see a vast improvement in the quality of your photographs using this method. The colours that you see in the images should look more natural and less jarring. It’s a great tip to know and easy to execute when you know how to.
Related Questions
How to Connect Canon EOS Rebel T6/1300D/Kiss X80 to iPhone
You can take full control of your Canon camera by connecting your iPhone via wifi. You can use your phone to take photos with your camera or easily transfer photos from your camera to your phone for instant sharing. To find out more, click here.
What Are The Canon Shooting Modes on an EOS Rebel T6/1300D/Kiss X80?
For a detailed overview of all the camera shooting modes on an entry-level DSLR see our comprehensive guide here in Photography Skool.